There are few kitchen moments more satisfying than pulling a perfect, golden-brown apple pie from the oven. The buttery aroma fills the air, the crust is latticed beautifully, and you can just imagine the warm, spiced filling inside. But then comes the moment of truth: you cut that first slice, and your heart sinks. A cavernous gap has formed between the top crust and the shrunken, compacted apple filling.
It’s a common frustration that can make an otherwise perfect pie feel like a failure. You followed the recipe, so what went wrong? The answer isn’t about a bad recipe; it’s about chemistry. The apples, your crust, and the heat of your oven are all part of an equation. Today, we’re going to solve that equation and eliminate the dreaded pie gap for good.
The Anatomy of the Apple Pie Gap
To fix the problem, we first have to understand why it happens. Think of a raw apple slice. It’s firm and full of water, with its structure held together by pectin and cellulose. Crucially, it’s also filled with tiny air pockets between the cells. When you pack raw apples into a pie shell, you’re also packing in a significant amount of air and water.
As the pie bakes, a few things happen. The heat turns the water within the apples into steam, which softens the fruit. The apple’s cellular structure begins to break down, causing it to collapse and release its liquid. This process, in essence, is the apples cooking down. All that volume you started with—fruit, water, and air—shrinks dramatically as the air is forced out and the structure softens.
Meanwhile, your top crust is doing the exact opposite. The heat is causing the butter and water in the dough to create steam, pushing the pastry layers apart and making it puff up into a beautiful, flaky, and—most importantly—rigid structure. It sets in this high-domed position.
So, you have a filling that’s shrinking downwards while a crust is setting firmly above it. The result? A hollow space right in the middle. This not only looks disappointing but also means the filling is often denser and can contribute to a soggy bottom crust as all that released liquid pools at the bottom.
Your First Line of Defense Choosing the Right Apples
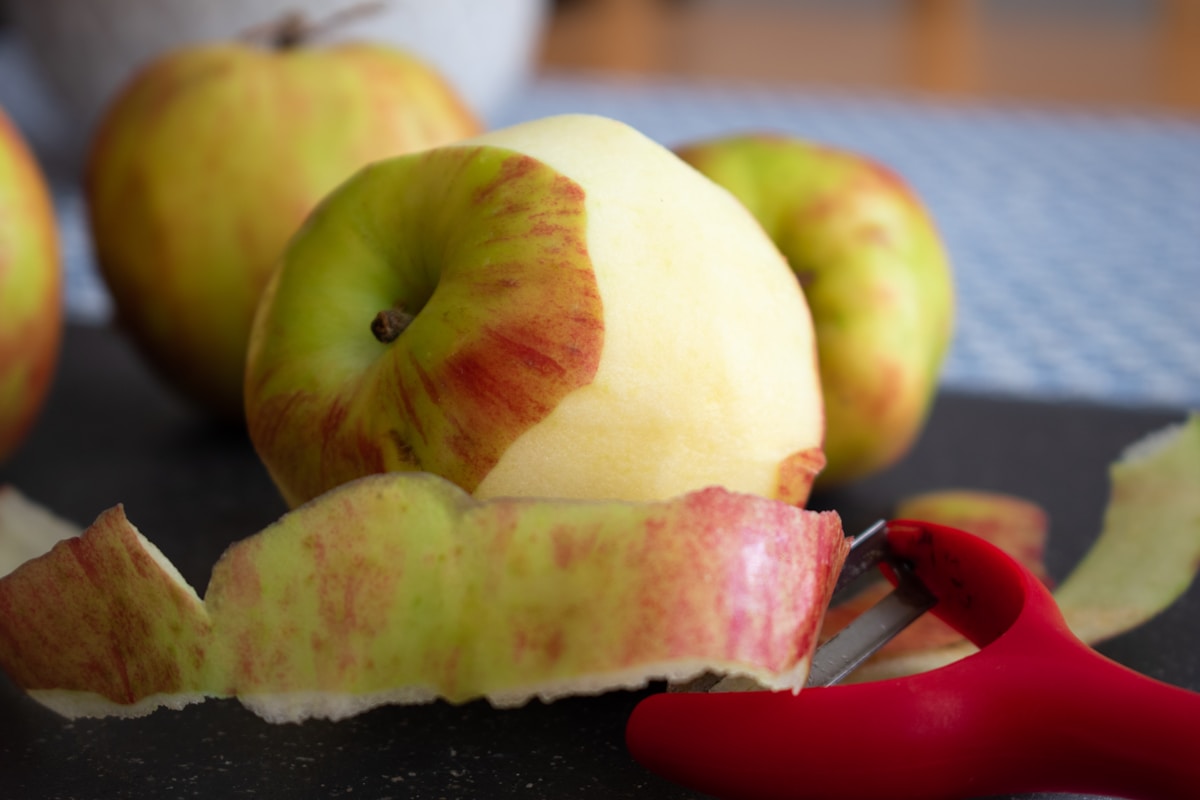
The foundation of a structurally sound pie filling begins at the grocery store. Not all apples are created equal when it comes to baking. The ideal pie apple needs to have a firm texture and hold its shape under heat. It should also have a good balance of tart and sweet flavors that intensify during baking.
Here are my go-to varieties:
- Granny Smith: The undisputed champion of pie apples. They are incredibly tart, which balances the sugar in the filling, and they have a high pectin content and firm flesh that remains distinct and toothsome after baking. No mush here.
- Honeycrisp: A fantastic modern option. As the name implies, they are exceptionally crisp and have a wonderful sweet-tart flavor. They hold their shape almost as well as Granny Smiths and contribute a lovely juiciness.
- Braeburn: An excellent all-rounder. Braeburns are firm, crisp, and have a complex, spicy-sweet flavor that is absolutely beautiful in a pie. They soften slightly more than a Granny Smith but won’t dissolve into sauce.
A Pro Tip: Use a mix! My favorite pie fillings often use two or three different types of apples. A base of Granny Smith provides the essential structure and tartness, while a few Honeycrisp or Braeburn apples add layers of sweetness and a slightly softer texture. This combination creates a filling that is complex in flavor and never one-note.
What to avoid? Apples like Red Delicious or McIntosh are generally too soft. They have a lower pectin content and a mealy texture that will break down into applesauce when baked, which is great if you’re making apple butter, but not so great for a sliceable pie.
The Slice is Everything Uniformity is Non-Negotiable
Once you have your apples, how you slice them is just as important as which ones you chose. If your slices are a jumble of different thicknesses—some paper-thin, others chunky—they will cook at different rates. The thin pieces will turn to mush while the thick chunks remain stubbornly crunchy.
For a perfectly and evenly cooked filling, consistency is your goal. Aim for uniform slices about 1/4-inch (around 6mm) thick. This is the sweet spot where the apple is substantial enough to hold its shape but thin enough to cook through completely in the time it takes your crust to turn golden brown.
How do you achieve this level of precision? While a steady hand and a sharp knife work, my secret weapon is a simple mandoline slicer. (Yes, really.) It allows you to produce hundreds of perfectly uniform slices in minutes. It guarantees that every single piece of apple in your pie will cook at the same rate, resulting in a flawless, consistent texture throughout. Just be sure to use the safety guard—they are famously sharp.
The Game-Changer Par-Cooking Your Filling
Here it is. The single most effective technique to eliminate the pie gap and guarantee a perfect filling every single time: par-cooking your apples. It might seem like an extra step, but the scientific payoff is enormous.
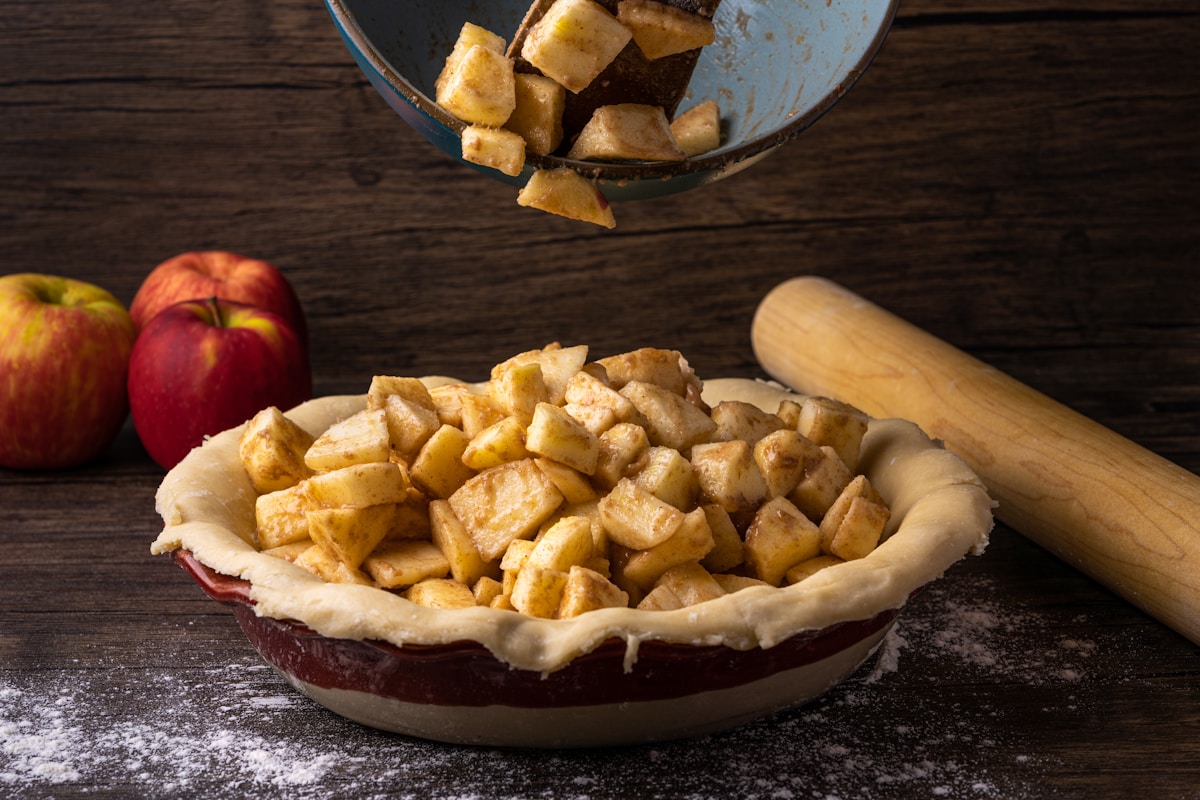
By cooking the apples on the stovetop before they go into the pie, you are forcing them to shrink and release their liquid in a controlled environment. You are essentially completing the collapsing process ahead of time. When you then pile this pre-cooked filling into your pie shell, it’s already at its final volume. There’s nowhere left for it to shrink.
Here’s a reliable method for the filling:
- Yields: Filling for one 9-inch deep-dish pie
- Apples: About 4 lbs (1.8 kg) of firm, tart apples, peeled, cored, and sliced to a uniform 1/4-inch thickness. This is usually 7-8 medium apples.
- Other Ingredients:
- 3/4 cup (150g) granulated sugar
- 1/4 cup (55g) packed light brown sugar
- 1 teaspoon ground cinnamon
- 1/4 teaspoon ground nutmeg
- 1/4 teaspoon salt
- 2 tablespoons (28g) unsalted butter
- 1 tablespoon fresh lemon juice
- 2 tablespoons cornstarch (optional, for a thicker filling)
Method:
- In a large Dutch oven or heavy-bottomed pot, melt the butter over medium heat.
- Add the sliced apples, both sugars, cinnamon, nutmeg, salt, and lemon juice. If using cornstarch, toss the apples with it before adding to the pot. Stir gently to combine.
- Cook, stirring occasionally, for 10 to 15 minutes. The goal is not to cook them to mush. You want the apples to become tender and pliable but still retain their shape. They should bend easily without snapping.
- The Kitchen Hack: Once cooked, pour the entire mixture into a colander set over a bowl. Let the apples drain for at least 15 minutes. You will be amazed at how much liquid comes out! You can then take that reserved liquid, boil it in a small saucepan for 5-7 minutes until it reduces to a thick, syrupy glaze, and pour it back over the drained apples. This gives you all the concentrated flavor without the excess water.
- Critically Important: Let the filling cool completely—to room temperature—before putting it into your raw pie dough. Adding a hot or even warm filling to a cold, butter-laden crust will melt the fat, destroying those precious flaky layers you worked so hard to create.
Assembling and Baking for a Flawless Finish
Now that your filling is pre-shrunk and cooled, you can confidently mound it into your chilled, unbaked pie shell. Pile it high! It won’t sink. Place your top crust, crimp the edges, cut your steam vents, and you’re ready for the oven.
To ensure a crisp bottom crust, always start with a hot oven. I bake my pies on a metal baking sheet to catch drips and help conduct heat to the bottom.
- Initial Bake: 425°F (220°C) for 15 minutes. This intense initial heat helps to rapidly set the bottom crust, preventing it from getting soggy.
- Continued Bake: Reduce the oven temperature to 375°F (190°C) and continue baking for another 35-45 minutes.
The pie is done when the crust is a deep golden brown and you can see thick, syrupy juices bubbling slowly through the vents. (Don’t pull it out when it’s just pale blonde! Color is flavor—that’s the Maillard reaction at work.)
Finally, the hardest part: patience. You must let the pie cool on a wire rack for at least four hours before slicing. This allows the pectin and any starches in the filling to fully set up into a stable, sliceable gel. Cut into a hot pie, and you’ll have a soupy, delicious mess. Wait, and you will be rewarded with perfect, clean slices every single time. Your future self will thank you.