It’s a moment every new baker knows. You followed the recipe perfectly. You measured everything with care. And now you’re standing over a bowl of what can only be described as culinary glue. It’s sticking to your hands, the bowl, the counter, and your will to live. Your first instinct is probably to either dump another cup of flour in or scrape the whole mess into the trash.
Take a deep breath. Step away from the flour bin. I’m Beatrice, and I’m here to tell you that this sticky situation is not a failure. In fact, it might just be the opposite. That messy, uncooperative dough is often the start of some of the most tender, airy, and delicious bread you’ll ever make. Let’s figure out why it happens and how you can become the confident boss of that dough.
The Sticky Dough Panic Is Real (But It’s Usually a Good Sign!)
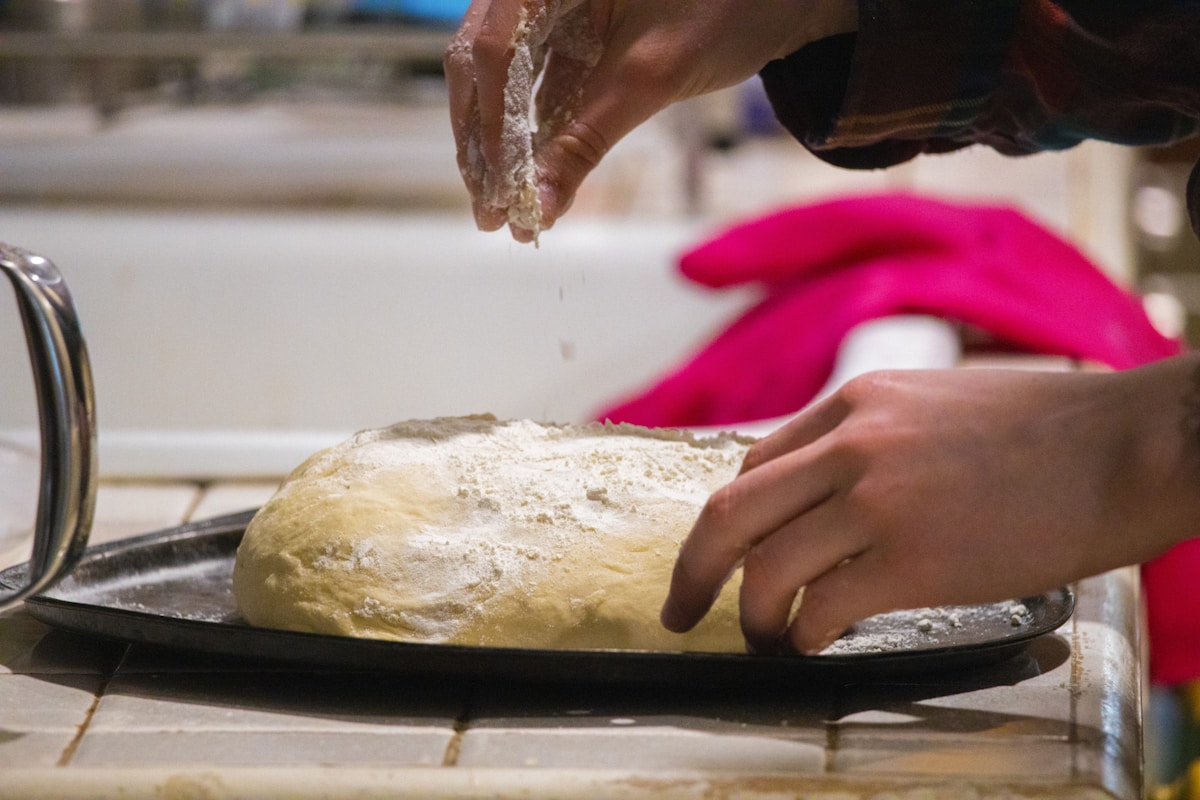
First, let’s get one thing straight: in the world of bread, sticky is not the enemy. A wet, sticky dough is what bakers call a “high-hydration” dough. All that means is that it has a relatively high amount of water compared to the amount of flour. And what does that extra water do? It creates steam in the oven, which helps the bread rise beautifully (that’s called “oven spring”) and results in a soft, moist crumb and a wonderfully crisp crust.
Many artisan breads, like ciabatta or some sourdoughs, and even super-soft Asian milk buns, start out as shockingly wet doughs. Beginners often see this and think they’ve made a mistake, adding more and more flour until the dough is stiff and easy to handle. The result? A loaf of bread that’s dense, heavy, and dry. (Yes, I’ve made many of those myself!)
The secret isn’t to eliminate the stickiness, but to learn how to manage it. The journey from a shaggy, sticky mess to a smooth, elastic ball is the magic of bread making, and it’s powered by two things: gluten development and a little bit of patience.
The Three Invisible Culprits In Your Kitchen
So why did your dough turn out so much stickier than the recipe video looked? It’s probably not your fault. Cooking is a science, but your kitchen is a unique laboratory with its own set of variables. Here are the three most common culprits.
-
Your Flour Isn’t Their Flour: Think of flour as a sponge. Different types and even different brands of flour can absorb different amounts of water. The recipe creator might have been using a high-protein bread flour, like a King Arthur Bread Flour, which is very “thirsty” and can handle a lot of water. If you used an all-purpose flour, especially a lower-protein store brand, it might get overwhelmed by the same amount of water, resulting in a much wetter dough.
-
The Weather Inside Your House: This one sounds crazy, but it’s true! Flour absorbs moisture from the air. On a humid, rainy summer day, your flour has already soaked up some ambient moisture before you even add it to the bowl. It’s less thirsty, so the water in the recipe turns the dough soupy. On a crisp, dry winter day, the opposite is true; your flour is parched and might even need an extra tablespoon of water to get to the right consistency. A recipe writer in dry Arizona and a baker in humid Florida will have very different experiences with the exact same recipe.
-
Temperature and Yeast: Yeast is a living organism that gets sluggish in the cold and hyperactive in the heat. If your kitchen is warm, the yeast will start fermenting faster, which can sometimes make the dough feel stickier and more delicate early on. The recipe might say “let rise for 1 hour,” but if your kitchen is 80°F (27°C), your dough might be ready in 40 minutes. If it’s 68°F (20°C), it might take 90 minutes. Learning to watch the dough, not the clock, is a key skill.
How to Tame the Stickiness (Without Adding a Ton of Flour)
Okay, you understand the why. Now for the how. Your dough is sticky and you need to knead it. What do you do? Don’t panic. Here are the tools and techniques that will turn you from a sticky victim to a dough-taming champion.
-
Use a Dough Scraper: I call this tool my best friend. A plastic or metal bench scraper is your number one weapon. Use it to lift the dough from the counter, fold it over on itself, and scrape your hands clean. It allows you to handle the dough without it becoming a permanent part of you.
-
Embrace the Knead: Kneading is what develops gluten, the network of proteins that gives bread its structure. When you start, a wet dough will have no structure—it will feel like a puddle. But as you knead, that gluten network forms, and the dough will magically start to pull itself together, becoming smoother, more elastic, and less sticky. For a wet dough, this could take 10-15 minutes of consistent kneading by hand or 8-10 minutes in a stand mixer. You have to trust the process.
-
Try the ‘Slap and Fold’ Method: For very wet doughs, traditional kneading can feel impossible. The “slap and fold” is a game-changer. You lift the dough up, slap the front end of it down on the counter, and then stretch it forward and fold it back over on itself. It aerates the dough and develops gluten incredibly fast without adding extra flour. It looks messy at first, but after just a few minutes, you’ll feel the dough transform.
-
A Little Oil or Water on Your Hands: Instead of flouring your hands (which adds to the overall flour content), try rubbing them with a tiny bit of neutral oil or simply wetting them with water. This creates a temporary non-stick barrier that lets you handle the dough more easily.
What About Grandma’s Old Family Recipe?
This brings us to a really common point of frustration: trying to replicate a treasured family recipe that never seems to work. You follow Grandma’s handwritten card to the letter, but your pandan milk buns come out like hockey pucks.
It’s not that Grandma left out a secret ingredient. It’s that Grandma had years of invisible knowledge. She used the same brand of flour for 40 years, she knew the feel of the dough on a humid day, and she measured with her heart and hands, not with measuring cups. Her instruction to “add flour until it feels right” was a perfect instruction for her, but it can feel impossible for a beginner.
When you tackle these recipes, think of them as a guide, not gospel. Pay close attention to the visual and tactile cues. Does your dough look as sticky as hers in that old photo? Does it feel pillowy and soft after the first rise? Start by assuming the recipe is right, and use the techniques above to manage the dough. Over time, you’ll develop your own “feel” for it, just like she did.
Try This Tonight
Feeling a little more confident? I hope so. The journey from baker-in-training to bread-master is paved with sticky dough. Every time you face it, you’re learning something new.
So here’s your homework, and it’s super easy. Don’t try to make a perfect loaf. Just get to know the dough. Find a simple “No-Knead Bread” recipe online. It will have four ingredients: flour, water, salt, and yeast. Mix them in a bowl until just combined. It will look like a shaggy, sticky, unpromising mess. Cover the bowl and just leave it on your counter for 12-18 hours. When you come back to it, look at how it’s transformed. It will be bubbly and alive, and the gluten will have developed all on its own. You didn’t do anything but wait! This simple exercise will teach you more about the life of dough than anything else. You’ve got this.


 Beatrice
