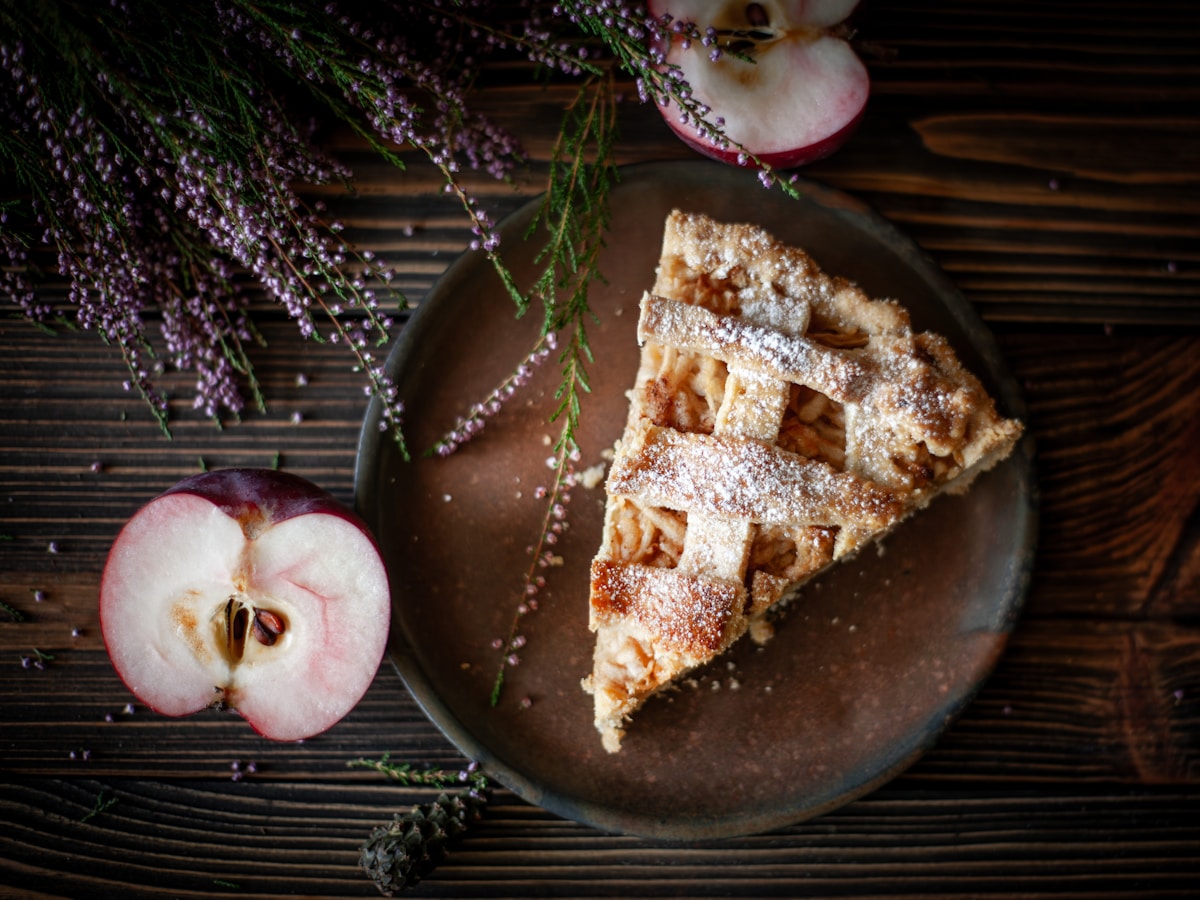
You’ve done everything right. The pie crust, a delicate lattice of buttery, flaky pastry you chilled and rolled with painstaking care, is a perfect golden brown. The aroma of cinnamon and baked apples has been filling your kitchen for the last hour, promising a slice of pure comfort. You pull it from the oven, let it cool just long enough, and cut the first slice. The crust shatters beautifully under your fork… but then you hit it. A distinct, disappointing crunch. The apples are firm, undercooked, and a world away from the soft, yielding filling you dreamed of.
It’s one of the most common frustrations in baking. How can the crust be perfectly baked while the filling remains stubbornly raw? It feels like a paradox, forcing you to choose between a burnt crust and a tender filling. But I’m here to tell you it’s not a paradox; it’s chemistry. And once you understand the science at play, you can guarantee a perfect apple pie filling every single time.
The Science of the Stubborn Apple
The heart of the problem lies in a simple mismatch of timing. Your pie crust, especially the top crust, is directly exposed to the oven’s intense heat. It undergoes the Maillard reaction, browning and crisping relatively quickly, usually within 45 to 60 minutes at around 375°F (190°C). The apples, however, are insulated by that very crust and by each other. They cook with gentler, steam-generated heat, and breaking down their cellular structure takes time.
Two key factors dictate how an apple behaves in your pie:
-
Apple Variety: Not all apples are created equal. Apples like Granny Smith, Honeycrisp, and Braeburn are prized for pies because they are firm and have a sturdy cell structure held together by a substance called pectin. This allows them to hold their shape and not turn into a mushy sauce. (A good thing!) The downside is that this same sturdiness means they require more time and heat to soften. Softer apples, like McIntosh or Cortland, cook down much faster but can easily become applesauce if you’re not careful.
-
Slice Thickness: This is the most critical variable you control. A half-inch-thick slice of a Granny Smith apple has a lot of mass to cook through. The heat has to slowly penetrate to the center of each slice to soften it. If your slices are too thick, the crust will be perfectly browned long before the apples have had a chance to surrender. A 1/4-inch (about 6mm) slice is the sweet spot for a traditional bake, but even then, results can vary.
The core issue is that we’re asking two very different ingredients—delicate pastry and fibrous fruit—to reach perfection in the exact same amount of time, under the exact same conditions. It’s a tall order. Luckily, there’s a technique that takes the guesswork out of it entirely.
The Foolproof Fix Pre-Cooking Your Filling
The single most reliable method to ensure tender apples in a perfectly baked pie is to par-cook them, or pre-cook them, on the stovetop before they ever see the inside of a pie crust. It might feel like an extra step, but these 15 minutes of prep will save you from an hour of oven-side anxiety.
This method does more than just soften the apples; it solves two other classic pie problems: the dreaded gap between the filling and the top crust, and the soggy bottom. Here’s the step-by-step process.
The Perfect Pre-Cooked Apple Pie Filling
This recipe is enough for a standard 9-inch deep-dish pie.
Ingredients:
- 3.5 lbs (about 1.6 kg) of firm baking apples, like a mix of Granny Smith and Honeycrisp (this is about 7-8 medium apples)
- 1/2 cup (100g) granulated sugar
- 1/2 cup (110g) packed light brown sugar
- 1 teaspoon ground cinnamon
- 1/4 teaspoon ground nutmeg
- 1/4 teaspoon ground allspice
- 1/4 teaspoon salt
- Juice of one lemon (about 2 tablespoons)
- 4 tablespoons (57g) unsalted butter
- 3 tablespoons cornstarch
- 1/4 cup (60ml) apple cider or water
Instructions:
-
Prep Your Apples: Peel, core, and slice your apples to a uniform thickness, about 1/4-inch thick. A mandoline slicer is fantastic for this, but a sharp knife and a steady hand work just fine. Place the slices in a large bowl and toss them with the lemon juice to prevent browning. (This is an enzymatic reaction, and the acid from the lemon juice slows it down.)
-
Combine Sugars and Spices: In a small bowl, whisk together the granulated sugar, brown sugar, cinnamon, nutmeg, allspice, and salt. Sprinkle this mixture over the apples and toss gently to coat every slice.
-
Begin the Cook: Melt the butter in a large, wide-bottomed pot or Dutch oven over medium heat. Once it’s foamy, add the coated apple slices. Stir gently to coat them in the butter.
-
Soften the Apples: Cook the apples, stirring occasionally, for about 10-15 minutes. You’re not trying to cook them all the way through. The goal is for them to become pliable and just tender when poked with a fork—think al dente pasta. They will release a significant amount of liquid. This is exactly what you want.
-
Thicken the Juices: While the apples are cooking, prepare your thickener. In a small bowl, whisk the cornstarch with the apple cider or water until no lumps remain. This is called a slurry. Pour this slurry into the pot with the apples.
-
Simmer and Set: Continue to cook, stirring gently but constantly, for another 1-2 minutes. You will see the liquid in the pot transform from watery to a thick, glossy sauce. This is the cornstarch gelatinizing, a process where the starch granules absorb water and swell, creating a gel. This is the secret to preventing a soggy bottom crust.
-
Cool Completely: Remove the pot from the heat and spread the filling out on a baking sheet to cool completely. (Yes, completely.) Putting hot filling into a raw pie crust is a one-way ticket to a doughy, steamed bottom. Cooling it quickly on a baking sheet expedites this process.
Once cool, your filling is ready. You can now pile it high into your prepared pie shell. Because the apples have already released their water and shrunk, the mountain of filling you pile in is the mountain you’ll get after baking. Goodbye, pie gap!
Beyond Pre-Cooking Other Paths to Tenderness
While I believe pre-cooking is the superior method, it’s not the only one. If you’re set on a raw-apple filling, here are a few techniques to improve your chances of success:
- Go Paper-Thin: Slice your apples as thinly as you possibly can, 1/8-inch or even less. A mandoline is almost essential here. Thinner slices have less distance for heat to travel, so they cook much faster.
- Macerate First: Tossing raw apple slices with sugar and letting them sit for 30-60 minutes (a process called maceration) will draw out a lot of their water beforehand. You can then drain off this excess liquid (and even boil it down to a syrup to add back in for flavor) before layering the apples in your pie. This helps, but doesn’t soften the apples themselves.
- Employ a Pie Shield: The edges of the crust always brown first. A simple aluminum foil ring or a dedicated pie shield placed over the edges for the first 25-30 minutes of baking will protect them. This allows you to bake the pie for longer—maybe 70-75 minutes total—giving the apples more time to cook without incinerating your beautiful crust.
To check for doneness in a pie with a top crust, listen for the vigorous bubbling of the filling through the vents. You can also insert a thin skewer or knife through a vent; it should meet with little to no resistance from the apple slices.
Why Your Pie Has That Sad, Empty Dome
Let’s talk a little more about that gap. You build a gorgeous, mile-high apple pie, but after baking, the top crust sits suspended over a cavernous space with the filling huddled at the bottom.
This happens because raw apples are full of water and air. As they bake, their cell walls break down, releasing steam and collapsing. A pie filled with raw apples can lose up to 40% of its volume during baking. The crust, however, sets its shape early on in the baking process. The result is a rigid dome of pastry with a shrunken filling below.
Pre-cooking collapses the apples before they go into the pie. You can pack your cooled, pre-cooked filling tightly into the pie shell, knowing it won’t shrink any further. The result is a perfectly full slice of pie, from bottom crust to top. It’s a small detail, but it makes for a much more satisfying and structurally sound slice.
Baking, at its core, is about controlling transformations—turning simple ingredients into something extraordinary through the application of heat and technique. Understanding why your apples stay crunchy is the first step to controlling that transformation. By giving them a head start on the stovetop, you’re not just softening them; you’re managing moisture, thickening sauces, and ensuring that every element of your pie—crust and filling—reaches its peak of perfection at the exact same moment. That’s not just baking; that’s edible chemistry. And the result is delicious.