Do you ever get that craving for real, thick-crust pizza with a crispy, almost-fried bottom and a chewy, airy crumb? The kind you imagine could only come from a special pizzeria oven? Then, you look at your kitchen, see the lack of a big, heavy stand mixer, and think, “Well, maybe another time.” I’m here to tell you that today is the day. You don’t need a $300 KitchenAid, you don’t need to knead for ten minutes, and you certainly don’t need days of complex fermentation. All you need is a bowl, a spoon, a hot oven, and about an hour. Welcome to the magic of no-knead pan pizza. It’s easier than you think, and I promise, you can do this.
The No-Mixer Magic Why This Dough Works
Let’s get one common fear out of the way: making dough is not a mystical art reserved for Italian grandmothers and professional bakers. It’s simple science, and this method is about as simple as it gets. The secret is hydration. We’re going to use a bit more water than a traditional kneaded dough. Think of it less like firm modeling clay and more like a very, very thick pancake batter. This high water content does two amazing things for us. First, it makes the dough super easy to mix by hand—no fighting with a stiff, uncooperative lump. Second, and more importantly, it helps the gluten develop all on its own. Gluten is the network of proteins in flour that gives bread its structure and chew. A mixer’s dough hook develops it by forcefully smashing the flour molecules around. We’re going to take a gentler approach. By simply letting our wet dough rest, the flour naturally absorbs the water, and the gluten strands begin to link up. A few simple “stretch and folds” (which we’ll cover in a moment) are all it takes to organize that network into a strong, elastic web. So when you mix this dough and see a sticky, shaggy mess in the bowl, don’t panic! You haven’t done it wrong; you’ve done it exactly right.
Your Only Tools A Bowl a Spoon and a Skillet
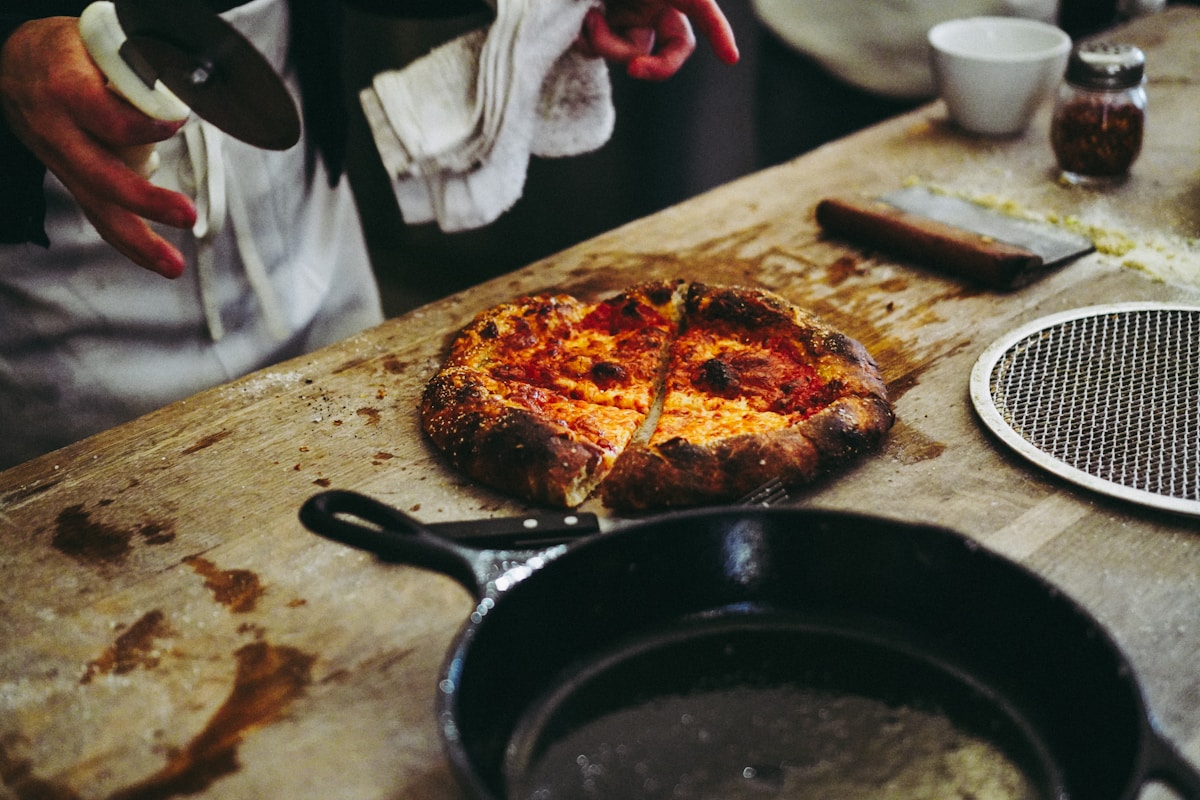
I want you to look around your kitchen. Do you have a large bowl? A sturdy spoon, maybe a wooden one? Measuring cups? Great. You’re most of the way there. The final piece of the puzzle, and our secret weapon for that incredible crust, is a cast iron skillet. A standard 10-inch or 12-inch skillet from a brand like Lodge is perfect and one of the best investments you can make for your kitchen. (Honestly, they’re not even that expensive and will last forever.) Why cast iron? Because it gets screaming hot and, more importantly, it stays screaming hot. This intense, retained heat is what will give our pizza a crispy, golden-brown, perfectly cooked bottom crust that you just can’t get from a flimsy baking sheet. That’s it. No dough hook, no pizza stone, no special peels. Just the basics.
Step-by-Step The 1-Hour Pizza Dough Plan
Ready to make some magic? Here is the entire process, broken down into tiny, manageable steps. Don’t overthink it, just follow along.
Your Ingredients:
- 3 cups (360g) Bread Flour (King Arthur is fantastic if you can find it, but any will do)
- 1 ½ teaspoons Instant Yeast (not Active Dry)
- 1 ½ teaspoons Kosher Salt
- 1 teaspoon Granulated Sugar or Honey
- 1 ⅓ cups (320ml) Warm Water (about 110°F / 43°C—it should feel like a warm bath, not hot)
- 2-3 Tablespoons Olive Oil, for the pan
The Method:
- The Mix: In your large bowl, whisk together the bread flour, instant yeast, salt, and sugar. Pour in the warm water all at once. Using your wooden spoon, mix until everything is just combined and no dry patches of flour remain. It will look shaggy and feel sticky. This is perfect. Stop mixing. (Yes, really.)
- The Rest: Cover the bowl with a tea towel or plastic wrap and let it sit on your counter for 15 minutes. This little nap allows the flour to fully absorb the water, making it easier to work with.
- The Folds: After 15 minutes, uncover the dough. Wet your hands slightly to prevent sticking. Reach into the bowl, grab one edge of the dough, gently stretch it upwards, and fold it over the center of the mass. Rotate the bowl a quarter turn and repeat. Do this 4-6 times, until the dough tightens up into a smoother ball. It will still be soft and a little sticky.
- The Rise: Cover the bowl again and place it in a slightly warm, draft-free spot for 30-45 minutes. Your oven with the light on (but the heat off) is a great spot. The dough should rise, look puffy, and have some bubbles on the surface.
From Dough to Dinner Assembling Your Masterpiece
While your dough is rising, it’s time to prepare for baking. This is the most important part for getting that crispy crust!
About 20 minutes before you’re ready to bake, place your cast iron skillet on the middle rack of your oven and preheat the oven to 450°F (232°C). Getting the pan itself incredibly hot is key. When your dough is risen and puffy, it’s go-time. Please be careful here—the pan is extremely hot. Using sturdy oven mitts, carefully remove the hot skillet from the oven and place it on a heat-proof surface like your stovetop. Pour 2-3 tablespoons of olive oil into the pan. It should shimmer immediately. Gently scrape your risen dough out of the bowl and into the hot oil. Be careful not to burn your fingers! The oil will sizzle. Using your fingertips, gently press and stretch the dough to the edges of the skillet. If it springs back, wait a minute and try again. Don’t worry about making it a perfect circle. Now, work quickly! Spread on your sauce, sprinkle your cheese, and add your favorite toppings. Place the skillet back in the hot oven and bake for 12-18 minutes, or until the cheese is bubbly and melted and the crust is a deep golden brown. Let it cool for a few minutes before slicing and enjoying the glorious crunch.
Try This Tonight
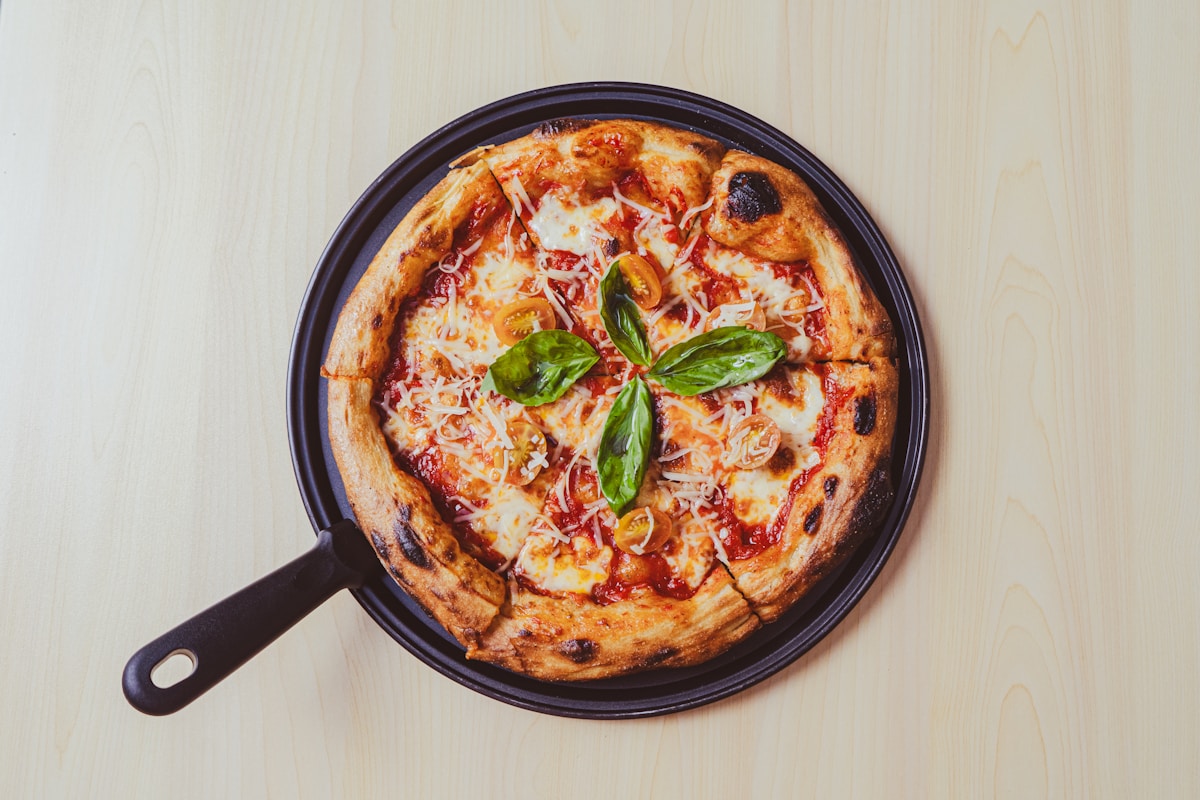
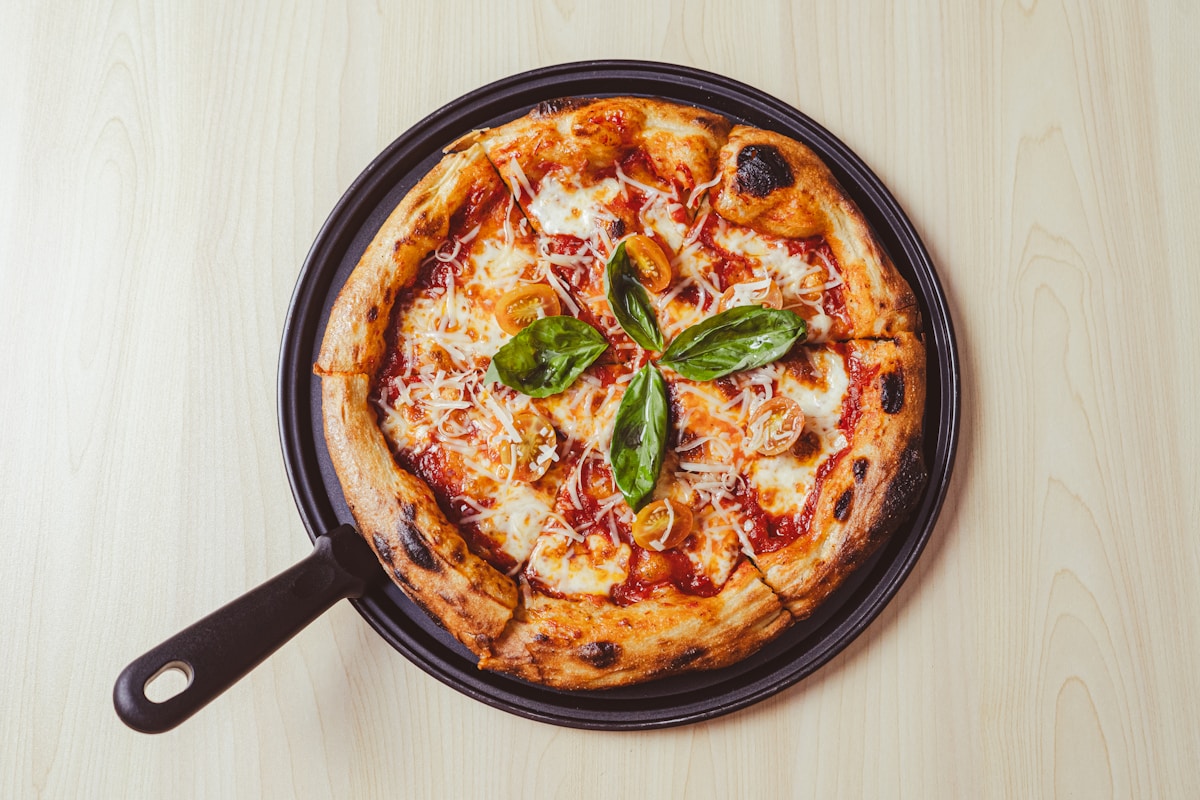
Feeling empowered? You should be! You just learned the entire framework for making world-class pizza with almost no effort. Forget takeout tonight. Your mission, should you choose to accept it, is to make a simple Margherita pizza. All you need is a can of crushed San Marzano tomatoes, some fresh mozzarella cheese torn into chunks, and a few fresh basil leaves to throw on after it comes out of the oven. The simplicity will let you appreciate the incredible flavor and texture of the crust you made with your own two hands. You’ll be amazed at what you created.