Have you ever stared at a picture of a perfect, golden-crusted pizza and thought, “I could never make that”? Maybe you pictured hours of kneading, a kitchen dusted in flour, and one of those giant, expensive stand mixers taking up all your counter space. The dream of homemade pizza suddenly feels exhausting and out of reach.
I get it. I’ve been there. But I’m here to tell you a wonderful secret: the heavy, trusty cast iron skillet sitting in your cupboard is about to change everything. You can achieve a bubbly, chewy, and unbelievably crispy pizza crust at home, and the best part? You don’t need a mixer, you don’t need to knead, and you can be ready to bake in about an hour. (Yes, really!)
Welcome to the world of cast iron pan pizza. It’s less about hard work and more about letting simple ingredients and a hot pan do the magic for you. Let’s get started.
Why Your Cast Iron Skillet is a Pizza Superhero
First, let’s talk about why this method works so well. Your standard aluminum baking sheet is thin and flimsy. It heats up and cools down quickly, which often leads to a pale, soft, and slightly disappointing pizza bottom. It gets the job done, but it doesn’t inspire greatness.
A cast iron skillet, on the other hand, is a thermal powerhouse. Think of it like a brick oven you can hold in your hand. Brands like Lodge have been making these kitchen workhorses for over a century for good reason. Here’s what makes it so perfect for pizza:
- Incredible Heat Retention: Cast iron gets hot and, more importantly, stays hot. When you slide that pan into a screaming-hot oven, the metal doesn’t flinch. It blasts the bottom of your dough with consistent, powerful heat, creating a crispy, golden-brown crust that’s impossible to get otherwise.
- The “Frying” Effect: In this recipe, we use a generous amount of olive oil to coat the pan. As the pizza bakes, the bottom of the dough doesn’t just bake—it essentially fries in the hot oil. This is the secret to that coveted crunchy, satisfying texture you find in Detroit-style or classic pan pizzas.
- Edge-to-Edge Perfection: The high sides of the skillet encourage the cheese and sauce to melt right up to the edge, creating a beautiful “frico”—a lacy, crispy cheese wall that is arguably the best part of the entire pizza.
So, dust off that 10-inch or 12-inch skillet. It’s not just for searing steaks anymore. It’s your ticket to the best homemade pizza you’ve ever made.
The Magic of No-Knead Dough (It’s Mostly Just Waiting)
The biggest hurdle for beginner bread makers is gluten development. Gluten is the network of proteins in flour that gives dough its stretch and chew. Traditionally, you develop it by kneading—a process that can be tiring and tricky to get right.
But there’s another way: time and water.
When flour is mixed with water, the gluten proteins start linking up all on their own. By giving the dough a little time to rest (a process called hydration or autolyse), it essentially kneads itself. We’ll give it a couple of quick folds to help it along, but the mixer can stay in the cupboard.
For this to work best, we need the right ingredients:
- Bread Flour: Please, please use bread flour if you can! Brands like King Arthur Bread Flour have a higher protein content (around 12.7%) than all-purpose flour. More protein means stronger gluten, which means a chewier, more satisfying crust. You can use all-purpose in a pinch, but the texture will be softer and more cake-like.
- Instant Yeast: This is sometimes called rapid-rise yeast. It’s reliable and doesn’t need to be “bloomed” in warm water first. You just mix it in with the dry ingredients.
- Water: We’re using a relatively high amount of water, which makes the dough sticky but also helps the gluten develop quickly. Don’t be afraid of a sticky dough!
- Salt: Essential for flavor and for controlling the yeast’s activity.
That’s it. Four simple ingredients and a little bit of patience are all you need.
Your Step-by-Step No-Mixer Pizza Dough Recipe
This recipe makes one perfect 10-inch or 12-inch pan pizza. Feel free to double it if you have two pans!
Ingredients:
- 300g Bread Flour (about 2 cups, spooned and leveled)
- 6g Kosher Salt (about 1 teaspoon)
- 4g Instant Yeast (about 1 teaspoon)
- 210g Warm Water (about 1 cup, around 100°F / 38°C)
- 2-3 Tablespoons Olive Oil (for the pan)
Instructions:
-
The Initial Mix: In a medium-sized bowl, whisk together the bread flour, salt, and instant yeast. Pour in the warm water. Switch to a spatula or wooden spoon and mix until just combined. It will look like a shaggy, sticky mess. (This is normal! Don’t panic.) Cover the bowl with a plate or plastic wrap and let it rest on the counter for 30 minutes. We’ll call this its “hydration nap.”
-
The Fold: After 30 minutes, you’ll see that the dough looks a little smoother. Wet your hand slightly to prevent sticking. Reach into the bowl, grab one edge of the dough, stretch it up gently, and fold it over the center. Rotate the bowl a quarter turn and repeat. Do this four times in total (north, south, east, west). You’ll feel the dough tightening up. This entire process takes less than 30 seconds.
-
Prepare the Pan: Pour 2-3 tablespoons of olive oil into your 10 or 12-inch cast iron skillet. Use your fingers to spread it evenly across the bottom and up the sides. This feels like a lot of oil, but trust me, it’s the key to a crispy bottom.
-
The Final Proof (In the Pan!): Scrape the dough out of the bowl and place it in the center of your oiled skillet. Flip it over once to coat both sides in oil. Now, gently press and stretch the dough towards the edges of the pan. It won’t reach the sides yet, and that’s okay! It will resist. Don’t fight it. Cover the pan with a clean kitchen towel and let it rest for another 15-20 minutes. After this short rest, the gluten will have relaxed. Uncover the pan and now easily press the dough to the edges. It should fill the pan completely. If it springs back, give it 5 more minutes. (Your future self will thank you for being patient.)
Your dough is now ready for toppings!
Assembling and Baking Your Masterpiece
While your dough is having its final rest in the pan, it’s time to prep. Place an oven rack in the middle position and preheat your oven to its highest setting, ideally 500°F (260°C). A hot oven is crucial.
Topping Strategy for Beginners:
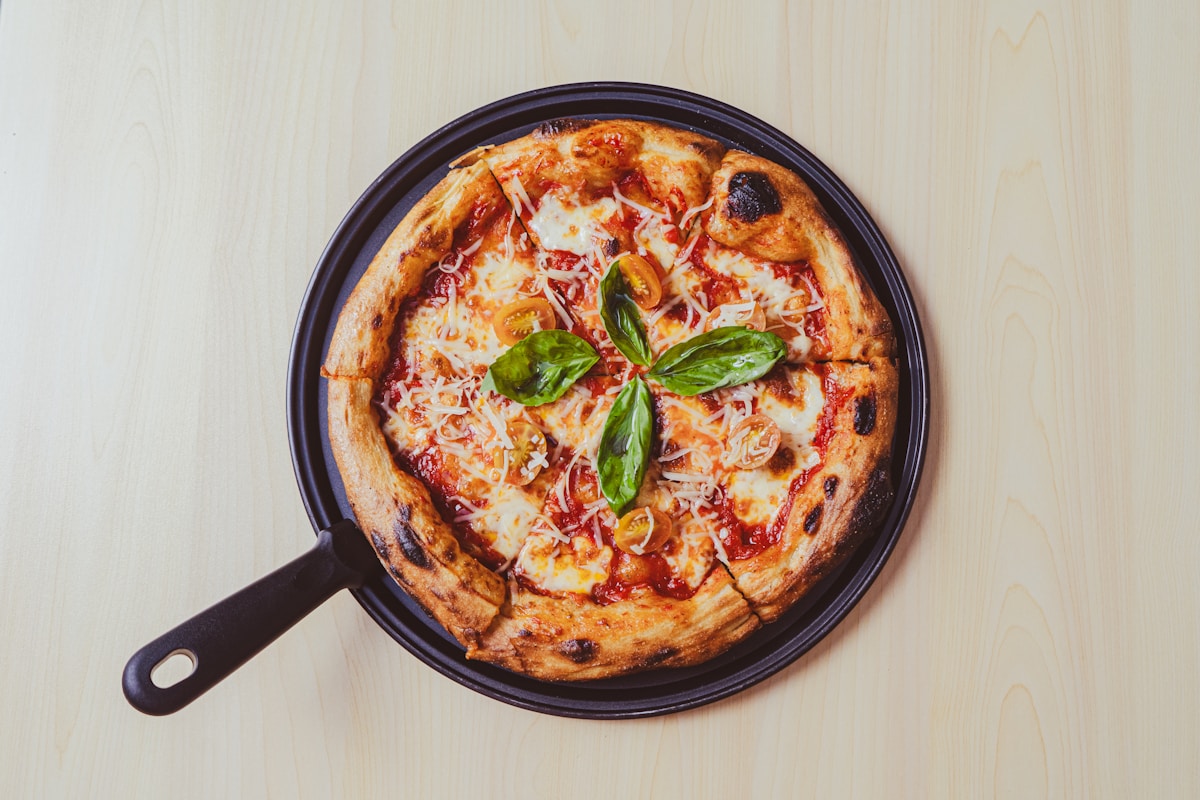
The golden rule of pizza toppings is “less is more.” Overloading your pizza, especially with wet ingredients, will lead to a soggy crust. Keep it simple for your first try.
- Sauce: A simple canned pizza sauce or even crushed tomatoes work great. Spread a thin layer, leaving a small border around the edge.
- Cheese: Use low-moisture mozzarella, either shredded or torn from a block. Fresh mozzarella balls contain a lot of water and should be used sparingly by beginners. Spread the cheese all the way to the edges of the pan. This is how you get that glorious crispy cheese crust!
- Other Toppings: Pepperoni is a classic for a reason—it crisps up beautifully in the high heat. Cooked sausage, sliced mushrooms, or olives are also great choices.
Time to Bake:
Once topped, place the skillet on the middle rack in your fully preheated oven. Bake for 12-15 minutes.
Don’t just trust the timer—use your eyes and ears! The pizza is done when the cheese is bubbly and golden brown, and the crust around the edge is a deep, dark brown. You should hear it sizzling in the pan. That’s the sound of victory.
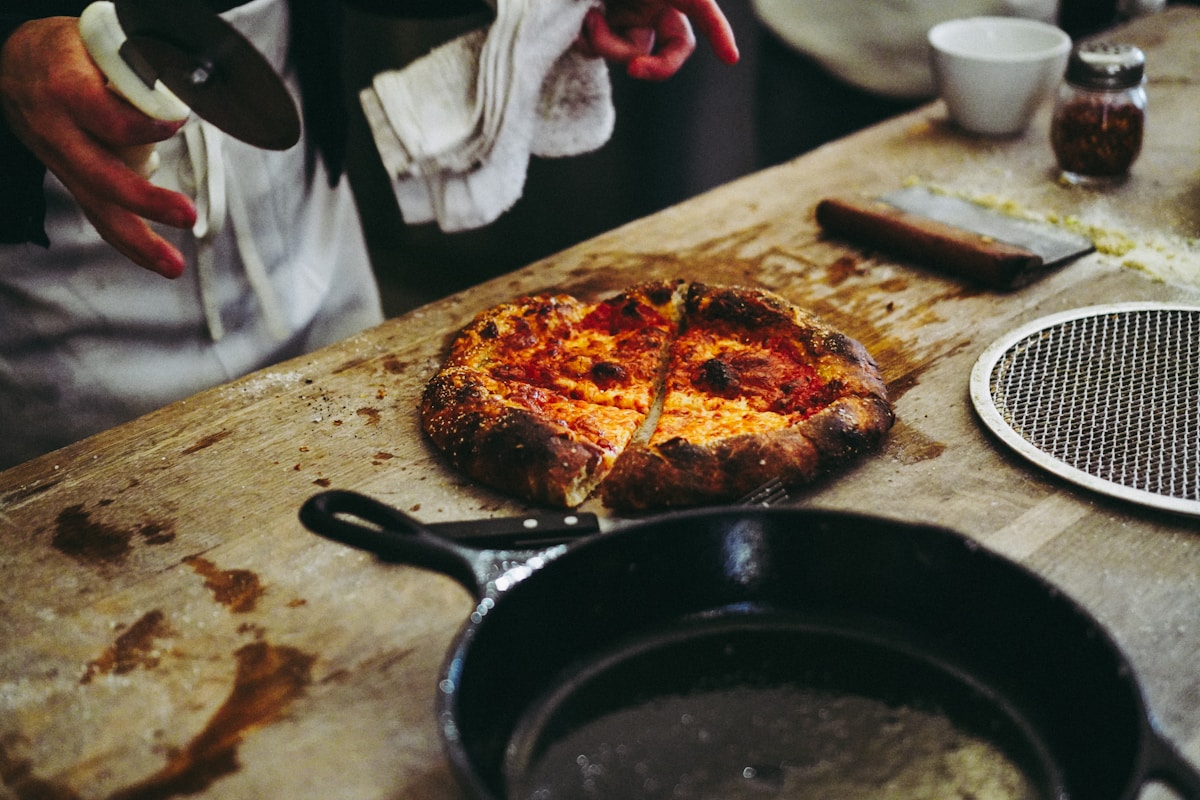
Carefully remove the hot skillet from the oven (use good oven mitts!). Let it cool in the pan for a minute or two. Then, use a thin metal spatula or a fish spatula to carefully lift the pizza out of the pan and onto a cutting board. The bottom should be beautifully browned and crispy.
Kitchen Hack and Quick Troubleshooting
-
What if my dough doesn’t stretch? It just needs more time. Gluten is like a tense muscle; it needs time to relax. Give it another 10 minutes of rest, and it will be much more cooperative.
-
My bottom isn’t crispy enough! Your oven might not have been hot enough, or you may not have used enough oil. Another trick: you can finish the pizza on the stovetop! After it comes out of the oven, place the skillet over medium heat for 2-3 minutes to get extra-crispy insurance on the bottom.
-
Pro-Tip for Leftovers: The best way to reheat a slice of cast iron pizza is… back in the cast iron skillet! Place a slice in a dry skillet over medium-low heat. Cover with a lid for a few minutes until the cheese is re-melted and the bottom is perfectly crisp again. It’s almost as good as fresh.
Try This Tonight
See? No mixer, no marathon kneading session, no special pizza stone. Just a bowl, a spoon, and your trusty skillet. You are just about an hour away from a truly spectacular homemade pizza.
For your first attempt, I challenge you to make a simple pepperoni pizza. Follow the steps, trust the process, and listen for that sizzle. The moment you pull that golden, bubbly creation from the oven, you’ll realize that amazing pizza was within your reach all along. The kitchen is more forgiving than you think, and this recipe is a perfect place to start. Happy cooking!