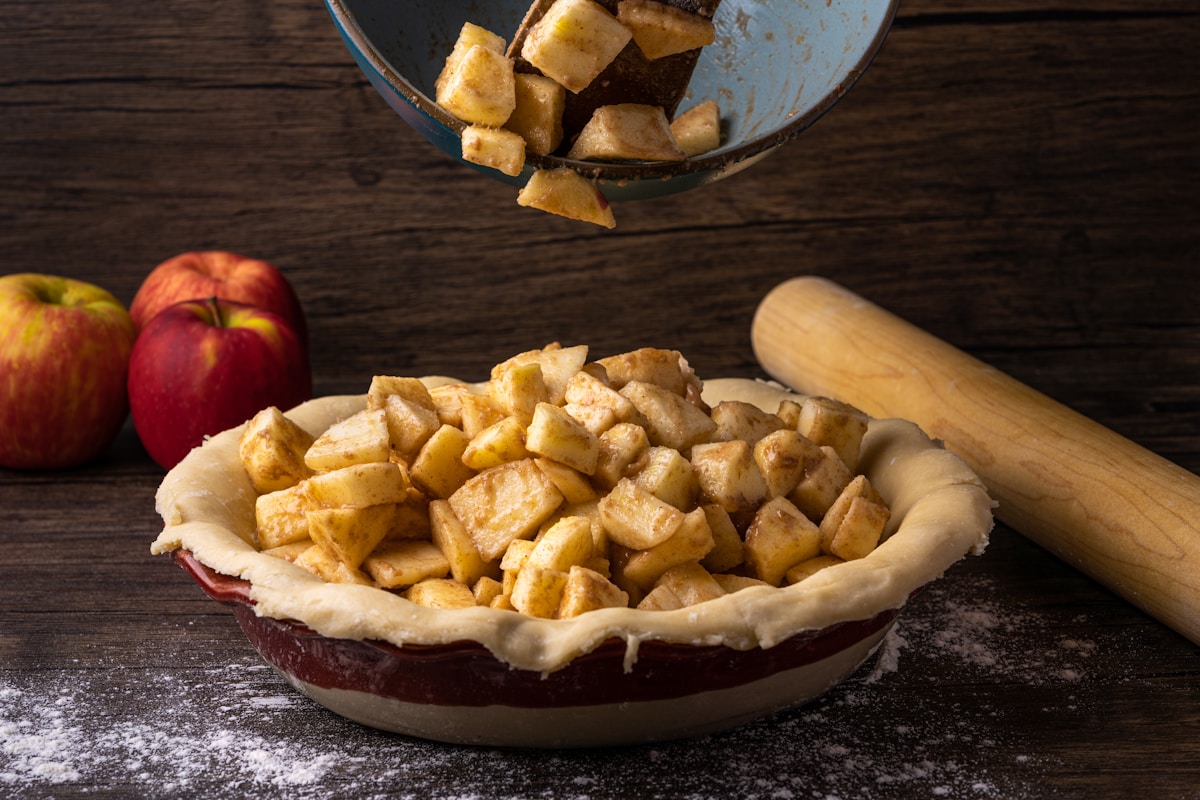
There are few moments in baking more visually rewarding than pulling a perfectly golden-brown apple pie from the oven. The crust is flaky, the sugary top is caramelized, and the aroma fills your entire kitchen. You let it cool (mostly), slice into it with anticipation, and then you hear it: the unmistakable, unwelcome crunch of a raw apple.
It’s a deflating experience, and one every baker has faced. You followed the recipe, the crust is baked to perfection, yet the filling is a landscape of firm, undercooked slices. This isn’t a failure of the recipe; it’s a failure of synchronization. Baking a perfect pie is a race against time between the pastry and the fruit, and if they don’t cross the finish line together, you get disappointing results. But the solution isn’t just to bake it longer. The solution lies in understanding the chemistry of an apple.
The Science of the Slice Why Thickness Is Everything
The fundamental challenge of an apple pie is that the crust and the filling cook at different rates and by different mechanisms. Your pie crust browns because of the Maillard reaction, a beautiful chemical process between amino acids and reducing sugars that creates flavor and color. This happens wonderfully at temperatures around 375°F (190°C).
Apples, on the other hand, become tender when heat breaks down pectin, the natural cellular glue that holds their structure together. For that to happen, the internal temperature of the filling needs to be high enough for long enough to soften the fruit. If your apple slices are too thick, the heat simply cannot penetrate to the center of each slice before the crust is done, or even burnt.
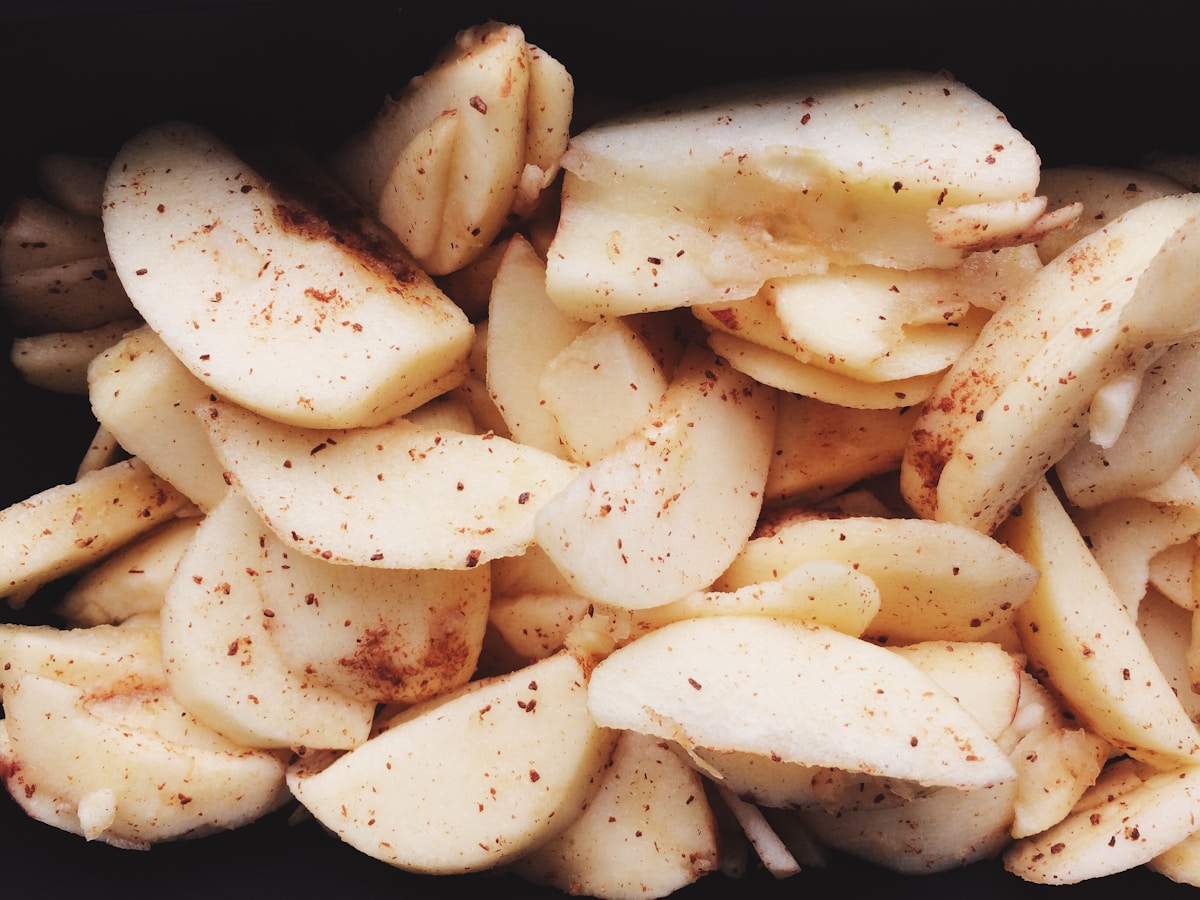
This is where precision becomes your greatest tool. The ideal thickness for an apple pie slice is between 1/8-inch and 1/4-inch (that’s about 3 to 6 millimeters). This is the baker’s Goldilocks Zone.
- Thicker than 1/4-inch: These chunky slices are the primary culprits of crunchy pie. They have too much mass for the oven’s heat to soften them in the 45-60 minutes it takes to bake a crust.
- Thinner than 1/8-inch: On the other end of the spectrum, paper-thin slices have so little structure that their cell walls completely disintegrate in the heat, turning your filling into a homogenous, soupy applesauce.
To achieve this consistency, a mandoline is an invaluable tool. It guarantees that every single slice is identical, ensuring they all cook at the same rate. If you don’t have one, a very sharp chef’s knife and a steady hand will do. Just focus on uniformity above all else. (Your future self will thank you.)
Choosing Your Champion The Best Apples for Pie
The variety of apple you choose has a dramatic impact on the final texture. The key factors are the apple’s pectin content and acidity, which determine how well it holds its shape when heated. Biting into a crisp, juicy Honeycrisp is a very different experience from biting into a soft, mealy Red Delicious, and that difference is magnified in the oven.
For pie, you want apples that are firm and tart. The firmness means they have a strong cellular structure that won’t immediately collapse into mush, and the tartness balances the sugar you’ll be adding.
-
The All-Stars (Firm & Tart): Granny Smith is the undisputed king of pie apples for a reason. It’s intensely tart and becomes tender without falling apart. Other fantastic choices include Honeycrisp, Braeburn, Golden Delicious, and Jonagold. These varieties provide structure and a bright, classic apple flavor.
-
The Flavor-Makers (Softer & Sweeter): Apples like McIntosh, Cortland, and Gala have wonderful, aromatic flavors but tend to break down more easily. They can turn soft and lose their distinct shape.
Here’s a professional baker’s tip: use a mix! My favorite combination is 70% Granny Smith for that reliable structure and tart backbone, and 30% McIntosh for its beautiful aroma and softer texture that helps bind the filling together. This gives you the best of both worlds—defined slices of apple suspended in a silkier, more flavorful sauce.
The Pre-Bake Insurance Policy Two Paths to Perfect Texture
If you want to absolutely guarantee a tender, perfectly cooked filling every single time, you need to give the apples a head start. By pre-treating the apples before they even go into the crust, you take all the guesswork out of the final bake. There are two primary methods to do this.
Method 1: Maceration (The Cold Method)
Macerating is simply the process of tossing your sliced apples with sugar and letting them sit. It’s a gentle, effective way to pre-soften the fruit.
- The Technique: In a large bowl, combine your 1/8 to 1/4-inch thick apple slices with your sugar (typically 3/4 cup for 6-8 apples), spices (like 1 tsp cinnamon, 1/4 tsp nutmeg), and a tablespoon of lemon juice. Toss everything thoroughly and let it sit at room temperature for at least 45 minutes, up to 90 minutes.
- The Science (Osmosis): The sugar on the surface of the apples draws water out of the apple cells via osmosis. This does two brilliant things: it begins to soften the apples, and it pulls out excess moisture that could otherwise make your bottom crust soggy.
- Kitchen Hack: After macerating, you’ll find a significant amount of liquid pooled at the bottom of the bowl. Don’t throw it out! Strain the apples and pour that liquid into a small saucepan. Boil it for 3-5 minutes until it reduces to a thick, caramel-like syrup. Let it cool slightly, then pour it back over the apples before filling your pie. This intensifies the flavor and ensures a less-runny filling.
Method 2: Par-Cooking (The Hot Method)
This method is more direct and gives you complete control over the final texture of your apples.
- The Technique: In a large skillet or Dutch oven, melt 2-3 tablespoons of unsalted butter over medium heat. Add your apple slices, sugar, and spices. Cook, stirring gently, for about 8-10 minutes. You’re not trying to cook them completely; you’re just looking for them to lose their raw crispness and become pliable. They should be just barely fork-tender.
- The Science: This quick sauté gives the apples a huge head start on the cooking process. It ensures that even the thickest slices will be perfectly tender by the time the crust is done. Crucially, you must let the filling cool completely—to room temperature—before putting it into your raw pie shell. A hot filling will melt the butter in your pastry, ruining its flaky potential.
Assembling for Success Temperature and Timing
Now that your filling is prepared, the final bake is about managing heat to get that perfect crust and bubbly interior.
A common mistake is baking the pie at a single, moderate temperature. A better strategy is to start hot and then reduce the heat.
-
Initial Blast: Place your assembled pie on a baking sheet and bake at 425°F (220°C) for the first 15 minutes. This intense initial heat helps to set the bottom crust quickly, creating a barrier against sogginess.
-
The Long Bake: After 15 minutes, reduce the oven temperature to 375°F (190°C). Continue baking for another 35-50 minutes.
So how do you know when it’s truly done? The color of the crust is a good indicator, but it isn’t the most reliable one. The real signal is the filling. You need to see it bubbling vigorously through the vents you cut in the top crust. This bubbling means the internal temperature is high enough (over 200°F / 93°C) for the filling to have cooked through and for any thickener you used (like flour or cornstarch) to have fully activated. If you don’t see thick, slow bubbles, the pie isn’t done yet. If your crust edges are getting too dark, simply tent them loosely with a piece of aluminum foil.
The Final, Agonizing Step Patience and Cooling
You’ve done it. The crust is golden, the filling was bubbling, and the pie is out of the oven. The final test is not one of skill, but of willpower. You must let it cool. (Yes, really.)
Cutting into a hot pie is a recipe for a soupy disaster. The magic that transforms the juices into a clean, sliceable filling happens as the pie cools. The pectin and starches, which were agitated by the heat, will set into a stable gel as the temperature drops. This process takes time.
For a perfect slice, you must let your apple pie cool at room temperature for a minimum of four hours. Six hours is even better. I know it feels like an eternity, but this single step is the difference between a slice of pie and a bowl of hot apples with a pastry lid. Trust me on this one. It’s the final piece of the chemical reaction you’ve been so carefully orchestrating.
Baking a truly great apple pie is a masterclass in control—control over thickness, temperature, and time. By understanding why each step works, you move from just following a recipe to commanding it, ensuring that every pie you bake is as delicious to eat as it is beautiful to behold.