We’ve all made them. That classic, no-bake square of puffed rice cereal and melted marshmallow is a cornerstone of childhood bake sales and quick weeknight desserts. They’re reliable, comforting, and sweet. Almost too sweet, sometimes. The flavor is simple, a straightforward sugar rush that, while pleasant, isn’t particularly memorable.
But what if you could take that same, simple recipe and, with one extra five-minute step, transform it into something profoundly delicious? What if you could introduce notes of toasted nuts and deep caramel, creating a treat that’s complex, sophisticated, and utterly irresistible? You can. The key isn’t a secret ingredient you have to order online; it’s a fundamental technique that unlocks the hidden potential in an ingredient you already have in your refrigerator: butter.
The One-Ingredient Upgrade Your Treats Deserve
The technique is called browning butter, known in French pastry as beurre noisette, which beautifully translates to “hazelnut butter.” The name is a perfect description of the flavor and aroma you create. By simply heating butter on the stove past its melting point, you toast the milk solids suspended within it. This process changes everything.
The one-note sweetness of the marshmallow is suddenly balanced by a rich, nutty depth. The flavor goes from flat to dynamic. It’s the kind of subtle but powerful change that makes people pause after their first bite and ask, “What did you do to these?” This isn’t just about adding flavor; it’s about creating layers of flavor that make a simple treat feel intentional and gourmet.
The Science of Brown Butter (Chemistry You Can Eat)
As a baker who believes understanding the ‘why’ is as important as the ‘how,’ this is my favorite part. Browning butter isn’t magic; it’s a beautiful, edible chemistry experiment. The primary reaction at play here is the Maillard reaction.
If that sounds intimidating, don’t let it. You experience the Maillard reaction every day. It’s the set of chemical reactions between amino acids and reducing sugars that gives browned food its distinctive flavor. It’s why a seared steak is more delicious than a boiled one, why toasted bread tastes so much better than plain, and why roasted coffee has such a complex aroma. It’s the reaction responsible for creating hundreds of new flavor and aroma compounds that weren’t there to begin with.
When you heat butter in a pan, here’s what’s happening on a molecular level:
- Water Evaporation: Butter is typically about 80-82% butterfat, 16-18% water, and 1-2% milk solids. First, the butter melts. Then, as the temperature rises past the boiling point of water (212°F or 100°C), the water begins to boil off. You’ll hear it sputtering and see it foaming. This is a crucial phase.
- Toasting the Solids: Once most of the water has evaporated, the sputtering will quiet down, and the temperature of the fat can rise higher. This is when the milk solids (proteins and sugars) at the bottom of the pan begin to toast and undergo the Maillard reaction. They turn from pale white to a gorgeous amber, then to a nutty brown, releasing an incredibly aromatic bouquet of new flavors.
You are fundamentally changing the chemical makeup of the butter, creating a brand-new ingredient from an old one. (This is the chemistry you can eat.)
How to Make Perfect Brown Butter Every Time
Mastering this is easy, but it requires your full attention. Butter can go from perfectly browned to sadly burnt in a matter of seconds. (Don’t walk away from the stove!)
Equipment: A light-colored saucepan is your best friend here. A stainless steel or enameled pan allows you to accurately see the color of the milk solids. Using a dark, non-stick pan is like trying to navigate in the dark—you’ll likely miss the visual cues and burn it.
Ingredients: Start with a good quality unsalted butter. Since butter is the star, its quality matters. I often use a European-style butter like Kerrygold because its higher butterfat content yields more of those delicious brown bits.
The Methodical Process:
- Prep: Cut one stick (1/2 cup or 113g) of unsalted butter into tablespoon-sized pieces. This helps it melt evenly.
- Melt: Place the butter in your light-colored saucepan over medium heat. Let it melt completely, swirling the pan occasionally.
- Foam: As the butter heats up, it will begin to foam. This is the water cooking off. Continue to swirl the pan gently.
- Listen & Look: The initial loud sputtering will begin to subside. This is your cue to pay close attention. The foam will thin, and you’ll be able to see the bottom of the pan. You’ll notice tiny, light-tan specks forming. These are the milk solids starting to toast.
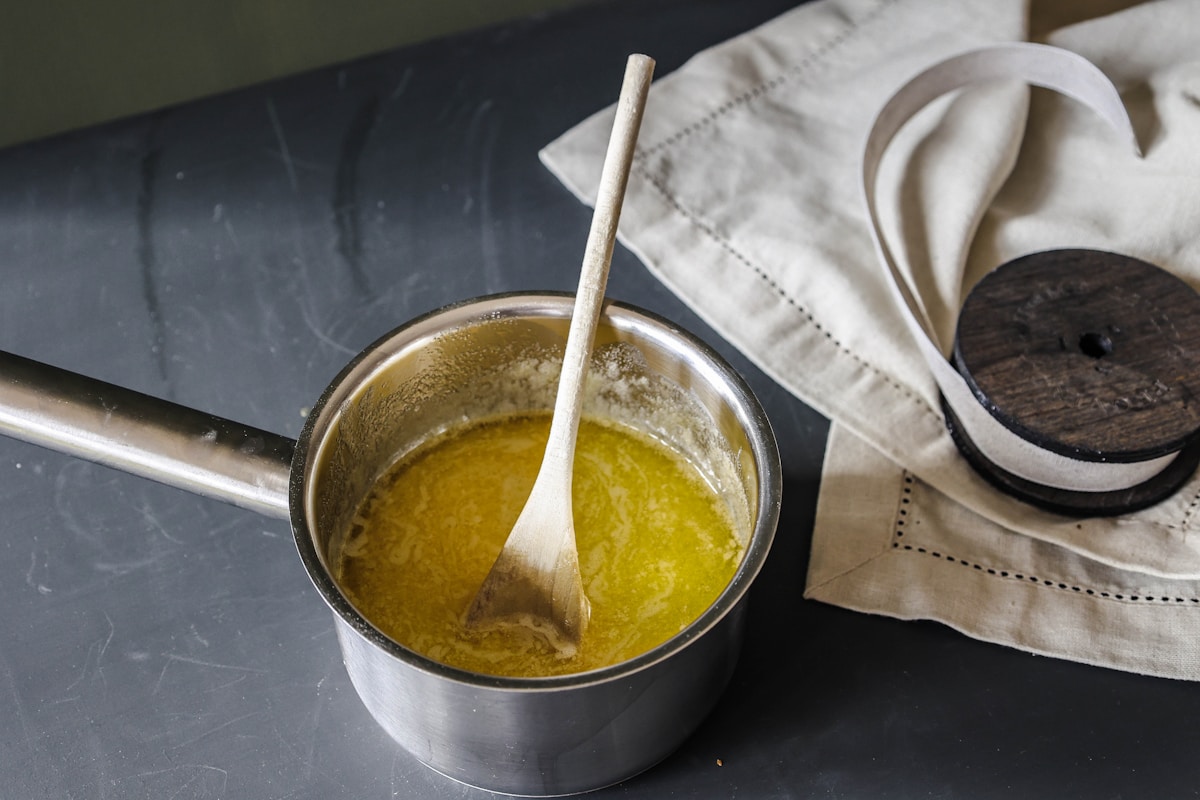
- Smell & Swirl: The aroma will shift from simply melted butter to something nutty and fragrant. Swirl the pan continuously now to ensure the solids brown evenly. Watch the color of the specks intently—they will go from tan to a deep, nutty brown. This can happen very quickly.
- Stop the Cooking: The instant you see amber-brown specks and smell that intoxicating nutty aroma, remove the pan from the heat. Immediately pour the butter—including all the brown bits—into a heatproof bowl to stop the cooking process. If you leave it in the hot pan, the residual heat will burn it.
Troubleshooting: If the bits are black and the smell is acrid or bitter, it’s burnt. Unfortunately, there’s no saving it. The only solution is to discard it and start again. This is a lesson every baker learns once.
The Ultimate Brown Butter Rice Krispie Treat Recipe
Now, let’s put our beautiful beurre noisette to work. This recipe also incorporates flaky sea salt, another key player in balancing sweetness and elevating flavor.
Yields: 16 squares Prep Time: 10 minutes Set Time: 1 hour
Ingredients:
- 1/2 cup (113g) unsalted butter
- 1 (10-ounce / approx. 280g) bag of mini marshmallows (Jet-Puffed brand is very consistent)
- 1 teaspoon pure vanilla extract
- 1/2 teaspoon flaky sea salt (like Maldon), plus more for sprinkling
- 6 cups (about 170g) crispy rice cereal (the classic Kellogg’s Rice Krispies work perfectly)
Instructions:
- Prepare Your Pan: Line a 9x9-inch (23x23 cm) square baking pan with parchment paper, leaving an overhang on two sides to act as handles for easy removal later.
- Brown the Butter: In a large Dutch oven or heavy-bottomed pot, brown the 1/2 cup of butter over medium heat using the method described above. Watch it carefully until the milk solids are a deep amber brown and the aroma is nutty.
- Melt the Marshmallows: Once the butter is perfectly browned, turn the heat down to low. Immediately add the entire bag of mini marshmallows and the 1/2 teaspoon of flaky sea salt. Stir constantly with a heatproof spatula until the marshmallows are completely melted and the mixture is smooth and homogenous. It will be a beautiful light caramel color.
- Add Flavor: Remove the pot from the heat. Stir in the vanilla extract.
- Fold in the Cereal: Add all 6 cups of the crispy rice cereal to the pot. Gently fold everything together until the cereal is just evenly coated. Be careful not to overmix or crush the cereal.
- Press Gently (The Kitchen Hack): Transfer the mixture to your prepared pan. Here’s the most important tip for chewy, not dense, treats: do not compact the mixture with force. Use a greased spatula or another piece of parchment paper to gently press the mixture into an even layer. Compressing it tightly is what leads to hard, tough treats.
- Set and Finish: Sprinkle a little extra flaky sea salt over the top. Let the treats set at room temperature for at least one hour before using the parchment handles to lift them out of the pan. Cut into 16 squares and serve.
Beyond Rice Krispie Treats: Your New Favorite Technique
Once you master the art of browning butter, you’ll see opportunities to use it everywhere. It’s a foundational skill that elevates countless dishes, both sweet and savory.
Think about swapping it for regular melted butter in your favorite chocolate chip cookie recipe for an incredible toffee-like depth. Toss it with gnocchi and fresh sage for a classic Italian sauce. Drizzle it over roasted asparagus or steamed green beans. Use it to make classic French financiers or a simple brown butter cake.
By learning this one simple process, you’ve unlocked a new dimension of flavor in your kitchen. You’ve taken a basic ingredient and, through a little heat and a little chemistry, turned it into something special. And that, to me, is what baking is all about.