You’ve done it. You seared the perfect steak, roasted the most beautiful vegetables, or baked a batch of life-changing chocolate chip cookies. You’re ready for the final flourish, that chef-level touch that separates the good from the great: a generous sprinkle of flaky finishing salt.
You reach for that iconic box of Maldon, anticipating the delicate, pyramid-like crystals that will deliver that satisfying, saline crunch. But instead of perfect flakes, you find a damp, clumpy brick. Or worse, the bottom of the box is filled with nothing but salty dust, the beautiful structure completely pulverized from being knocked around in the pantry.
It’s a small kitchen tragedy, but it’s a real one. You spent good money on a premium ingredient specifically for its texture, and your storage method let you down. The right tool makes cooking easier, but it also protects the ingredients you invest in. When it comes to flaky salt, the cardboard box it came in just isn’t the right tool.
Why Your Salt Shaker is Crushing Your Culinary Dreams
Let’s get the most common mistake out of the way first. You see that beautiful salt, and your first instinct might be to pour it into an empty salt shaker. Please, for the love of good food, do not do this.
A standard salt shaker is designed for one thing: dispensing fine-grained, uniform salt like table salt or kosher salt. The tiny holes act as a sieve. When you try to force large, delicate, pyramid-shaped flakes of Maldon through them, you’re essentially running them through a cheese grater. The shaker will break, crush, and pulverize those gorgeous crystals into a fine powder. You instantly destroy the very thing you paid for — the texture.
And a salt grinder? That’s even worse. Finishing salt is already the perfect size and shape. Grinding it is like buying a hand-crafted wooden chair and immediately feeding it into a woodchipper. It completely misses the point of the product.
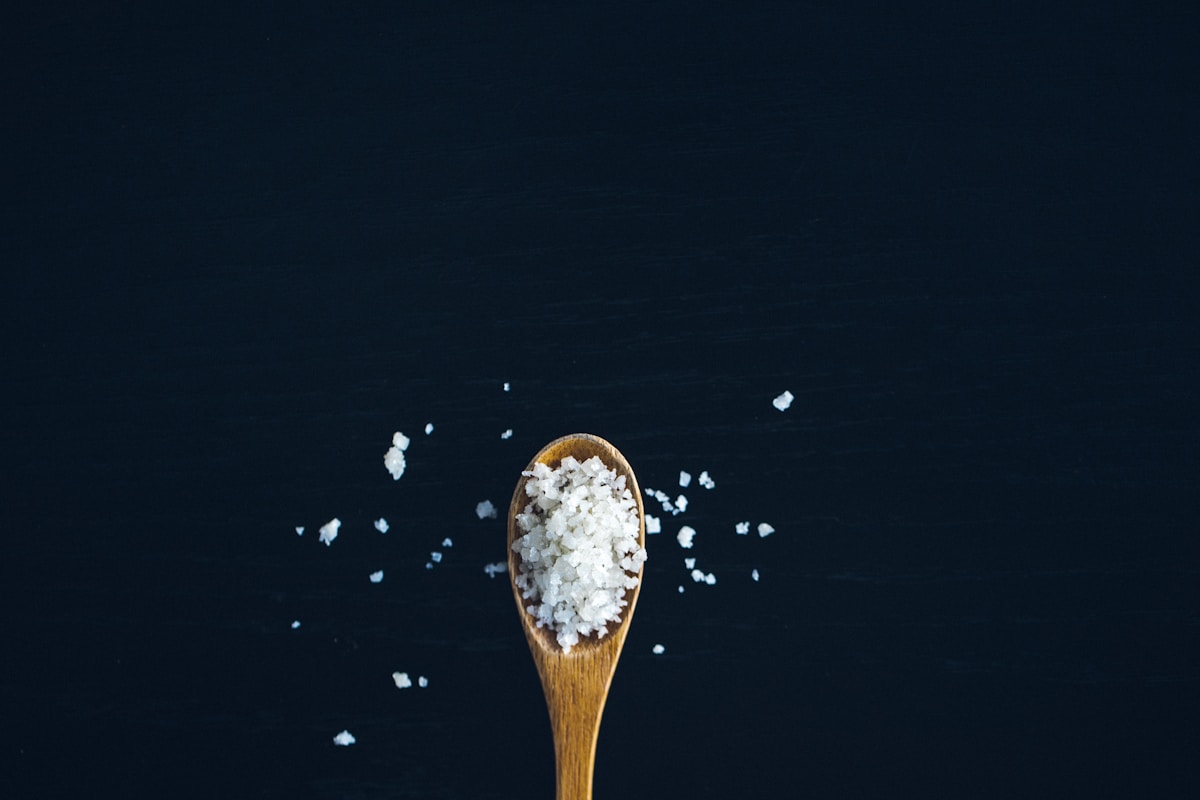
The value of a finishing salt like Maldon or Jacobsen lies in its structure. That wide, flaky surface area dissolves quickly on the tongue for a clean burst of flavor, while the crunchy texture provides a delightful contrast. Preserving that structure is priority number one.
Meet the Salt Cellar The Simple Tool Chefs Swear By
Walk into any professional kitchen, and you won’t see a line of salt shakers next to the stove. You’ll see small pots, boxes, or bowls filled with salt. These are called salt cellars, salt pigs, or salt boxes, and they are the undisputed best way to store and use any salt you plan to pinch with your fingers.
A salt cellar has two key features that make it ideal for finishing salt:
-
A Wide Opening: The entire purpose is to allow you to reach in with your fingers and grab a generous pinch. This gives you far more control over seasoning than a shaker ever could. You can feel the salt, see exactly how much you have, and distribute it evenly from high above the food like a pro. (Yes, the “Salt Bae” move actually has a practical purpose — it ensures even distribution!)
-
A Protective Design: A good cellar keeps the salt clean and dry. It shields the contents from airborne grease, steam, dust, and other kitchen grime that can turn your pristine salt into a sticky mess. Most have a lid or a hooded design to accomplish this without being a hassle to open.
By allowing you to pinch the salt, you maintain total control and, more importantly, you don’t damage the flakes. You’re taking what you need without disturbing the rest. This is why it’s the standard for chefs who need to season food quickly, accurately, and consistently hundreds of times a night.
Choosing Your Champion The Best Materials for Salt Cellars
Not all salt cellars are created equal. The material it’s made from matters for durability, moisture control, and ease of use. I’ve tested dozens over the years, and here’s my honest breakdown of the most common options.
Ceramic & Porcelain
This is the material of the classic “salt pig,” a container with a wide mouth and a large, hooded opening or “snout” that you reach into. It’s a fantastic choice.
- Pros: It’s non-porous and non-reactive, so it won’t absorb moisture or impart any flavors. It’s heavy and stable, so it won’t slide around your counter. They are also incredibly easy to clean — most can go right in the dishwasher. Brands like Emile Henry or Le Creuset make beautiful, durable ones.
- Cons: They can be a bit pricier ($30 - $50), and if you drop it on a tile floor, it’s game over.
- Best For: Someone who wants a permanent, handsome fixture by their stove that offers excellent protection from splatters.
Wood (Acacia, Olive, Bamboo)
Wooden salt boxes, often with a clever swivel lid, are my top recommendation for most home cooks. They hit the sweet spot of function, form, and price.
- Pros: They look warm and natural on the counter. The swivel lid, especially one with a small magnet to keep it closed, is brilliant for one-handed use while you’re busy stirring a pot. They are also typically the most affordable option. Look for models from brands like Totally Bamboo or Ironwood Gourmet.
- Cons: You need to ensure it’s made from a dense hardwood. Soft, porous woods can absorb moisture and odors over time. You also can’t put it in the dishwasher; it’s a simple wipe-clean situation.
- Best For: The practical home cook who values convenience and budget. A good acacia wood salt box is probably the best value-for-money upgrade you can make for your seasoning game.
Marble
If you’re going for a specific aesthetic, a marble salt cellar is a showstopper. It’s heavy, cool, and feels incredibly premium.
- Pros: Its substantial weight means it’s incredibly stable. The natural coolness of the stone can help prevent the salt from clumping in warm kitchens. It’s a beautiful statement piece.
- Cons: Marble is the most expensive option. It’s also slightly porous, so it can stain if you splash something like tomato sauce on it. It also requires hand washing.
- Best For: The design-conscious cook who wants their tools to double as kitchen decor.
The Little Details That Make a Big Difference
Beyond material, here are two final things to consider when you’re choosing your salt cellar.
-
The Lid is Everything: The lid’s job is to keep contaminants out while providing easy access. A swivel lid with a magnetic closure is my personal favorite for its one-handed convenience. A simple, loose-fitting lid works just fine, too. The “salt pig” snout is excellent at keeping grease out, but you’ll need two hands to move it and grab salt. The goal isn’t an airtight seal; you just want to keep the big stuff out.
-
Opening Size Matters: Make sure the opening is at least 2.5 to 3 inches in diameter. You want to be able to get your fingers in and out comfortably without having to contort your hand or crush the salt against the sides. (Your future self will thank you.)
Lucas’s Picks and a Pro Tip for Humid Kitchens
After all the testing, if you want my direct recommendations, here they are:
-
Best Overall Value: The Totally Bamboo Salt Box. For around $15, you get a durable, good-looking box made from a sustainable material with a fantastic magnetic swivel lid. It’s the one I recommend to all my friends. It does the job perfectly without breaking the bank.
-
Best Stovetop Workhorse: The Emile Henry Salt Pig. If you cook a lot and keep your salt right next to the heat, this is worth the investment. It’s virtually indestructible, the design is brilliant for keeping splatters out, and it will last you a literal lifetime.
My Favorite Kitchen Hack: The Rice Grain Trick If you live in a particularly humid environment, you might still find your salt clumping a little, even in a good cellar. The solution is simple: toss about a dozen grains of uncooked white rice into the bottom of the cellar. The rice will act as a natural, food-safe desiccant, absorbing excess moisture from the air and keeping your salt flakes perfectly dry and separate. Just swap the rice out every couple of months.
Ultimately, protecting your finishing salt isn’t about buying the most expensive container. It’s about moving from a package that destroys the product to a tool that preserves it. For the price of a couple of lattes, a simple wooden salt box can completely change your seasoning workflow and ensure that every beautiful, crunchy flake you paid for ends up on your food, not as dust at the bottom of a box.