We’ve all been there. You pull a gorgeous pan of fudgy, chocolatey brownies from the oven. The smell is intoxicating. You let them cool (or, if you’re like me, you get impatient and go for it a little too soon). You grab a knife, make that first cut, and… disaster. Jagged edges, a mess of crumbs, and a first piece that looks like it barely survived a natural disaster.
Then there’s the great brownie debate: are you an edge person or a center person? For those who live for that chewy, slightly caramelized crust, the four corner pieces are pure gold. The rest are just a consolation prize. This very dilemma is what gave birth to the brownie pan divider, a gadget that promises a world of perfect squares and all-edge pieces.
But here at kitchen-fun.com, we look at every gadget with a healthy dose of skepticism. My philosophy is simple: the right tool makes cooking easier, but the most expensive tool isn’t always the right one. So, is this specialized pan a game-changer that earns its spot in your cupboard, or is it another single-use gimmick destined to gather dust? Let’s get our hands dirty and find out.
What Exactly Is a Brownie Pan Divider?
At its core, a brownie pan divider is a simple concept. It’s a metal grid, typically made of nonstick-coated steel or aluminum, designed to fit snugly inside a corresponding square pan (usually an 8x8 or 9x9 inch pan). Some are sold as a complete set—pan plus divider—while others are standalone inserts.
The promise is twofold:
-
Perfect Portions: You place the divider into the pan after you pour in the batter but before you bake. As the brownies bake, the grid walls off each portion. When they’re done, you lift the divider out, and voilà: perfectly pre-cut, identical brownie squares. No knife, no mess, no arguments.
-
The All-Edge Dream: Because the metal grid makes contact with the batter on all four sides of each individual brownie, it conducts heat and creates that coveted chewy edge texture on every single piece. No more soft, gooey center pieces. (For edge lovers, this is the main selling point; for center lovers, it’s a deal-breaker.)
Brands like the famous Baker’s Edge Pan take this a step further with a continuous, maze-like pan design, but the insert-style dividers from companies like Wilton or Chicago Metallic are more common. They seem like the perfect solution for bake sales, parties, or anyone who values precision and consistency in their baking. But as with any specialized tool, the real story is in the execution.
The Great Brownie Test Putting Dividers on Trial
To give this tool a fair shake, I grabbed a popular 9x9 inch nonstick pan with a matching divider insert. I decided to use a classic fudgy brownie recipe, because their dense, gooey batter is the ultimate test. A lighter, more cake-like batter is less likely to seep, but a fudgy brownie batter is the true challenge.
My go-to recipe involves melting 1/2 cup (113g) of unsalted butter with 4 ounces (113g) of unsweetened chocolate. Once smooth, I whisk in 1 1/4 cups (250g) of sugar, 2 large eggs, a teaspoon of vanilla, and a pinch of salt. Finally, I fold in 1/2 cup (60g) of all-purpose flour until just combined. Over-mixing is the enemy of fudgy texture.
Here’s how the test went down, step-by-step:
-
Preparation: I preheated my oven to 350°F (175°C). I greased the pan itself but debated whether to grease the divider. The instructions said the nonstick coating was enough, but my gut told me to hit it with a light coating of baking spray. (Spoiler: I’m glad I did.)
-
The Pour: I poured the thick, glossy batter into the pan and smoothed it with an offset spatula. This part is crucial. You need an even layer for the divider to work properly.
-
Inserting the Divider: This felt a bit strange. I pressed the metal grid slowly and firmly into the raw batter. Some batter oozed up the sides of the grid, which is expected. The key is to press it all the way down until it touches the bottom of the pan. If your batter is too thin, I can easily see it seeping underneath and defeating the whole purpose of pre-cutting.
-
The Bake: I baked for 30 minutes, the standard time for this recipe. The aroma was fantastic, but I was watching the pan like a hawk. I could see the edges of each individual square bubbling and setting up, which was promising.
-
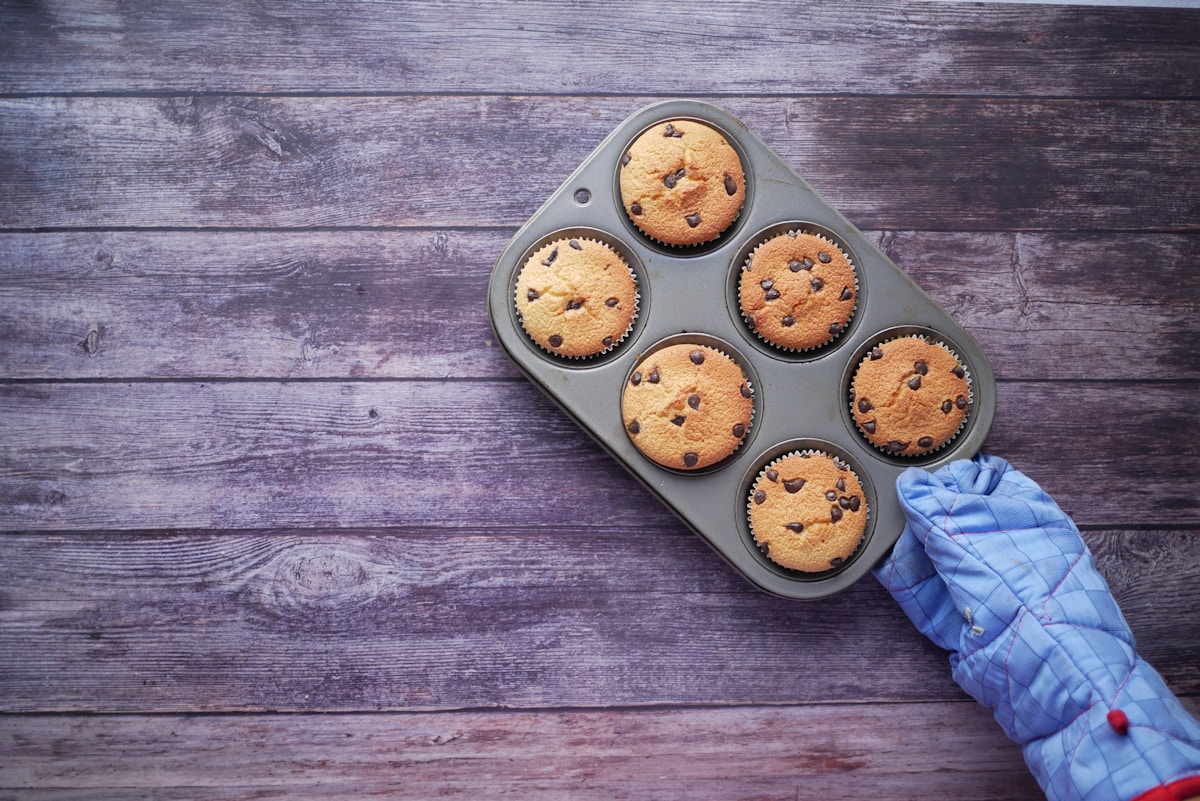
The Reveal: After baking, I let the pan cool on a wire rack for about 15 minutes. The instructions said to remove the divider while the brownies are still warm, not hot. With a bit of gentle wiggling, the divider lifted out. And I have to admit, the result was visually stunning. A grid of 16 perfectly uniform, identical brownies, each with a full set of chewy edges. No cutting required.
But the story doesn’t end there. Now came the part nobody talks about in the commercials: the cleanup.
The Verdict The Good The Bad and The Messy
After testing, tasting, and—most importantly—cleaning, here’s my honest breakdown of whether a brownie divider is worth your money and effort.
The Good (Why You Might Love It)
- Flawless Presentation: The results are undeniable. If you need picture-perfect, identical brownies for a bake sale, a party, or your food blog, this tool delivers. Every piece is a perfect square.
- The Edge Effect: It absolutely works. Every single brownie has that delightfully chewy, slightly crispy edge all the way around. For an edge-lover, it’s a dream come true.
- No-Fuss Cutting: You can say goodbye to crumbly messes and uneven portions. This is especially helpful when dealing with add-ins like nuts or chocolate chips that can make clean knife cuts difficult.
- Flavor Compartments: Here’s a cool trick. You can use the grid to create a multi-flavor brownie batch. Sprinkle chopped walnuts in one row, sea salt and caramel in another, and leave a third plain. The divider keeps everything neatly contained. (This is a huge plus.)
The Bad (Why You Might Hate It)
- The Cleanup is a Nightmare: Let’s be direct. Cleaning this thing is a pain. You have dozens of little corners and angles where baked-on brownie gets stuck. Even with a good nonstick coating and my pre-emptive baking spray, it required a long soak and meticulous work with a sponge and a detail brush. (Your dishwasher might struggle, too.)
- It’s a Unitasker: This tool does one thing and one thing only. It divides brownies. It takes up as much space as a small pan, but you’ll only use it occasionally. For anyone trying to minimize kitchen clutter, this is a major drawback.
- Batter Consistency is Key: If your brownie recipe is too thin or liquidy, batter will seep under the grid, gluing the whole thing to the bottom of the pan and ruining the pre-cut effect. It works best with thick, fudgy batters.
- No More Gooey Centers: This is the flip side of the all-edge dream. If you are a person who treasures that super-soft, under-baked gooey center piece, this pan will actively destroy what you love most about brownies.
Who Should Actually Buy a Brownie Divider?
So, what’s the bottom line? This isn’t a simple ‘yes’ or ’no’ answer. It comes down to what kind of baker you are.
You should consider buying a brownie divider if:
- You’re a Perfectionist: You value precision and appearance above all else. The satisfaction of seeing a tray of flawless brownies outweighs the hassle of cleaning.
- You Bake for Events: If you frequently contribute to bake sales, office parties, or pack lunches, the speed and uniformity are a massive time-saver.
- You’re an ‘Edge’ Aficionado: If you genuinely believe the edge piece is the only piece worth eating, this tool was literally made for you.
- You Love Multi-Flavor Batches: The ability to create a variety pack of brownies in one go is a unique feature that’s hard to replicate otherwise.
You should probably skip it if:
- You’re a Kitchen Minimalist: You hate single-use gadgets and your drawer space is sacred. A good knife does the job well enough for you.
- You Love the Gooey Center: Don’t even think about it. This pan is your enemy.
- You Hate Washing Dishes: Seriously, if you dread cleanup, this tool will bring you nothing but misery. The convenience of not cutting is completely erased by the inconvenience of scrubbing every last nook and cranny.
The Best Alternatives to a Dedicated Divider
Before you spend $20-$30 on a specialized pan, remember that great results are achievable with tools you already own. Here are my favorite non-gadget methods for perfect brownies.
The Hot Knife Trick: This is the classic pastry chef technique. Let your brownies cool completely. Fill a tall container (like a mint julep cup) with very hot water. Dip a long, sharp chef’s knife into the water, wipe it clean and dry with a paper towel, and make one clean cut. The hot blade melts through the chocolate and fat, preventing sticking and dragging. Repeat the dip-and-wipe process for every single cut. It’s methodical, but the results are shockingly clean.
The Bench Scraper: For a standard 8x8 or 9x9 pan, a simple, flat-edged bench scraper is my secret weapon. Once the brownies are cool, just press straight down with the scraper to make your cuts. Because you’re applying even, downward pressure instead of dragging a blade, you get much cleaner lines with less crumbling.
The Plastic Knife: It sounds crazy, but a disposable plastic knife is one of the best tools for cutting brownies. Its slightly serrated, non-stick surface often produces a cleaner cut than an expensive metal knife without any special tricks. (Try it. You’ll be surprised.)
Ultimately, the brownie pan divider is a luxury, not a necessity. It solves a real problem and does what it promises, but at the cost of storage space and a tedious cleanup. For my money, I’ll stick with my bench scraper and the hot knife trick. But if you’re a die-hard edge lover who needs every brownie to be a perfect 10, it just might be the right, specialized tool for your kitchen.


