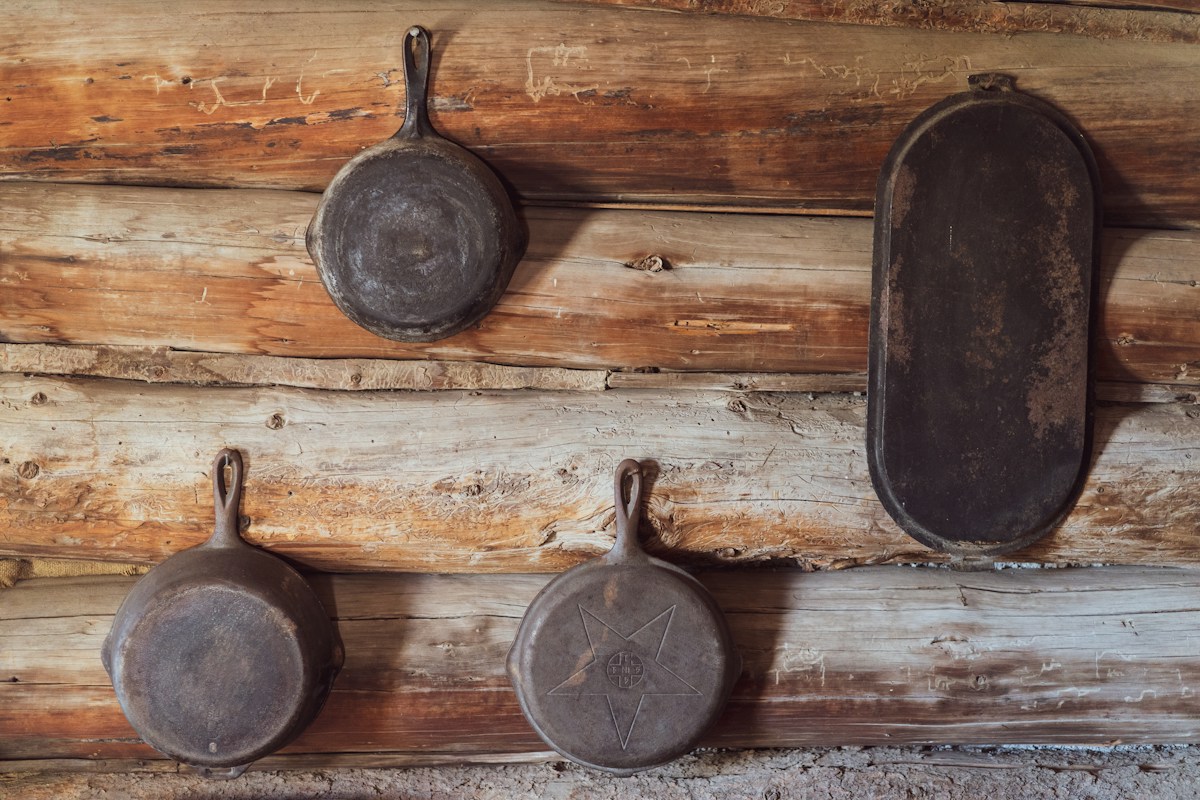
You find an old cast iron pan at the back of a cupboard, flea market, or relative’s kitchen. The handle is dusty, the surface is orange with rust, and you are not sure whether you have found useful cookware or a metal problem.
The good news is that ordinary surface rust often does not mean the pan is ruined. To restore rusty cast iron, inspect it first, remove rust without unnecessarily damaging the iron, dry it completely, and rebuild the seasoning with several thin oil layers. Cracks, severe warping, deep corrosion, flaking surfaces, loose hardware, and unknown coatings are different concerns and may make the pan unsuitable for cooking.
Work slowly, ventilate the area, use heat protection, and follow the manufacturer’s instructions if you can identify the cookware. This process applies to bare cast iron, not automatically to enameled cast iron or pans with wooden, plastic, or mixed-material parts.
Key Takeaways
- Surface rust is often removable, but cracks, severe warping, deep corrosion, flaking, and loose handles can make a pan unsuitable for cooking.
- Start with light scrubbing and use a monitored soak only when ordinary abrasion is not enough.
- Wash away residue and dry every part of the pan immediately before applying oil.
- Season with several nearly invisible oil layers rather than one thick coat.
- Test the restored pan with moderately oily foods before trying delicate or acidic recipes.
1. Decide Whether the Rusty Cast Iron Pan Is Worth Restoring
Start with a careful inspection before scrubbing. Look at the cooking surface, underside, rim, pour spouts, handle, helper handle, lid, and any screws or other hardware. Rust around the outside is usually less concerning than damage affecting the pan’s structure or food-contact surface.
Loose orange or reddish-brown rust that powders or flakes away during light rubbing is generally surface rust. Dark staining and shallow pitting may remain after cleaning and do not automatically make a pan unusable. A restored pan does not need to look new or perfectly smooth; it needs to be structurally sound and cleanable.
Pay closer attention to these warning signs:
- Cracks in the cooking surface, base, rim, or handles
- A base that rocks badly on a flat counter or stovetop
- Severe warping that prevents stable contact with the cooking surface
- Deep corrosion with sharp edges, holes, or metal that continues to crumble
- A loose handle, unstable helper handle, or damaged attachment point
- A coating that is flaking and cannot be identified
- Non-cast-iron parts that cannot safely tolerate washing or oven heat
A little unevenness is common in older cookware, but a pan that rocks, wobbles, or has a visibly bent base deserves caution. Do not try to hammer it flat. Cast iron is hard but brittle, and forcing it can worsen a crack or create one.
Maker marks, unusual shapes, and apparent age can make a pan interesting, but they do not guarantee collectible value. If the pan may be valuable, photograph it and identify it before aggressive cleaning. Cleaning can remove old residue or obscure details that matter to a collector. A missing lid does not automatically disqualify a skillet: the pan can still be useful, although a replacement lid should match its diameter and design rather than simply resting loosely on the rim.
If you cannot determine what the pan is made from, or if you see cracking, flaking material, or serious structural damage, stop before cooking in it. Food-contact safety is not something to guess at when the cookware’s condition or construction is uncertain.
2. Remove Rust With the Least Aggressive Method That Works
For a basic restoration, gather a stiff nylon brush or scrub pad, steel wool or a purpose-made rust eraser, mild dish soap, clean towels, cooking oil, and heat-resistant gloves. Eye protection is sensible when brushing aggressively, especially if dry rust or abrasive particles may become airborne. Work in a well-ventilated area and protect the work surface.
The goal is to remove loose rust and damaged seasoning while preserving sound metal. You do not need to polish the pan silver or grind away every dark mark.
Light rust and small rusty areas
Begin with the least aggressive approach. Scrub the rusty sections with a stiff nylon brush or abrasive pad. If that does not remove the loose layer, move to steel wool or a rust eraser and work in small sections. Use even pressure instead of concentrating force on one spot.
A rusty cast iron skillet may lose some or all of its old seasoning during this step. That is acceptable when you are doing a full restoration because the seasoning will be rebuilt later. Rinse or wipe away residue periodically so you can see whether you are removing rust or simply wearing down sound metal.
For a small patch, coarse salt rubbed with a damp cloth can provide mild abrasion. Fine abrasive paper may help with a localized rough spot, but use it carefully and avoid reshaping the cooking surface. Stop when the loose rust and flakes are gone and the metal feels stable.
Heavier rust and monitored soaking
If rust covers much of the pan and scrubbing becomes impractical, a controlled soak may be considered. A diluted vinegar-and-water solution is more aggressive than ordinary scrubbing, so monitor it closely rather than leaving the pan unattended for an arbitrary length of time. Acid can affect the iron if exposure continues too long.
Use a container that will not be damaged by the solution, keep the pan supported, and inspect it frequently. As the rust softens, remove the pan and scrub it. Do not assume that a longer soak is better. Once the rust is loosened, rinse thoroughly and move directly to drying.
Do not mix cleaning products. Avoid unidentified rust removers or harsh chemicals unless you know the exact product, its cookware compatibility, ventilation requirements, protective equipment, and food-contact instructions. Power tools, grinders, wire wheels, and sanders can remove metal quickly and create dust or sparks; they are not sensible default choices for a beginner’s kitchen restoration.
3. Wash, Dry, and Prepare the Bare Pan for Seasoning
After rust removal, wash the pan with warm water and a small amount of dish soap. This removes loose rust, abrasive residue, and any remaining cleaning solution. Soap is useful at this stage because you are preparing the pan for new seasoning rather than trying to preserve the old coating.
Rinse thoroughly, then dry immediately with a lint-free towel. Pay attention to the handle junction, underside, rim, pour spouts, and small gaps where water can remain hidden.
Place the pan on a stovetop over low heat for a short period to drive off remaining moisture, staying nearby while it heats. Use only a heat method approved for that cookware. The pan should be completely dry before oil is applied; moisture left in pores or around the handle can encourage new rust beneath the seasoning.
Let it cool enough to handle safely, then inspect it again under good light. Look for orange residue, loose flakes, cracks, sharp corrosion, or areas that need another cleaning pass. If rust remains in a shallow pit but is no longer loose, it may not be practical to remove every dark mark. The important distinction is between stable discoloration and active, flaky corrosion.
4. Apply Thin Cast Iron Seasoning Layers
Seasoning is a bonded layer of cooking oil that protects bare iron and can improve food release. It is not a permanent plastic-like nonstick coating, and it will not make a damaged pan safe or hide structural problems.
Use a cooking oil recommended by the cookware maker when that information is available. Pour a small amount into the pan and spread it over the interior, exterior, rim, handle, and underside. Then wipe almost all of it away with a clean lint-free cloth.
This is the step many beginners get wrong. The surface should look lightly conditioned, not wet or glossy with puddles. If you can see oil collecting in the corners, you have probably used too much. A thin layer is more likely to set evenly than a heavy coat.
Place the pan according to the manufacturer’s oven guidance, commonly upside down with a sheet of foil or another suitable catch surface below it to protect against drips. Bare cast iron cookware is often seasoned in an oven around 425–500°F (220–260°C) for about an hour, but this is not a universal setting. Check the maker’s instructions, especially for enameled pieces, lids, detachable handles, silicone parts, or mixed-material construction.
Ventilate the kitchen because heated oil may smoke. Use heat-resistant gloves and allow the pan to cool safely before moving it. Do not handle a hot pan with a wet towel or place hot cast iron on a surface that may be damaged by heat.
One careful cycle may provide basic protection, but several thin cycles usually produce a more even starting finish. Let the pan cool, wipe it with another very small amount of oil if needed, and repeat according to the cookware guidance. More oil is not a shortcut to better seasoning.
Here is how to read the result:
- Sticky or tacky seasoning: The oil layer was probably too thick or did not fully set. Wipe away excess and use the manufacturer’s process for another heating cycle.
- Smoky seasoning: Oil may have reached its smoke point. Improve ventilation and confirm that the oil amount and oven setting are appropriate rather than adding more oil.
- Patchy or uneven color: This is common after restoration and may improve with additional thin cycles and regular cooking.
- Orange residue or renewed rust: Moisture or active rust may remain. Clean the affected area again, dry it completely, and re-season.
Do not judge the pan solely by color. A dark, glossy finish is not automatically better than a lighter, uneven one. Stability, cleanliness, and the absence of loose rust matter more than appearance.
5. Test the Restored Pan and Maintain It
For the first cooking test, choose a forgiving food with some oil, such as sautéed vegetables, potatoes, or another moderately oily dish. These foods let you assess whether the surface is stable without making a delicate recipe the first challenge.
Avoid starting with a thin omelet, sticky dessert, or highly acidic recipe. A newly restored surface may not yet release food reliably, and extended contact with acidic ingredients can be less forgiving while the seasoning is still developing. If food sticks, do not immediately assume the restoration failed; temperature, oil, moisture, and developing seasoning all matter.
After cooking, remove food residue while the pan is still manageable to handle. Rinse with warm water and use a brush or non-damaging scrubber. A small amount of dish soap can be used when needed. Dry the pan immediately with a towel, then use gentle heat briefly if moisture may remain.
When appropriate for the pan, wipe on an extremely thin protective oil layer before storage. Again, wipe until the surface looks nearly dry. Heavy oil can become sticky and create an unpleasant coating.
Store the pan where air can circulate. If it has a lid, avoid trapping moisture underneath; storing the lid separately or leaving it slightly ajar may help. Do not stack damp cookware together. If rust returns quickly, repeat the rust-removal and seasoning process rather than repeatedly cooking over active corrosion.
Reassess the pan if the surface begins shedding material, a crack becomes visible, the handle loosens, or the pan becomes unstable. Restoration is not a one-time guarantee, and seasoning does not permanently prevent rust.
Frequently Asked Questions
Is rusty cast iron safe to cook with?
Loose surface rust should be removed before cooking. Wash the pan, rinse away residue, dry it completely, and re-season it first. Do not use cookware with cracks, severe corrosion, flaking material, unstable handles, or an unknown coating unless the manufacturer or a qualified safety professional confirms that it is suitable for food use.
What is the easiest way to remove rust from a cast iron skillet?
For light rust, scrub with a nylon brush, steel wool, or a rust eraser. For heavier rust, a closely monitored vinegar-and-water soak may reduce scrubbing, but it requires attention and thorough rinsing. Whichever method you use, dry the pan immediately and season it afterward.
How many cast iron seasoning steps does a restored pan need?
There is no universal number. One thin, properly heated layer can protect the pan, while several thin cycles can create a more even finish. The quality of each layer matters more than applying one heavy coat or chasing a particular color.
Can I restore a vintage cast iron pan with deep pitting?
Shallow pitting may be acceptable if the surface is stable and easy to clean. Deep pits, sharp edges, crumbling metal, holes, or structural cracks are different. Do not assume age makes damaged cookware safe or valuable; stop and seek qualified guidance when the condition is uncertain.
Does a missing lid change the restoration decision?
Usually not for a skillet that is otherwise sound. You can use it without a lid, but a replacement should fit the diameter and rim properly. Check that any replacement lid is compatible with the pan and with the heat source you plan to use.
A rusty pan is often worth saving, but only after an honest inspection. If the iron is sound, simple tools and patience can take you a long way. Remove the rust gradually, dry every hidden area, apply seasoning in thin layers, and let the first few meals build confidence rather than testing the pan with your most delicate recipe.