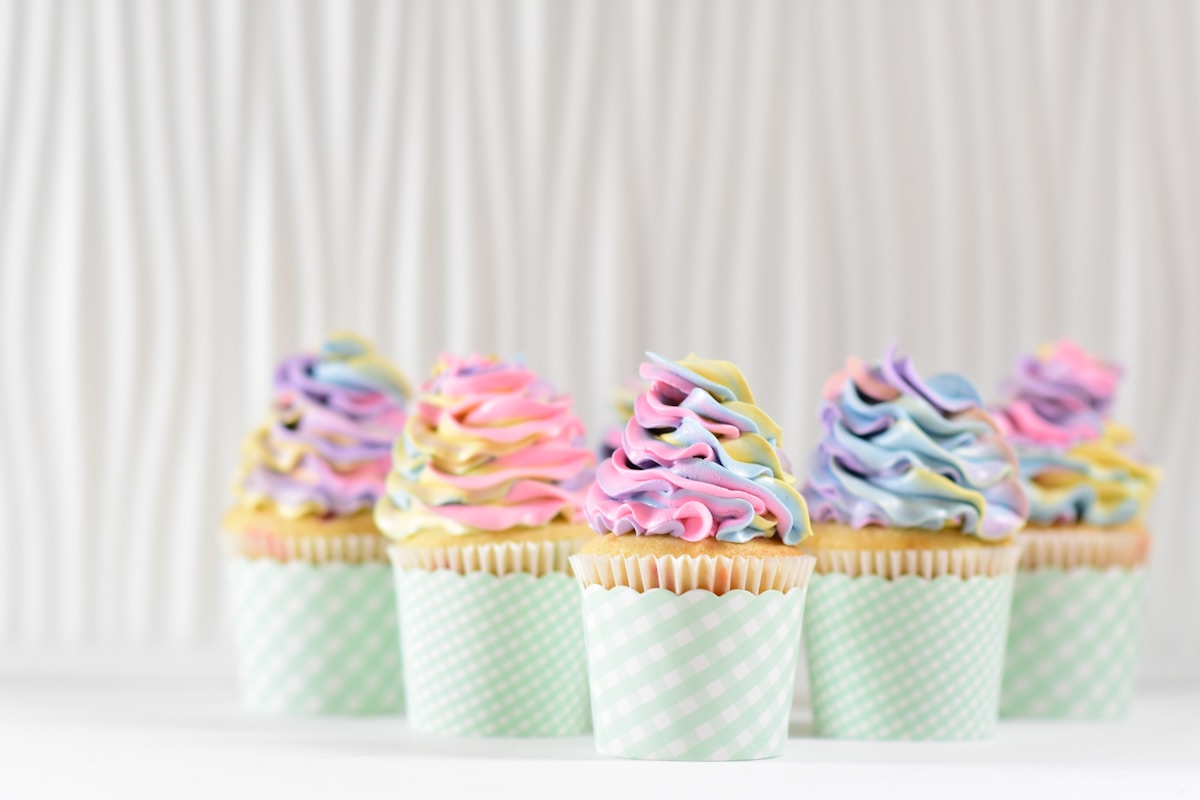
You pipe the first cupcake, step back, and realize the frosting is taller than the cake itself. That can be a deliberate bakery-style look—or a sign that your tip, pressure, and number of rings are adding more volume than you planned.
The quick answer: a large or jumbo cupcake piping tip size is most likely to create a giant swirl on a standard cupcake. But tip size is only one part of the result. Thick frosting, firm pressure, a long piping time, and extra rings can turn almost any swirl into a frosting tower.
Key Takeaways
- A large star piping tip can make a standard cupcake look bakery-style; a jumbo opening makes an even more dramatic swirl.
- Tip shape controls the pattern, while opening size, pressure, and piping time control most of the frosting volume.
- Match the tip to the cupcake: small-to-medium for minis, medium-to-large for standard cupcakes, and large-to-jumbo for oversized cupcakes.
- Pipe one test cupcake before decorating the full batch to check the swirl’s width, height, and frosting use.
The short answer: a large opening creates the bakery-style look
A piping tip has two separate jobs. Its shape creates the frosting pattern, while the size of its opening affects how quickly frosting comes out and how broad the finished swirl can become.
A large star tip can make a standard cupcake look dramatically frosted in one or two passes. A jumbo opening takes that effect further by depositing a thick rope of frosting quickly. That can look balanced on a large bakery-style cupcake, but it can overwhelm a smaller homemade cupcake just as fast.
Think of a giant swirl as one that is noticeably wider than the cupcake top, much taller than a low single-ring finish, or both. It is not automatically a mistake. The issue is usually that the decoration does not match the size of the cake or the amount of frosting you intended to use.
Do not rely on a tip number alone when shopping. Piping-tip numbers are not a universal size standard across every maker. Compare the tip family—star, round, petal, or specialty shape—and look for the opening diameter or a clear product photo when available.
For a standard cupcake, a medium opening usually gives a balanced swirl, a large opening creates a prominent bakery-style finish, and a jumbo opening produces an intentionally dramatic effect. If you want less frosting, reduce the opening size, the number of rings, or both.
Choose a cupcake piping tip size for the finish you want
Start with the cupcake, not the tip. A tip that looks ordinary on an oversized cupcake can look enormous on a mini. Aim to match the frosting footprint to the exposed cake top before deciding how tall the swirl should be.
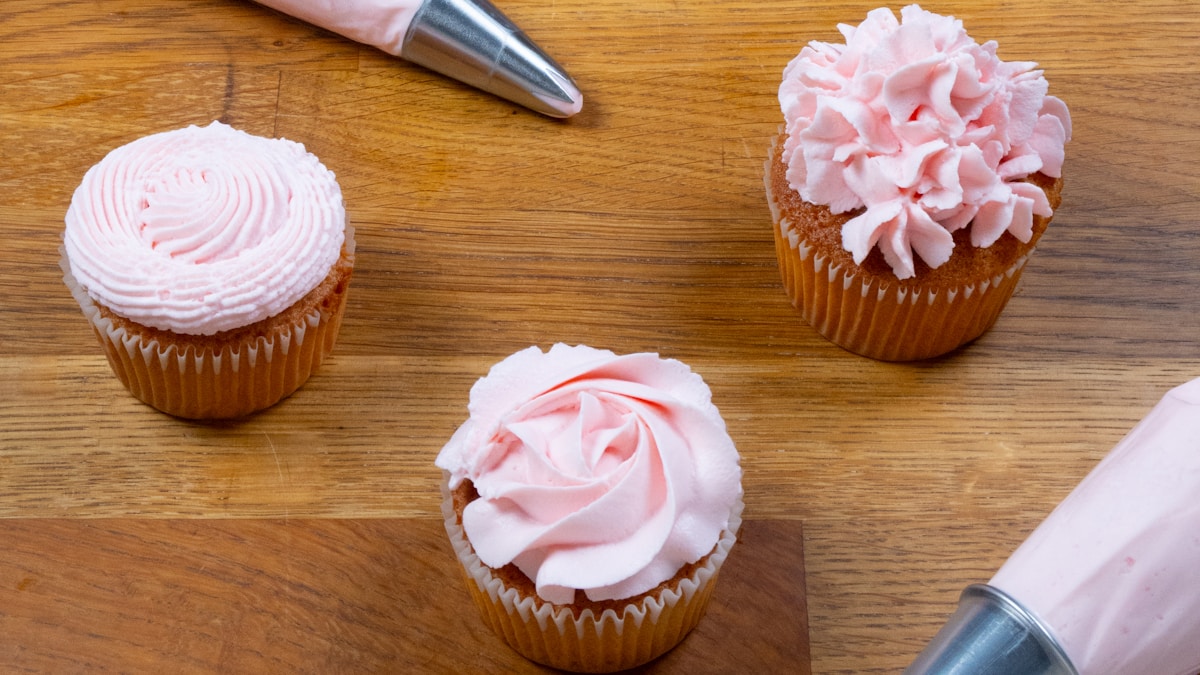
For mini cupcakes, use a small-to-medium opening. A short ridged coil, compact rosette, or simple dollop usually looks proportional. A very large tip can cover most of a mini cupcake in one squeeze, leaving little cake visible.
For standard cupcakes, a medium opening is a flexible everyday choice. It can create a neat one- or two-ring swirl without emptying the bag too quickly. A large star piping tip gives a more noticeable bakery-style finish, especially when you add a second ring on top of the first.
For oversized cupcakes, large and jumbo openings often look more proportional. A small tip can still work, but it may require several narrow passes to cover the surface. That creates a busier texture and takes more time.
Use these visual targets when choosing your finish:
- Modest finish: Stays close to the width of the cake top and remains fairly low. One controlled ring or a small rosette is often enough.
- Medium finish: Reaches near the edge of the cupcake top and includes a defined second level or central peak.
- Dramatic finish: Uses broad frosting ropes, multiple rings, noticeable height, or a width that intentionally reaches beyond the visible cake top.
Tip shape changes the surface look, not just the frosting amount. Common tip families create these effects:
- Open-star tips: Produce more separated grooves and a softer, more relaxed spiral.
- Closed-star tips: Create tighter ridges and a more defined, floral-looking swirl.
- Round tips: Make smooth coils, dollops, and dots instead of ridged swirls.
- Large specialty tips: Can produce broad ribbons, bold rosettes, or dramatic peaks depending on the opening shape.
Choosing between an open-star and closed-star tip is mostly a texture decision. A closed-star tip does not automatically make a smaller swirl, and an open-star tip does not automatically use less frosting. Opening size, pressure, and piping time still control the volume.
Set up the piping bag so the tip performs as expected
A simple frosting bag tip guide starts with a secure setup. Your bag should not shift, clog, or leave excess plastic blocking the opening.
Gather piping bags, selected tips, scissors, a spatula or bowl scraper, and a glass or tall container to hold the bag open while filling. Keep a sheet of parchment nearby for practice. Disposable bags simplify cleanup, while reusable bags reduce waste but need thorough washing and drying.
A coupler is useful when you want to switch among compatible standard-size tips using the same frosting color. It lets you remove one tip and attach another without emptying the bag. That is helpful when you want to compare a round tip and a star tip or change the surface pattern during a project.
Large and jumbo tips are often fitted directly into the piping bag instead. Their size may not work with a standard coupler system, and direct fitting uses fewer pieces. Check the tip and bag together before filling because compatibility depends on both their size and style.
To set up a direct-fit bag:
- Place the tip inside the empty bag with the opening pointing down.
- Push it gently toward the bag’s pointed end.
- Trim only enough plastic for the tip opening to show.
- Check that the tip stays snug before filling the bag.
If you cut the bag too large, the tip can wobble or slip through while you pipe. Fill the bag only partway, then twist the top above the frosting to keep pressure moving downward. An overfilled bag is harder to hold and more likely to force frosting out the top.
Use your dominant hand to squeeze and your other hand to guide the tip near the cupcake. Keep the tip nearly upright for a classic swirl. Holding the bag at a strong angle can push frosting sideways and make the design spread.
Before decorating a full batch, pipe three practice swirls on parchment. Use the same starting point, steady pressure, and the same number of rings each time. Compare their width and height, then adjust before frosting the cupcakes.
Control frosting volume: tip size is only one part of a giant swirl
A large cupcake piping tip size matters, but four variables determine the final mound: opening size, frosting consistency, pressure, and the number and height of passes.
A larger opening deposits frosting faster. Frosting that is very soft may spread instead of stacking, while frosting that is too firm can require excessive pressure and pipe unevenly. The best consistency depends on the frosting recipe, how it was mixed, and your kitchen conditions, so judge it by how it pipes and holds its shape.
For a reliable standard swirl, begin near the outer edge of the cupcake top or slightly inside it. Apply steady pressure and pipe one controlled ring. Continue in a spiral inward and upward, then stop squeezing before lifting the tip away. Releasing pressure first helps prevent a trailing frosting tail.
Starting position changes the shape more than many beginners expect. Start too close to the edge and frosting may spill toward the liner. Start too far inward and the base becomes narrow, encouraging a tall tower rather than a broad, grounded swirl.
For a shorter swirl, build a broad first ring and add little or no second ring. For a narrow, tall effect, start farther inward and stack upward—but use that approach intentionally because it can look top-heavy on a standard cupcake.
How much frosting per cupcake should you prepare? There is no single reliable amount for every recipe. The answer depends on cupcake diameter, tip opening, frosting type, design height, and whether you are piping one low ring or a multi-level jumbo cupcake swirl.
Instead, make one complete test cupcake using the exact tip and design you plan to repeat. Notice how much frosting you use from the bag or bowl, then use that test as your batch-planning reference. It is wise to make a little extra frosting when possible, since a nearly empty bag is harder to control consistently.
Do not judge frosting supply by cupcake count alone. Twelve cupcakes with low rosettes can use far less frosting than twelve cupcakes with large, two-ring swirls. A large opening also empties a bag more quickly, so refill before the last small amount makes your final cupcakes look uneven.
Fix a cupcake swirl that looks too tall, too wide, or poorly defined
The most common giant-swirl problem is using a large tip and adding the same number of rings you would use with a smaller one. Change one variable at a time so you can see which adjustment improves the result.
If the swirl is too tall: Use fewer rings and stop pressure sooner. Make the bottom ring slightly broader instead of stacking frosting upward. You can also switch to a smaller opening or reduce pressure, but reducing the number of passes is often the quickest fix.
If the swirl is too wide: Start slightly farther from the cupcake edge. Use lighter pressure and keep the tip moving instead of holding it in one place. A smaller opening gives more control on small cupcakes or with frosting that flows quickly.
If the cupcake looks buried under frosting: Choose a modest or medium finish for the remaining batch. Set a finished cupcake beside an unfrosted one and compare the frosting width with the cake top. That quick check helps you spot an out-of-proportion design before repeating it.
If ridges disappear: First, confirm that you are using the tip shape you intended. Then check the frosting. If it seems too soft to hold ridges, adjust it according to the needs of your specific recipe before continuing. Excessive pressure can also flatten ridges, especially if the tip is pressed hard into the frosting already on the cupcake.
If frosting breaks, sputters, or pipes unevenly: Air pockets may be trapped in the bag. Press frosting down toward the tip before piping, keep the top tightly twisted, and refill before the bag becomes awkward to control. Also check that the bag opening is not blocking part of the tip.
If a finished swirl is too large: Remove it gently when practical and pipe a smaller design. Treat this as a presentation fix; handling leftover frosting depends on the recipe and how it has been stored.
FAQ: cupcake piping tip sizes explained
What piping tip makes a jumbo cupcake swirl?
A jumbo swirl usually comes from a large or jumbo opening, often in a star shape for visible ridges. On a standard cupcake, even a large star tip can already look oversized. Choose a jumbo opening for a large cupcake or when you want a dramatic frosting-to-cake ratio.
Is an open-star or closed-star tip better for cupcake swirls?
Neither is universally better. Open-star tips create a looser, more separated ridged spiral, while closed-star tips make tighter, more defined ridges. Choose the texture you prefer, then control the size with the opening diameter, pressure, and number of rings.
How much frosting should I plan per cupcake?
Plan from a test swirl instead of relying on one fixed amount. Pipe one cupcake using your actual tip, frosting, and target height, then use that result to estimate the rest of the batch. A low rosette and a tall jumbo swirl can use very different amounts, even on the same size cupcake.
The best cupcake piping tip size is the one that gives you the finish you planned without hiding the cake or using frosting faster than expected. Practice one swirl, adjust its width or height, and repeat that controlled design across the batch.