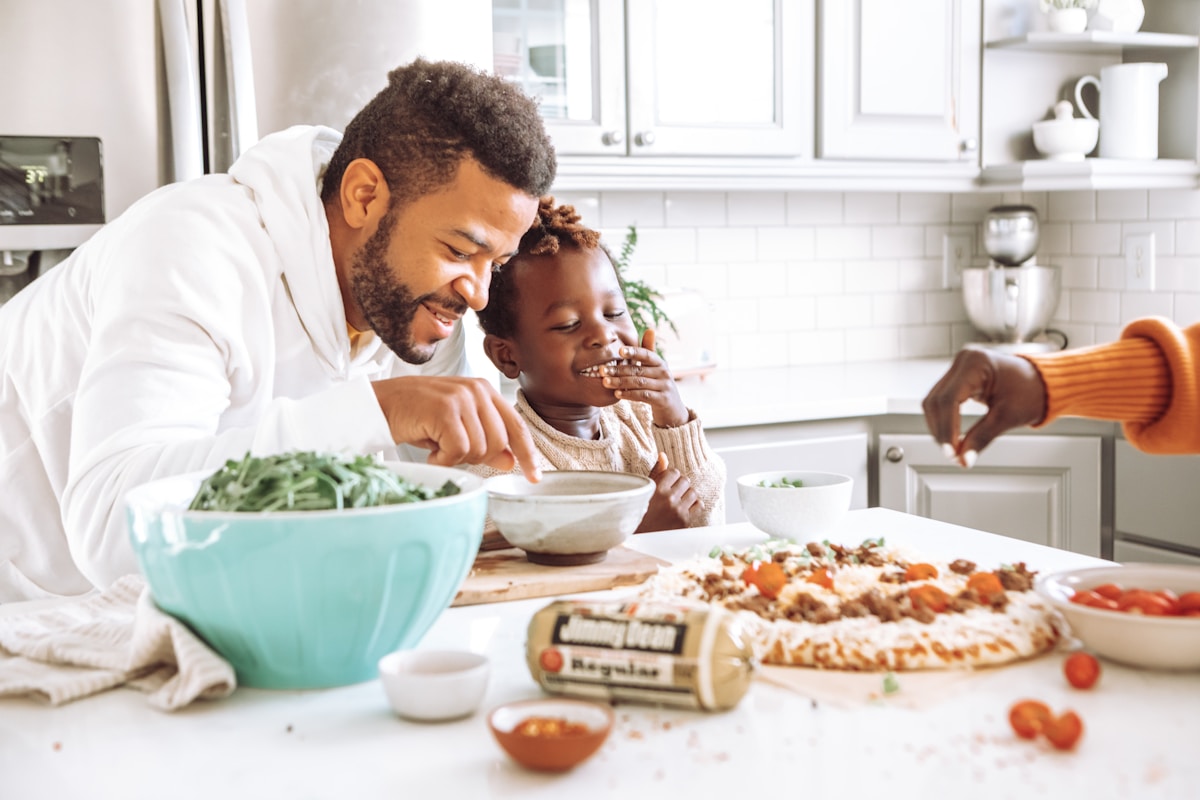
I’ll never forget the year my nephew, Leo, who was barely five, decided to make his mom breakfast in bed for Mother’s Day. His dad, my brother, called me in a whispered panic from the pantry. “He wants to make pancakes,” he hissed, “But I can’t manage him, the batter, and a hot griddle without waking the whole house and possibly setting off a smoke alarm.” We’ve all been there, haven’t we? That beautiful, pure desire from a little one to do something grand for Mom, which often involves things that are a bit too hot, a bit too sharp, or a bit too complicated for their tiny, enthusiastic hands.
The secret, my dears, isn’t to scale back their love, but to channel it. The most memorable Mother’s Day breakfast isn’t the one that looks like it came from a fancy café. It’s the one that comes from the heart, assembled with concentration by a little chef who is bursting with pride. It’s about making memories, not a five-star meal. So, let’s put away the frying pans and get out the mixing bowls. Here are a few of my favorite, truly kid-friendly breakfast ideas that are all about the fun and the love.
The Golden Rules of Cooking with Little Chefs
Before we even touch a berry, let’s set ourselves up for success. Remember, our goal is a happy kid, a happy mom, and a reasonably tidy kitchen. A little prep goes a long way.
- Safety Is Everything: This is our number one rule. For these recipes, we’re avoiding hot stovetops, ovens, and sharp knives. The adult’s job is to handle any prep that requires these tools before the little one even steps into the kitchen.
- Mise en Place is Your Best Friend: That’s just a fancy French term for “get everything ready beforehand.” The night before, wash and chop any fruit. Portion out the yogurt, granola, and other ingredients into small, manageable bowls. When your little chef arrives for duty, everything they need is ready for them to assemble. (This is the single best tip for keeping chaos at bay!)
- Embrace the Mess: Let me say it again for the people in the back: there will be mess. A little yogurt on the counter, a few dropped blueberries, a dusting of sprinkles on the floor—it’s the price of admission for making memories. Keep a damp cloth handy, put a mat down if you’re worried about the floor, and just breathe. The joy on their face is worth a little cleanup.
- Process Over Perfection: Your five-year-old’s parfait layers might not be perfectly even. Their toast might have more cream cheese on one side. It does not matter. Praise their effort, their focus, and their creativity. “Wow, look how carefully you’re spooning that yogurt!” is infinitely better than “Try to make the line straighter.”
The “Stained-Glass” Sunshine Parfait
This is a classic for a reason. It’s beautiful, delicious, and the main task is layering—something almost any child can master. It’s a feast for the eyes before it’s a feast for the tummy.
What You’ll Need:
- A clear glass, cup, or small mason jar. Seeing the layers is the whole point!
- 1 cup of thick Greek yogurt (I find brands like Fage or Chobani work well because they’re less runny). You can use plain or vanilla.
- 1/2 cup of your favorite granola. For kids, something simple and low in sugar like Bear Naked Fit Triple Berry is a great choice.
- 1 cup of mixed berries. A combination of blueberries, raspberries, and sliced strawberries creates a beautiful color palette.
The Grown-Up’s Job (The Night Before):
- Wash all the fruit thoroughly.
- Gently pat the berries dry to prevent them from making the yogurt watery.
- Slice the strawberries into rounds or quarters.
- Portion the yogurt, granola, and each type of berry into separate small bowls. Cover and refrigerate.
The Little Chef’s Job (The Big Morning):
- Set up an assembly station with the clear glass in the middle and the little bowls of ingredients surrounding it.
- Give your child a spoon and let them take the lead. Their first task: a big spoonful of yogurt at the bottom of the glass.
- Next, let them sprinkle in a layer of granola. Talk about the “crunchy” layer.
- Then comes the fruit! They can carefully place the blueberries or arrange the strawberry slices against the side of the glass. This is why I call it a “stained-glass” parfait—the fruit pressed against the glass looks like jewels.
- Repeat the layers: yogurt, granola, fruit. Finish with a special arrangement of berries on the very top. Let them be the artist. It’s their masterpiece, after all.
Fancy Toast from a Fancy Heart
Who needs pancakes when you can have toast that’s been made with this much love? This recipe lets kids get involved in spreading and decorating, which are always winning activities.
What You’ll Need:
- 2 slices of sturdy bread. Brioche, challah, or even a thick-cut whole wheat works beautifully.
- 4 ounces of cream cheese, softened to room temperature. (This is key!)
- Heart-shaped cookie cutter (or any fun shape you have).
- Toppings: Thinly sliced strawberries, blueberries, raspberries, maybe some fun, colorful sprinkles.
The Grown-Up’s Job:
- Use the cookie cutter to press out a shape from the center of each slice of bread. (Save the crusts! You can toast them with cinnamon sugar for a snack later.)
- You can serve the bread soft, or you can lightly toast it in a toaster or under the broiler for just a minute. This is the only “low-heat” part, and it’s totally optional. If you do toast it, let it cool completely before handing it over.
Beatrice’s Kitchen Hack: To make the cream cheese extra easy for little hands to spread, put the softened cream cheese in a small bowl and add just a tiny splash of milk or cream (about a teaspoon). Whip it with a fork until it’s light, fluffy, and super spreadable.
The Little Chef’s Job:
- Hand them the cooled toast shape and a small, dull knife (a children’s butter knife or a small offset spatula is perfect).
- Let them scoop and spread the fluffy cream cheese all over their toast heart. Don’t worry if it goes over the edges!
- Now for the decorating! Set out the small bowls of berries and sprinkles. They can make a smiley face, a flower pattern, or just a joyful explosion of color. This is their canvas.
A Rainbow Fruit Salad Masterpiece
A fruit salad is a wonderful way to teach kids about colors, textures, and flavors. It’s simple, healthy, and incredibly satisfying for a child to say, “I made the salad!”
What You’ll Need:
- A mix of colorful, soft fruits. Think blueberries, raspberries, seedless grapes, peeled mandarin orange segments, and sliced bananas.
- A few fresh mint leaves.
- A big bowl and a silicone spatula or large spoon for mixing.
The Grown-Up’s Job:
- Wash everything thoroughly.
- This is a critical safety step: Cut the grapes. Grapes are a choking hazard and should always be quartered lengthwise for young children.
- Peel and slice the banana and separate the mandarin segments.
- Place all the prepped fruit into a large mixing bowl.
The Little Chef’s Job:
- Their first task can be washing the blueberries and raspberries in a colander. Kids love playing with water, and this is a productive way to do it.
- Show them how to tear the mint leaves with their fingers and sprinkle them into the bowl. Encourage them to smell the mint—it’s a wonderful sensory experience.
- Hand them the spatula and let them gently stir everything together. Teach them to “fold” the fruit from the bottom to the top so the soft berries don’t get squished.
- Let them have the final, most important job: giving their creation a name. “Leo’s Super-Duper Berry Surprise” sounds much more exciting than “fruit salad,” doesn’t it?
The Grand Finale Assembling the Breakfast Tray
The food is made, the chef is proud, and now it’s time for the presentation. This final step makes the whole experience feel extra special.
Find a small tray. Let your child help arrange the plate of toast, the glass of parfait, and a small bowl of their fruit salad. Add a little glass of Mom’s favorite juice or milk. The finishing touch? A single flower from the garden in a tiny cup or a special card they colored themselves.
The grown-up is in charge of carrying the tray (we don’t want any last-minute tumbles!), but the little chef should lead the way. Let them be the one to pull open the bedroom door and shout, “Happy Mother’s Day!”
The look on Mom’s face when she sees that tray, and the beaming pride on your child’s face, is the real magic. It’s a memory made of love, a few sticky fingers, and the wonderful, simple joy of making something for someone you love. And that, my friends, is what kitchen fun is all about. Happy cooking!