There’s a special kind of quiet in the house on Mother’s Day morning, isn’t there? It’s the sound of little feet tiptoeing past Mom’s bedroom door, the muffled clatter of a dropped spoon, followed by a frantic, whispered “Shhhh!” It’s the smell of hope, excitement, and maybe, just maybe, a little bit of burnt toast.
And you know what? It’s perfect. Every single chaotic, sticky, beautiful moment of it.
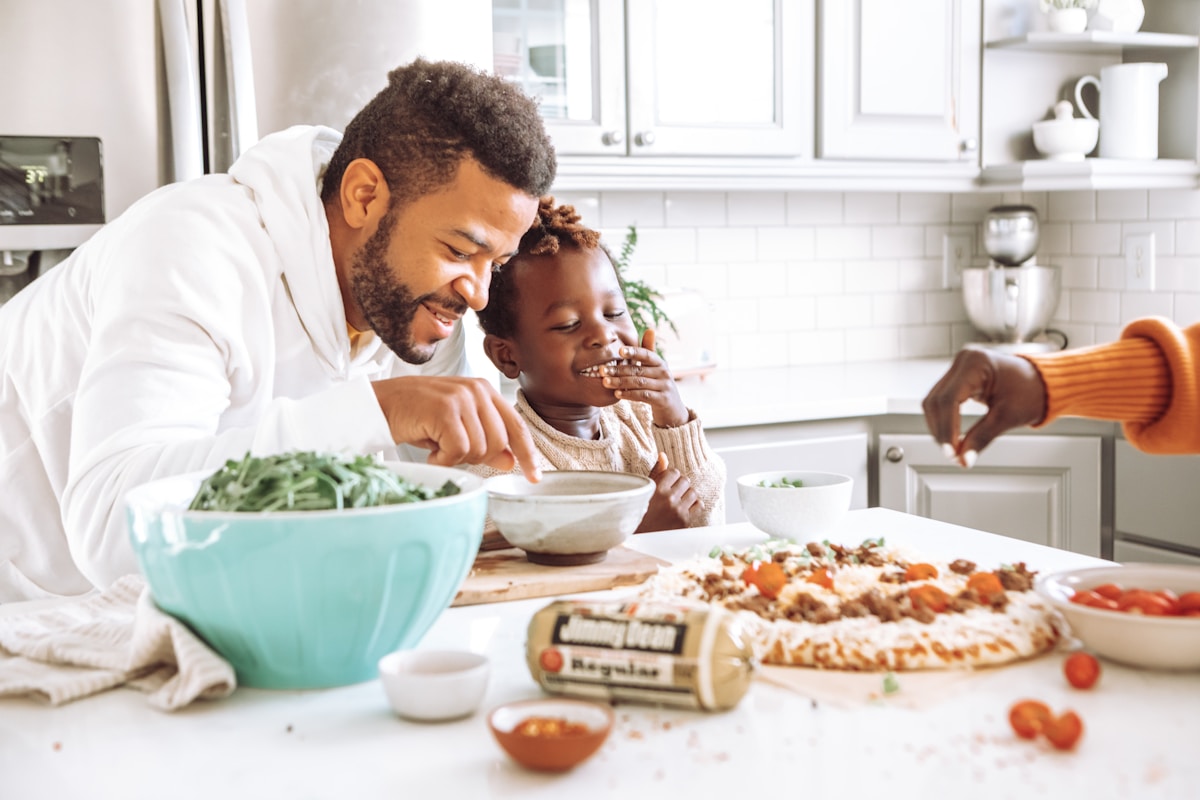
For the partner supervising this secret mission, the goal is to create a moment of pure joy for Mom without, well, creating a giant cleanup job for her later. The secret isn’t in making a five-star meal. It’s in letting the love and effort of your little ones shine through. The kitchen is where families grow together, and this is one of the most beautiful growing moments of the year.
So let’s tie on our aprons, take a deep breath, and plan a Mother’s Day breakfast that is less about culinary perfection and all about heartfelt participation. (Trust me, the lopsided pancakes taste the best.)
The Right Job for Every Little Chef
The key to a successful and joyful kid-led kitchen adventure is giving everyone a job they can genuinely do. It builds their confidence and keeps them safely and happily engaged. Think of your kitchen crew in terms of their skill level, not just their age.
The Tiniest Helpers (Ages 2-4)
At this stage, it’s all about sensory exploration and simple, satisfying tasks. Their little hands are perfect for jobs that don’t involve heat or sharp tools.
- Chief Berry Washer: Set them up at the sink (on a sturdy stool) with a colander of berries. Let them rinse the fruit under a gentle stream of cool water. It’s a fun splashy game with a delicious purpose.
- Official Herb Tearer: If you’re garnishing with mint or basil, let them tear the leaves off the stems. It smells wonderful and is fantastic for their fine motor skills.
- Banana Masher Extraordinaire: Give them a very ripe banana and a fork in a wide bowl. They will gleefully mash it into a pulp, perfect for adding to pancake batter or oatmeal.
- The Stirrer (with a big bowl): They can stir cold ingredients, like yogurt or a few dry ingredients. The trick is to give them a bowl that’s much bigger than they need to contain their enthusiastic stirring.
The Eager Apprentices (Ages 4-6)
These little ones have more dexterity and can follow simple, two-step instructions. They are ready for a little more responsibility, with you right by their side.
- The Cracker Jack: Cracking eggs is a kitchen rite of passage! My secret hack? Have them crack the egg into a separate, small bowl first. That way, if any shell gets in, you can easily fish it out before it goes into the main mixture.
- The Pourer & Dumper: Pre-measure ingredients like flour, sugar, or milk into small cups, and let them be the one to dump it into the main bowl. It gives them a huge sense of ownership over the recipe.
- The Spreader: Arm them with a butter knife and let them spread jam on toast or butter on a warm scone. It might not be even, but it will be spread with love.
- The Whisk Wielder: Hand them a whisk and let them go to town on eggs or a simple batter. It’s a fantastic way for them to get their energy out and see ingredients transform.
The Kitchen Pros (Ages 7+)
Older kids are ready for the real deal. They can read recipes, measure ingredients themselves, and even work near the stove with close supervision.
- Head Measurer: Let them be in charge of the measuring cups and spoons. This is a sneaky and effective way to practice fractions!
- The Griddle Assistant: While you control the heat, they can be in charge of scooping the batter onto a hot griddle. Teach them to look for the bubbles to form on the pancake’s surface—the universal sign that it’s ready to flip.
- The Toaster Operator: This might be their first solo appliance mission! Show them how to safely use the toaster and, more importantly, how to get the toast out without sticking anything metal inside.
- The Plating Artist: Give them the plates and the finished food, and let them arrange the breakfast. A few berries here, a dusting of powdered sugar there—they can turn a simple meal into a work of art.
Three Foolproof Breakfast-in-Bed Menus
Here are three menu ideas, ranging from no-heat-required to a little more involved, each with clear jobs for your kitchen crew.
Menu 1: The Sunshine Parfait Bar (No-Heat Wonder)
This is the safest, easiest, and arguably one of the prettiest options. It’s all about assembly, which makes it perfect for the tiniest helpers.
- What You’ll Need: A big tub of vanilla or plain Greek yogurt, a bowl of your favorite granola, a bowl of washed and prepped berries (sliced strawberries, blueberries, raspberries), and some pretty glasses or bowls.
- The Setup: Place all the components in separate bowls on the counter to create a “parfait bar.”
- Kid’s Job: This is the best part! Each child gets to build their own parfait for Mom. A scoop of yogurt, a sprinkle of granola, a handful of berries. Repeat the layers until the glass is full. They can’t get it wrong, and they feel like total artists. It’s colorful, healthy, and absolutely delicious.
Menu 2: The Famous Fluffy Sprinkle Pancakes (Low-Heat Magic)
Who doesn’t love pancakes, especially when they’re filled with a rainbow of sprinkles? Using a mix takes the pressure off and lets you focus on the fun.
- What You’ll Need: A quality pancake mix (I love the King Arthur Flour Buttermilk mix for its foolproof results), milk, an egg, a little vegetable oil or melted butter, and of course, rainbow sprinkles.
- The Perfect Batter Secret: For the fluffiest pancakes, don’t over-mix! Whisk your wet ingredients together in a large bowl. Add the dry mix and stir with a spatula until it’s just combined. A few lumps are your friends! Let the batter rest for 5 minutes. This allows the gluten to relax and results in a much more tender pancake. (Your future self will thank you.)
- Kid’s Job: Younger kids can dump the pre-measured mix and add the sprinkles at the very end. Older kids can measure the ingredients and do the whisking. When it’s time to cook, preheat your griddle to about 350°F (175°C). The supervising adult should handle pouring the batter, but let the kids watch for those tell-tale bubbles before you do the big flip!
Menu 3: Cheesy Scrambled Eggs & Fancy Toast (The Full Spread)
This is a classic for a reason. With a simple technique, you can make incredibly creamy, restaurant-worthy scrambled eggs.
- What You’ll Need: 2 large eggs per person, a splash of whole milk or heavy cream (about 1 tablespoon per 2 eggs), a pat of butter, a pinch of salt, and a handful of shredded mild cheddar or Colby cheese. Plus, your favorite bread for toast.
- The Low-and-Slow Egg Technique: The secret to creamy eggs is low heat. Melt the butter in a non-stick skillet over a surprisingly low flame. While it melts, have your little helper whisk the eggs, milk, and salt until they’re just blended. Pour the eggs into the pan and… wait. Let them sit for 30 seconds until the edges just begin to set. Then, using a rubber spatula, gently push the eggs from the edges toward the center. Wait another 20-30 seconds, and repeat. When the eggs are about 80% cooked (still looking a bit wet), toss in the cheese, give one final gentle stir, and take the pan off the heat. The pan’s residual heat will melt the cheese and finish cooking the eggs to perfection.
- Kid’s Job: Cracking and whisking the eggs is the prime job here. They can also be in charge of the toast station. Let them butter the toast and use a cookie cutter to press out a heart or star shape from the center. It’s a simple touch that feels incredibly special.
Beatrice’s Secrets for a Stress-Free Morning
A little planning goes a long way in keeping the morning fun instead of frantic.
-
Prep the Night Before. Seriously. Measure out the dry ingredients for pancakes and put them in a covered bowl. Wash and chop the fruit. Set out every single bowl, spoon, and spatula you’ll need. When you wake up, it’s just a matter of assembling and cooking. This is the single best thing you can do.
-
Embrace the Mess (Strategically). Before you even start, put a cheap plastic tablecloth on the floor under your work area. It will catch 90% of the drips and spills and can be bundled up and tossed out afterward. Aprons for everyone are a non-negotiable!
-
Presentation is Everything. Find a tray. Even a simple baking sheet will do. Place the food on it, add a small glass with a flower from the garden, and a little folded napkin. And most importantly, have the kids sign a handmade card and place it right on the tray. This little bit of ceremony elevates the meal from just food to a true gift.
In the end, what you’re making isn’t just breakfast. You’re making a memory. Mom won’t remember if the toast was perfectly golden or if the eggs were a tiny bit runny. She will remember the proud, beaming faces of her children carrying in a tray made just for her. She will remember that sweet, sticky hand in yours as you stirred the batter together.
That, my dears, is the magic of the family kitchen.