Let’s be honest. You see those gorgeous, heavy-duty stand mixers on cooking shows—the gleaming KitchenAids and powerful Ankarsrums—and a little voice whispers, “I could never make bread or pizza without one of those.” It feels like a secret club, and that mixer is your membership card. For years, I believed that, too. I thought incredible dough with that perfect chewy, airy texture was something that required expensive machinery.
Well, I’m here to tell you that’s one of the biggest myths in the kitchen. The most amazing, satisfying, and delicious pizza dough you’ll ever make requires only three things: a bowl, a few simple ingredients, and your own two hands. You don’t need a motor; you just need to understand a little bit of magic.
The Real Secret is Gluten Not a Machine
First, let’s talk about what a stand mixer is actually doing. When a dough hook spins around in that bowl, its only job is to develop gluten. Gluten is a network of proteins in flour that activates when it gets wet. Kneading—whether by machine or by hand—stretches and aligns those proteins into an elastic web. Think of it like a net made of microscopic bungee cords. This web is what traps the gasses released by yeast, creating those beautiful air pockets that make a crust light and airy. It’s also what gives pizza its signature satisfying chew.
A mixer does this with brute force. It just spins and pushes the dough around until that network forms. But here’s a little secret most beginners don’t know: it’s incredibly easy to over-knead dough with a mixer. An over-kneaded dough feels tough and dense because that gluten network gets too tight.
When you use your hands, you learn to feel the dough. You become part of the process. And by using a technique called the “stretch and fold,” you can develop even better gluten than a machine, all with minimal effort and zero risk of overdoing it. (Your future self will thank you.)
Meet Your New Best Friend The Stretch and Fold
The stretch and fold method is a gentle, elegant way to build strength in dough. It’s especially perfect for high-hydration doughs—the kind that are too wet and sticky to knead on a countertop. Instead of fighting with a sticky mess, you let time and simple physics do the work for you.
Imagine you’re trying to organize a pile of tangled yarn. You wouldn’t just mash it all together. You’d gently pull a strand, lay it straight, and repeat. That’s exactly what we’re doing with the gluten strands in our dough.
Here’s how it works, step-by-step:
-
Mix and Rest: Combine your flour, water, yeast, and salt in a large bowl. Mix with a spoon or your hand until it’s just a shaggy, messy blob. Don’t knead it! Just make sure there are no dry pockets of flour. Now, cover the bowl and walk away for 20-30 minutes. This resting period, sometimes called an “autolyse,” lets the flour fully absorb the water. It’s the most important first step, making the dough less sticky and more cooperative.
-
Get Your Hands Wet: This is the game-changing trick. Dip your hands in a small bowl of water before touching the dough. The thin layer of water acts as a barrier, preventing the sticky dough from clinging to your fingers. No need for extra flour!
-
The First Fold: With your wet hand, reach down the side of the bowl, grab the underside of the dough, and gently stretch it upwards until you feel a little resistance. Don’t tear it. Then, fold that stretched piece over the top of the dough ball.
-
Turn and Repeat: Give the bowl a quarter turn (like turning from 12 o’clock to 3 o’clock). Repeat the process: reach under, stretch up, and fold over. Do this two more times, for a total of four folds per set. The whole thing takes about 30 seconds.
That’s it! You’ve just completed one “set” of stretch and folds. You’ll cover the bowl and repeat this process a few more times over the next hour or so. With each set, you will feel the dough transforming. It will go from a slack, lumpy blob into a smooth, elastic, and pillowy ball. It feels like magic, but it’s just science.
A Simple No-Mixer Pizza Recipe to Try
Ready to put this into practice? This recipe creates enough dough for two 12-inch pizzas. It’s a relatively high-hydration dough, which creates a wonderfully open and airy crust.
Ingredients:
- 500g Bread Flour or “00” Pizza Flour (about 4 cups)
- 400g Warm Water, about 95°F / 35°C (about 1 ¾ cups)
- 10g Fine Sea Salt (about 2 teaspoons)
- 3g Instant Dry Yeast (about 1 teaspoon)
Instructions:
-
Combine: In a large bowl, whisk together the flour and yeast. In a separate container, dissolve the salt in the warm water. Pour the saltwater into the flour and mix with your hand until a shaggy dough forms and no dry flour remains.
-
Rest (Autolyse): Cover the bowl with a plate or plastic wrap and let it rest at room temperature for 30 minutes.
-
Perform Stretch & Folds: Over the next 90 minutes, you will perform three sets of stretch and folds.
- After the first 30-minute rest, perform your first set (4 folds). Cover and wait 30 minutes.
- Perform your second set. The dough should already feel stronger. Cover and wait 30 minutes.
- Perform your final set. The dough should be smooth and pull away from the sides of the bowl easily.
-
Bulk Ferment: Cover the dough and let it rise at room temperature for 2-4 hours, or until it has roughly doubled in size and you can see bubbles under the surface. You can also place it in the fridge at this point for a slow, cold ferment for 1 to 3 days, which develops incredible flavor.
From Dough to Dinner The Cast Iron Method
Now that you have this gorgeous, bubbly dough, the best way to cook it without a fancy pizza oven is in a screaming-hot cast iron pan. A standard 12-inch Lodge skillet is perfect for this. The heavy iron retains an incredible amount of heat, crisping the bottom of your crust beautifully.
-
Preheat Everything: Place your cast iron skillet in the oven and preheat it to its absolute highest temperature, usually 500°F or 550°F (260-288°C). Let the pan preheat for at least 45 minutes. (Yes, really! A hot pan is crucial for a crispy crust.)
-
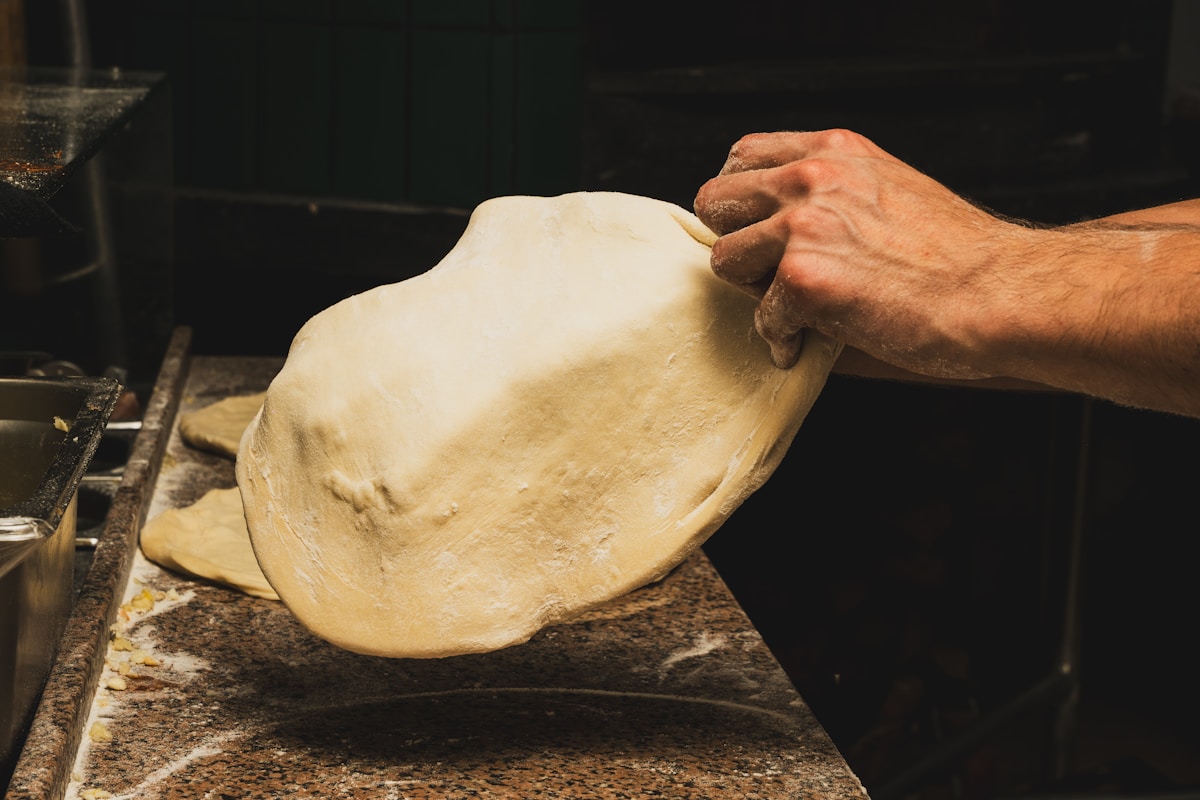
Shape Your Dough: Gently remove half the dough onto a lightly floured surface. Gently press and stretch it into a round about the size of your pan. Try not to press all the air out of the edges—this will become your puffy outer crust, or cornicione.
-
Build Your Pizza: Very carefully, remove the scorching hot pan from the oven and place it on your stovetop. Drizzle a little olive oil in the pan, then carefully lay your dough inside. It will sizzle immediately. Working quickly, spread your sauce, sprinkle your cheese, and add your toppings.
-
Bake: Place the pan back in the hot oven and bake for 10-14 minutes, or until the cheese is melted and bubbly and the crust is a deep golden brown.
Your Mission Tonight
See? No mixer, no problem. You’ve just learned a technique that professional bakers use to create world-class bread and pizza. You’ve learned to trust the feel of the dough and the power of time. The best part is the connection you build with your food—the quiet satisfaction of turning four simple ingredients into something truly special.
So here’s your challenge. Try mixing up that simple dough recipe tonight. You don’t even have to make a full pizza. Just mix it, let it rest, and perform that first set of stretch and folds. The moment you feel the dough transform from a sticky mess into a smooth, elastic ball under your hands, you’ll know. You’ll realize you can absolutely do this. The kitchen is more forgiving than you think, and your hands are the best tools you’ll ever own.