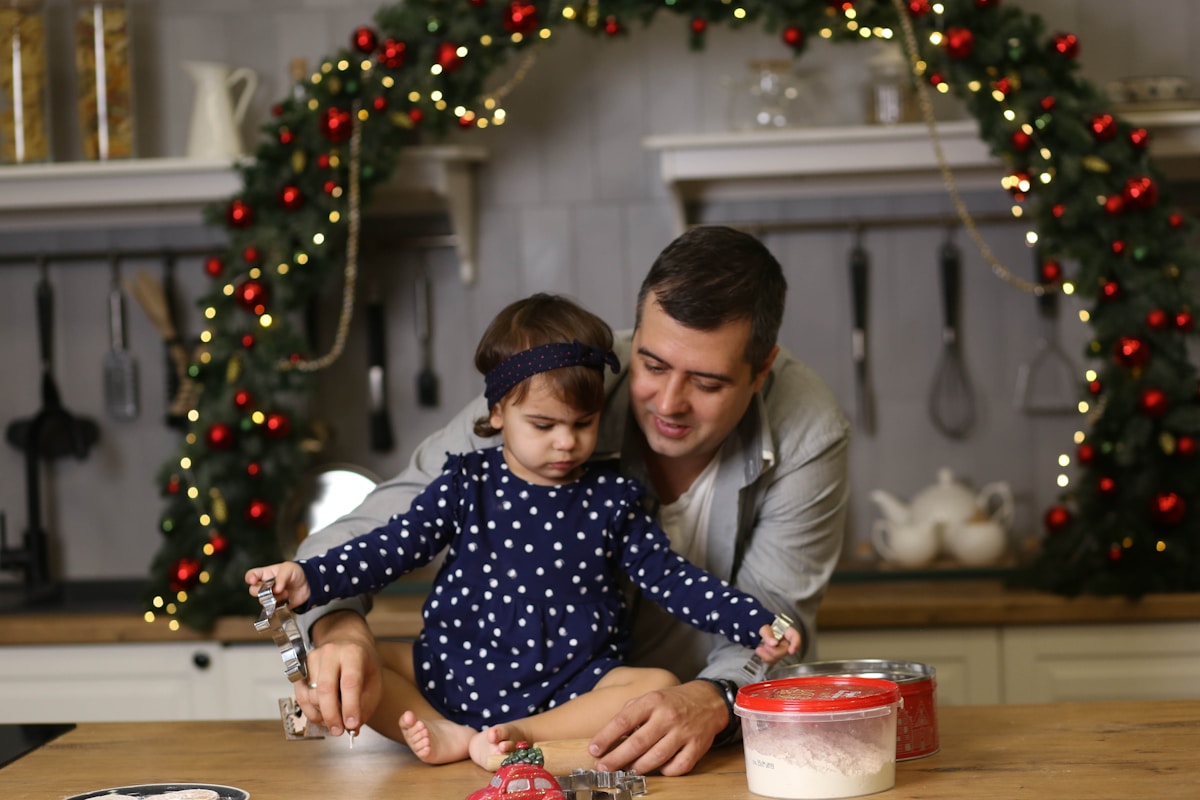
A birthday cake does not need sharp edges, elaborate flowers, or a professional finish to become the cake everyone remembers. One person can measure while another stirs, and the birthday child can add the final sprinkles. That shared work is what makes a family birthday cake special.
The easiest approach is to use a sturdy cake from a tested recipe, divide jobs by skill and safety, and treat baking, cooling, frosting, and decorating as separate checkpoints. With a little planning, baking with kids can feel like an easy birthday cake project rather than a rushed performance.
Key Takeaways
- Choose a sturdy cake and follow a tested recipe for its exact pan size, quantities, and baking instructions.
- Divide tasks by age and ability, while adults handle ovens, hot pans, knives, raw ingredients, and close equipment supervision.
- Cool the cake completely before filling or frosting it, and use a crumb coat to control loose crumbs.
- Keep decorating simple with dots, swirls, sprinkles, spoon-textured frosting, or a food-safe storage bag in place of a piping bag.
- Plan the work across two sessions and follow recipe-specific food-safety guidance for perishable frostings and fillings.
1. Choose a Forgiving Cake for a Family Baking Project
For a first homemade birthday cake, choose a flavor that is sturdy, familiar, and easy to pair with frosting. Vanilla, chocolate, and citrus cakes are practical choices because they generally work with buttercream-style frostings, whipped toppings intended for cakes, or another frosting from a reliable tested recipe.
The most important choice is not the flavor but the structure. Look for a recipe that holds its shape when cooled, spreads without crumbling excessively, and uses a pan size you already have. A single-layer 9-by-13-inch cake is often the least stressful option because it does not need to be split or stacked. If you want a layer cake, use two matching round pans only when the recipe gives instructions for that size and number of pans.
Do not simply double a recipe to make a taller cake. Pan depth, batter volume, and baking time can all change when a recipe is scaled. Use the quantities, pan dimensions, mixing directions, and doneness checks from a tested recipe.
Set out the basic equipment before anyone starts:
- Mixing bowls and measuring cups or a kitchen scale, as specified by the recipe
- Measuring spoons, a whisk, and a sturdy spatula
- The correct cake pan or pans
- Parchment paper and pan grease, if the recipe recommends them
- A cooling rack or another heat-safe surface
- A butter knife or small offset spatula for spreading frosting
- A serving plate, cake board, or clean tray
- A piping bag, food-safe storage bag, or small spoon for decorating
Prepare ingredients exactly as the recipe directs. If it calls for softened butter, bring it to the required texture rather than melting it unless the recipe says to melt it. If eggs or dairy need specific preparation, follow the recipe instead of guessing. Gather every ingredient and check it off before mixing so a busy helper does not forget baking powder, salt, or an additional egg.
2. Divide the Work by Skill Level and Safety
A good parent-child baking plan gives everyone a real job without assigning children responsibility for hot, sharp, or raw-food hazards. Explain that the adult is the kitchen captain, but every helper contributes to the finished cake.
The supervising adult or experienced baker can:
- Read the recipe from beginning to end
- Check that the pan, ingredients, and equipment are ready
- Supervise mixer use and handle the oven
- Pour batter into the pan if it is heavy or difficult to control
- Move hot pans and check the cake for doneness
- Use a serrated knife to trim a domed top, if needed
- Decide when the cake is cool enough to fill and frost
A younger child can:
- Gather unheated ingredients with an adult
- Help place parchment in the pan
- Stir dry ingredients while an adult checks the mixture
- Count decorations or sort sprinkles into small dishes
- Hold a bowl steady while an adult mixes
- Add sprinkles, fruit pieces, or other prepared decorations at the end
An older child, teen, or beginner partner can:
- Measure ingredients under supervision
- Read each recipe step aloud and check items off
- Mix batter at the speed and time directed by the recipe
- Prepare frosting according to a tested formula
- Spread filling, apply a crumb coat, and practice piping
- Create a simple pattern or write a short message
Children should not operate the oven, handle hot pans, taste raw batter, or use sharp knives independently. Mixers, raw eggs, hot equipment, and decorating tools need close, age-appropriate adult supervision. The right level of help depends on the child, appliance, tool, and kitchen setup.
For measuring, use a small production line: one person reads the ingredient, one measures, and the adult confirms it before it goes into the bowl. Keep raw eggs and their shells away from ready-to-eat decorations, and wash hands and work surfaces after handling them. Never encourage tasting batter or frosting that contains uncooked egg.
3. Bake, Cool, and Prepare the Cake Before Decorating
Begin by preparing the pan as the chosen recipe directs. Grease the base and sides when instructed, and use parchment if the recipe recommends it. For a layer cake, spread the batter between pans as evenly as possible. A kitchen scale can help an adult divide batter, but careful spooning and visual comparison also work when a scale is unavailable.
Follow the recipe’s mixing order and instructions. Overmixing after flour is added can make some cakes less tender, while undermixing can leave streaks or pockets of dry ingredients. Let the adult handle the final batter check, especially when a stand mixer or electric hand mixer is involved.
Bake according to the tested recipe rather than relying on a universal temperature or time. Cake pans, ovens, batter depth, and ingredients vary. The recipe’s recommended doneness check—such as testing the center with a suitable pick or looking for the described springy texture—matters more than the clock alone.
Cooling is a key checkpoint. Let the cake cool in the pan only for the period directed by the recipe, then transfer it to a rack if instructed. It must be completely cool before filling or frosting. A warm cake can soften the frosting, melt a butter-based filling, create condensation, and cause layers to slide.
If you are making layers, inspect them only after they are cool. An adult can trim a gently domed top with a serrated knife held level. Remove only the raised portion needed to help the layers sit flat. Save the trimmings for a separate treat rather than serving them before the cake is safely finished.
For filling, use a thin, even layer of frosting or a compatible jam from the recipe plan. Very wet fillings can make layers slippery, so avoid adding more than the recipe recommends. Place the second layer carefully, then check the sides before applying more frosting.
If the cake cracks, do not panic. A thin layer of frosting can often hold small cracks together, and the final coat will hide many imperfections. If the cake sheds many crumbs, chill the cooled layers briefly before frosting if that suits the recipe and your refrigerator space. If a layer shifts, stop spreading, gently nudge it back into place, and chill the assembled cake before continuing.
4. Use Beginner-Friendly Frosting and Decorating Techniques
Choose a frosting recipe designed for the cake and intended to have a spreadable consistency. The frosting should be firm enough to stay where it is placed but soft enough to move across the cake without tearing it. Exact ingredient ratios and mixing times should come from a tested recipe; avoid major substitutions when the cake needs to hold a design.
Use this simple decorating sequence:
- Place the first cooled layer on the serving plate or cake board.
- Add a thin, even layer of filling.
- Set the next layer on top and check that it is centered.
- Spread a thin crumb coat over the top and sides.
- Chill the cake if the frosting is soft or crumbs are becoming difficult to manage.
- Add the final layer of frosting and smooth or texture it.
- Finish with a simple border, message, fruit, chocolate pieces, or sprinkles.
A crumb coat is a deliberately thin layer of frosting that traps loose crumbs. It does not need to look beautiful. Use a butter knife, spoon, or small spatula to cover the cake, then pause and chill it if the cake feels unstable or the frosting starts to drag. Add the final coat only after the crumb coat has set enough to stay in place.
For cake decorating for beginners, start with designs that do not require perfect pressure. A disposable piping bag, reusable bag, or food-safe storage bag with a small corner snipped off can work for basic dots, lines, stars, shells, and a simple border. Practice a few shapes on a plate before touching the cake. Keep the opening small at first; a larger opening makes thicker lines that can be harder to control.
Easy piping choices include:
- Dots around the top or base
- Short stars arranged in a border
- Small shells made by squeezing, relaxing pressure, and pulling away
- A loose spiral or swirl on each slice area
- A short birthday message written slowly in frosting
No piping bag is required. Use the back of a spoon to make swirls, a fork to create ridges, or a small spatula to make broad waves. A paper stencil can guide a simple powdered topping if the recipe and cake surface suit it. Fresh fruit, chocolate pieces, toasted coconut, or evenly scattered sprinkles can also create a finished look without technical piping.
Let each family member complete one visible task. One person can smooth the top, another can add the border, and the birthday child can place the final decorations. A deliberately simple design usually looks more polished than a complicated design attempted in a hurry.
If the frosting is loose, pause instead of adding random ingredients. Chill the bowl or cake if the recipe and frosting type allow it, then reassess. If layers slide, remove excess filling from the edge, realign the cake, and chill it before applying more frosting. If crumbs show through, add another thin coat rather than pressing harder with the spatula. If the cake remains unstable, turn it into a single-layer celebration cake with a generous textured finish; stability matters more than height.
5. Plan Ahead, Store Safely, and Serve the Family Birthday Cake
The easiest schedule is to separate the work across two sessions. Bake the layers early enough for them to cool completely, then frost and decorate later. This leaves time for chilling and makes the actual birthday celebration less rushed.
A practical plan might look like this:
- Earlier in the day or the day before: Bake the cake according to the tested recipe, cool it fully, and protect it from drying out.
- Later: Prepare the frosting, fill the cake, apply the crumb coat, and chill if needed.
- Before serving: Add delicate decorations, the birthday message, and any final sprinkles.
Storage depends on the frosting and filling. Cakes containing cream cheese frosting, dairy-based fillings, whipped toppings, eggs, or other perishable ingredients may require refrigeration. Check the tested recipe and current food-safety guidance for the specific ingredients, and do not assume that every frosted cake can remain at room temperature.
Keep the cake covered in a suitable container so it is protected from odors, moisture, and accidental bumps. If it must be refrigerated, use a container tall enough that the cover does not touch the decorations. Refrigeration can firm some frostings and fillings, so allow the cake to move toward a pleasant serving texture according to the recipe’s guidance. Do not leave perishable frosting or filling out longer than verified food-safety guidance allows.
If the birthday child is too young to handle the technical steps, save a safe final job for them. They can place a few decorations, choose between two simple patterns, or add the last sprinkle to the center. Older children can write the message while an adult steadies the cake.
An uneven side, a slightly crooked border, or a fingerprint in the frosting is not a failed cake. It shows that the cake was made together. The goal of a family birthday cake is a safe, delicious centerpiece and a kitchen memory—not professional decorating skills.
Frequently Asked Questions
What is the easiest cake for a family birthday cake project?
A sturdy vanilla, chocolate, or citrus cake from a tested recipe is a practical starting point. A single-layer 9-by-13-inch cake is often simpler than a layer cake because it avoids trimming, filling, and stacking. If you prefer layers, use the exact pan size and batter quantity specified by the recipe.
How can children help decorate a cake safely?
Younger children can add sprinkles, place prepared fruit or chocolate pieces, and make spoon-textured designs with an adult nearby. Older children can practice piping or spread frosting under supervision. Adults should control hot pans, ovens, sharp knives, and tasks involving raw ingredients or equipment that could cause injury.
How far ahead can I bake, frost, and store a homemade birthday cake?
Bake and cool the cake ahead when the recipe permits, then protect it from drying out. Frosting and filling can be completed later, but storage time and refrigeration depend on the specific ingredients. For cream cheese frosting, dairy fillings, whipped toppings, and other perishables, follow the recipe and trusted food-safety guidance rather than using a universal room-temperature rule.