Do you dream of pulling a bubbly, golden-crusted pizza out of your own oven, but stop short when you think about the work? For so many of us, the idea of making dough is tied to images of a giant, expensive stand mixer churning away, or a baker heroically wrestling a sticky blob on a floured counter. If you don’t have the mixer or the muscle (or just the confidence), it feels like homemade pizza is off the table.
I’m here to tell you that’s simply not true. I want to let you in on the kitchen’s best-kept secret: the most incredible, flavorful, and forgiving pizza dough requires no kneading and no special equipment. The magic ingredient isn’t a machine; it’s time.
The Real Secret is Time Not Muscle
Think about dough for a second. The goal of kneading is to develop gluten, which is the protein network that gives bread and pizza crust its structure and chew. A stand mixer with a dough hook does this with mechanical force, speeding up the process. Hand-kneading does it with your own energy.
But there’s a third way, a wonderfully lazy way. When you mix flour and water, the proteins are just waiting to link up. If you give them enough time, they will find each other and form those gluten networks all on their own. This process is helped along by the yeast, which, as it ferments, creates little gas bubbles that push and stretch the dough from the inside out.
It’s like making a stew. You can stir it constantly over high heat, or you can put everything in a slow cooker and let it do its thing for hours. The no-knead method is the slow cooker of dough. You just combine the ingredients and walk away. The result is a dough that is not only perfectly structured but also has a deep, complex flavor that you just can’t get from a quick, 60-minute recipe.
Your No-Knead Pizza Dough Toolkit
You might be bracing for a surprise list of specialty items, but I promise you, it’s as basic as it gets. You probably have everything you need in your kitchen right now.
The Equipment:
- A Large Bowl: Any big mixing bowl will do.
- A Spoon or Spatula: For the 60 seconds of stirring you’re about to do.
- Plastic Wrap or a Plate: To cover the bowl while the dough rests.
- A Cast Iron Skillet: This is the key to a crispy, golden, almost-fried bottom crust. A 10 or 12-inch skillet from a brand like Lodge is a kitchen workhorse you’ll use forever.
The Ingredients:
- Flour: All-purpose flour works beautifully. If you have bread flour, it will give you an even chewier crust, but don’t go out and buy it just for this. Use what you have.
- Instant Yeast: Also called rapid-rise yeast. A single packet is usually perfect.
- Salt: Fine sea salt or regular table salt is great.
- Water: Lukewarm, not hot. Think baby’s bathwater temperature.
- Olive Oil: For the pan and for flavor.
That’s it. Seriously. No fancy flour, no dough conditioners, no stand mixer hogging your counter space.
Step-by-Step The Easiest Dough You Will Ever Make
Ready? Let’s spend five minutes making something that will feel like a gourmet masterpiece tomorrow. This makes enough dough for one thick-crust 10-12 inch pan pizza.
The Recipe:
- 400 grams (about 3 cups) All-Purpose or Bread Flour
- 8 grams (about 1 ½ tsp) Fine Sea Salt
- 2 grams (about ½ tsp) Instant Yeast
- 300 grams (about 1 ¼ cups) Lukewarm Water
The Method:
- Combine Dry Ingredients: In your large bowl, whisk together the flour, salt, and yeast. Just a quick stir to make sure everything is evenly distributed.
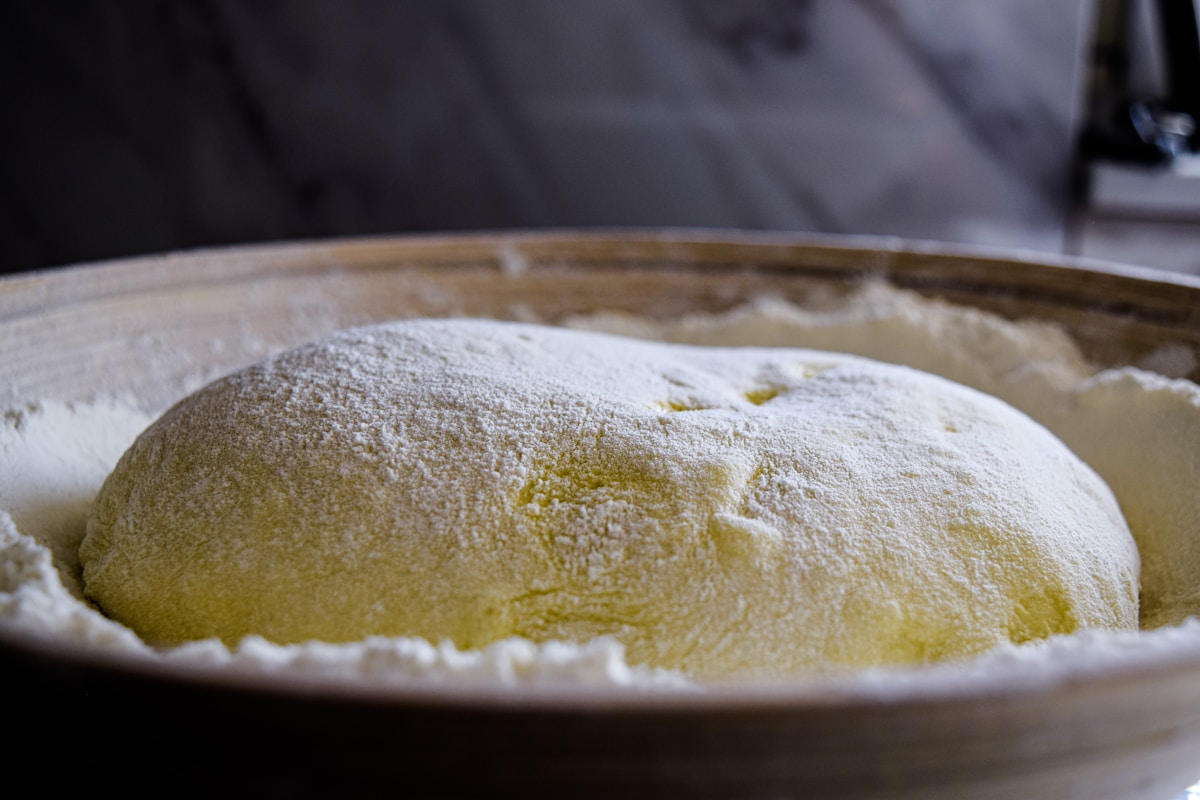
- Add Water and Mix: Pour in the lukewarm water. Using your spoon or spatula, mix until everything is combined and there are no dry patches of flour left. The dough will look very sticky and shaggy. It will not be a smooth ball. (This is 100% correct! Don’t panic.)
- The Long Rest: Scrape down the sides of the bowl. Cover the bowl tightly with plastic wrap or a plate and leave it on your counter at room temperature for at least 12 hours, and up to 24 hours. Go live your life. Go to sleep. Forget about it. Over this time, you’ll see it bubble up and grow.
- Shape (Gently!): After 12-24 hours, the dough will be bubbly and alive. Generously flour your countertop and gently scrape the sticky dough out of the bowl. It will want to spread out. Gently fold the edges into the center to form a rough ball. This isn’t really kneading; you’re just giving it a little shape and structure. Let it rest on the counter for 15 minutes.
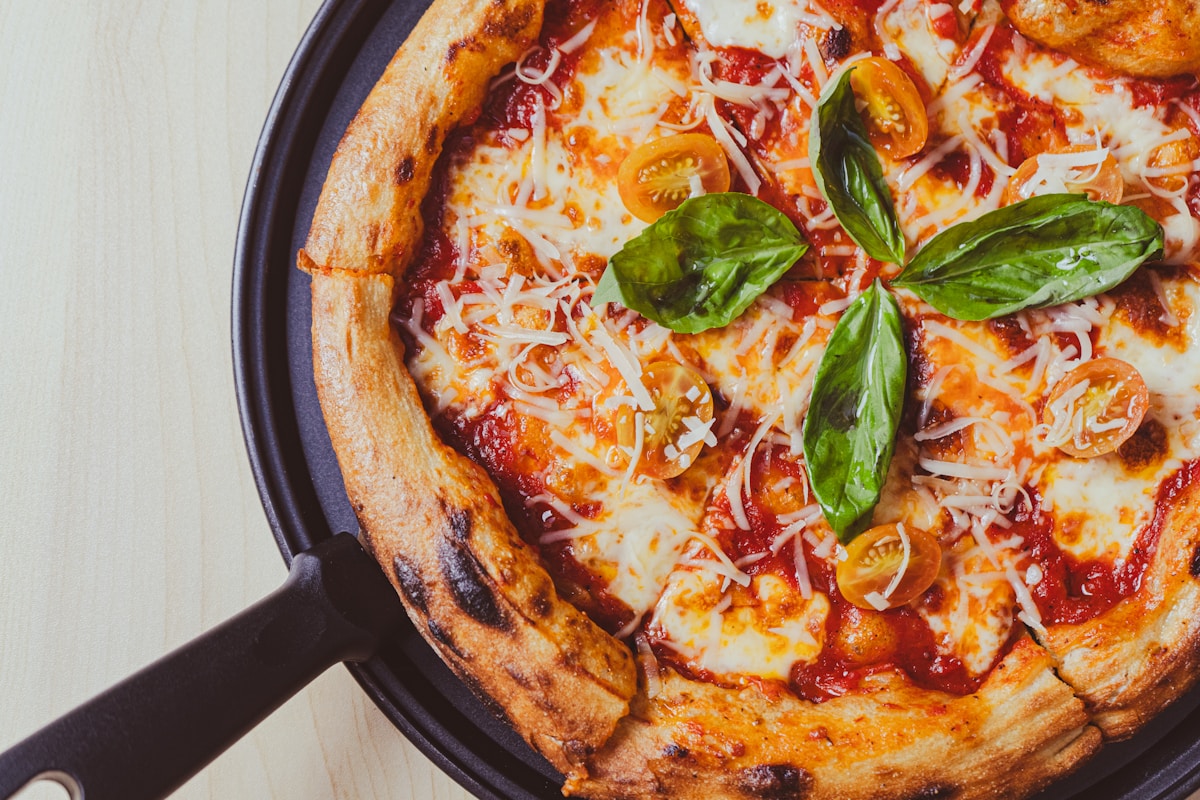
Baking Your Masterpiece in a Cast Iron Skillet
This is where the magic happens. The pre-heated cast iron gives you a pizzeria-level crust that’s crispy on the bottom, chewy in the middle, and utterly delicious.
- Preheat Everything: Place your 10 or 12-inch cast iron skillet on a middle rack in your oven. Preheat the oven to its highest setting, usually 500-550°F (260-290°C). Let the skillet heat up for at least 30 minutes.
- Prep the Pan: Very carefully, using sturdy oven mitts, remove the hot skillet from the oven and place it on a heatproof surface. Drizzle 2 tablespoons of olive oil into the pan. It should shimmer immediately.
- Press in the Dough: Gently place your dough ball into the center of the hot skillet. Be careful! Using your fingertips, gently press and stretch the dough out to fill the bottom of the pan. The oil will sizzle around the edges. (That’s the sound of a glorious crust being born.)
- Top and Bake: Working quickly, spread your sauce, cheese, and toppings on the pizza. Get it back into the hot oven immediately.
- Bake: Bake for 12 to 15 minutes, or until the cheese is bubbly and melted and the crust is a deep golden brown. Let it cool for a few minutes before slicing and devouring.
My Favorite Beginner Tip (Your Future Self Will Thank You)
Worried about timing the 12-24 hour rest? Here’s a brilliant little kitchen hack. After the long rest on the counter, you can place the covered bowl of dough in the refrigerator for up to 3 days. The cold temperature slows the yeast way down, but the flavor continues to develop and get even better. This means you can mix the dough on a Sunday, and have it ready for a quick weeknight pizza on Tuesday or Wednesday. It’s the ultimate meal prep.
So, forget the intimidating equipment and the complex techniques. All you need to bridge the gap between dreaming of homemade pizza and actually eating it is a bowl, a spoon, and a little bit of patience.
Try This Tonight: Right after you finish reading this, go into your kitchen. It will take you less than five minutes to stir together the flour, salt, yeast, and water. Cover it, and walk away. Tomorrow evening, you will be less than 20 minutes from pulling the best, easiest pizza you have ever made out of your oven. You can absolutely do this.