You pull two cake pans from the oven, and one layer has a tall dome while the other looks shorter. The frosting is ready, but now you are wondering how much cake needs trimming before you can stack it.
The good news is that you do not need a cabinet full of specialty gear. The best layer cake tools solve a few repeat problems: uneven batter portions, sticking, uncertain doneness, unstable stacking, and rough frosting. Start with dependable basics, then add specialty tools only when they solve a problem you regularly have.
Key Takeaways
- Buy first: matching cake pans, a digital scale, parchment rounds, a cooling rack, and an offset spatula.
- For more even layers: divide batter by weight and use pans with matching diameter, depth, and material.
- Cake strips are optional: they may reduce pronounced doming in some cakes, but they are not a substitute for even portions or matching pans.
- A serrated knife is the best cake leveler alternative for most occasional bakers; work only with fully cooled layers.
- Decorating tools improve finishing, not baking: a turntable and bench scraper can help frosting look neater, but they cannot fix uneven layers underneath.
Start with the tools that solve the biggest layer-cake problems
For an occasional baker, the highest-value tools are not piping sets or novelty decorating gadgets. They are the tools that help cake layers bake to similar heights, release cleanly, and stack without shifting.
Here is a practical buying order:
- Buy first: matching cake pans, a digital kitchen scale, parchment paper, a cooling rack, and an offset spatula.
- Helpful next: reusable cake strips, a metal cake tester, a rotating cake stand, and a bench scraper.
- Optional upgrades: an adjustable cake leveler, acetate collars, specialty pan wraps, and decorative piping tools.
It helps to separate baking tools from assembly tools. Matching pans, a scale, parchment, cake strips, and a tester affect the layers while they bake. A cooling rack, knife, cake board, spatula, turntable, and scraper make trimming, stacking, and frosting easier afterward.
That distinction can prevent wasted spending. A turntable may help you frost more smoothly, but it will not correct layers that started with noticeably different amounts of batter. Cake strips may help with doming in some setups, but they cannot compensate for mismatched pans or uneven oven heat.
Best tools for evenly baked, easy-release cake layers
Matching light-colored metal cake pans are the foundation of an even layer-cake setup. The pans should have the same diameter and depth so each layer holds the same amount of batter and bakes under similar conditions.
A pair or set of matching pans is more useful than several pans in nearby sizes. A 20-centimeter pan and a 23-centimeter pan will not make interchangeable layers, even if you split the batter carefully. Pan material, color, coating, and shape can also affect baking, so follow both the recipe and the pan maker’s care instructions.
For a first layer cake, two matching pans are enough. You can bake in batches if the recipe makes three layers. Three matching pans are convenient for a three-layer cake, but they are not essential for occasional birthday baking.
A digital kitchen scale is one of the most useful cake pan baking tools you can buy. It helps when recipes provide ingredient weights, but its biggest advantage for layer cakes is dividing batter evenly.
Use it this way:
- Put an empty prepared pan on the scale and tare it to zero.
- Add batter and note the weight.
- Repeat with the next pan, aiming for the same batter weight.
- Move small spoonfuls from the heavier pan to the lighter one until the portions are close.
You do not need laboratory-level precision. The goal is to avoid visibly different portions that create layers with different heights and potentially different baking times. If you do not own a scale, use the same scoop or measuring cup for each pan and alternate additions instead of pouring by eye.
Parchment rounds plus pan preparation solve the frustrating problem of a cake layer tearing during removal. A parchment-lined bottom creates a reliable release surface, while the rest of the preparation should follow your recipe and pan instructions.
A simple workflow is to grease the pan as directed, place a parchment round in the bottom, then prepare the parchment if the recipe calls for it. Some recipes use greased and floured pans, while others call for baking spray or another method. The key is to prepare every pan the same way.
Even with nonstick pans, parchment is a useful safeguard for delicate layers. Coatings can wear over time, and a torn cake is difficult to repair once it has cooled.
Reusable cake strips are the most debated upgrade on this list. Are cake strips worth it? They can be useful if your layers repeatedly bake with high domes and noticeably darker outer edges, especially after you have already addressed pan matching and batter portions.
These damp fabric-style strips wrap around the outside of a pan. They are intended to moderate heat around the pan edge, which may reduce pronounced doming for some cakes. Results vary with the recipe, pan, oven, batter amount, and correct setup, so they should not be treated as a guarantee of flat layers.
Check the manufacturer’s directions before using cake strips. Follow its guidance for soaking, fastening, oven use, and cleaning. Do not improvise with towels, paper products, or other materials not intended for oven use.
If you bake one or two layer cakes a year, cake strips can wait. Use matching pans, divide batter by weight, follow the recipe, cool the layers fully, and trim a dome only if it prevents stable stacking.
A metal cake tester is a small tool with a useful job. Its thin shaft makes a smaller hole than many wooden toothpicks and can give you a clearer sense of whether the center still feels wet, sticky, or mostly set.
A tester is not automatically better than a toothpick in every kitchen. Toothpicks work, and a thin skewer can work as well. A metal tester is mainly a reusable, slim, easy-to-clean upgrade.
Use any tester as one cue, not the only cue. Follow the recipe’s timing guidance, check the cake’s surface and edges, and test near the center when the recipe indicates it is time to check. Different cake styles can leave different amounts of crumb on a tester, so recipe instructions remain the best starting point.
Tools that make cooling, leveling, and stacking less frustrating
Wire cooling racks make cake handling easier by allowing air to circulate around the pan and later around an unmolded layer. They also free counter space and provide a stable place for cake layers to rest before assembly.
Follow the recipe for when to turn layers out. Moving a cake too soon can make it fragile, while leaving it in the pan too long may create handling issues depending on the cake and pan. A cooling rack is simple, but it is one of the most useful tools in a baking kit.
A long serrated knife is the most practical cake leveler alternative for most occasional bakers. It has other kitchen uses and can trim a pronounced dome when the cake is fully cooled.
For a controlled cut, place the cake on a stable board or flat surface. Mark a shallow guide line around the cake at the height you want, then use a gentle sawing motion while rotating the cake. Let the blade do the work instead of pressing down hard.
Do not try to level a warm or delicate layer. It is more likely to tear or compress. Keep fingers clear of the blade, stabilize the cake from a safe position, and use a sharp, clean knife rather than forcing a dull one. Store sharp tools safely when finished.
An adjustable cake leveler is a reasonable upgrade for someone who bakes layer cakes often and trims layers regularly. It can offer a repeatable cutting height and may feel more convenient once you are comfortable using it.
It is not mandatory, though. Some cakes do not need leveling at all, and a serrated knife works well when used patiently. Choose a leveler for convenience and repeatability, not because it promises perfect layers every time. Follow the maker’s cleaning and safety directions, particularly for wire-style models.
A cardboard cake round or flat serving board is a small but important stacking aid. The base should be flat, sturdy, and large enough to support the entire cake. A flimsy or undersized plate makes the cake harder to move and more likely to shift while frosting.
For a simple two-layer cake, place the first layer on the board before adding filling. If the cake needs moving later, the board gives you a secure surface to lift from underneath instead of sliding a frosted cake across a plate.
Essential cake decorating tools for straighter layers and smoother frosting
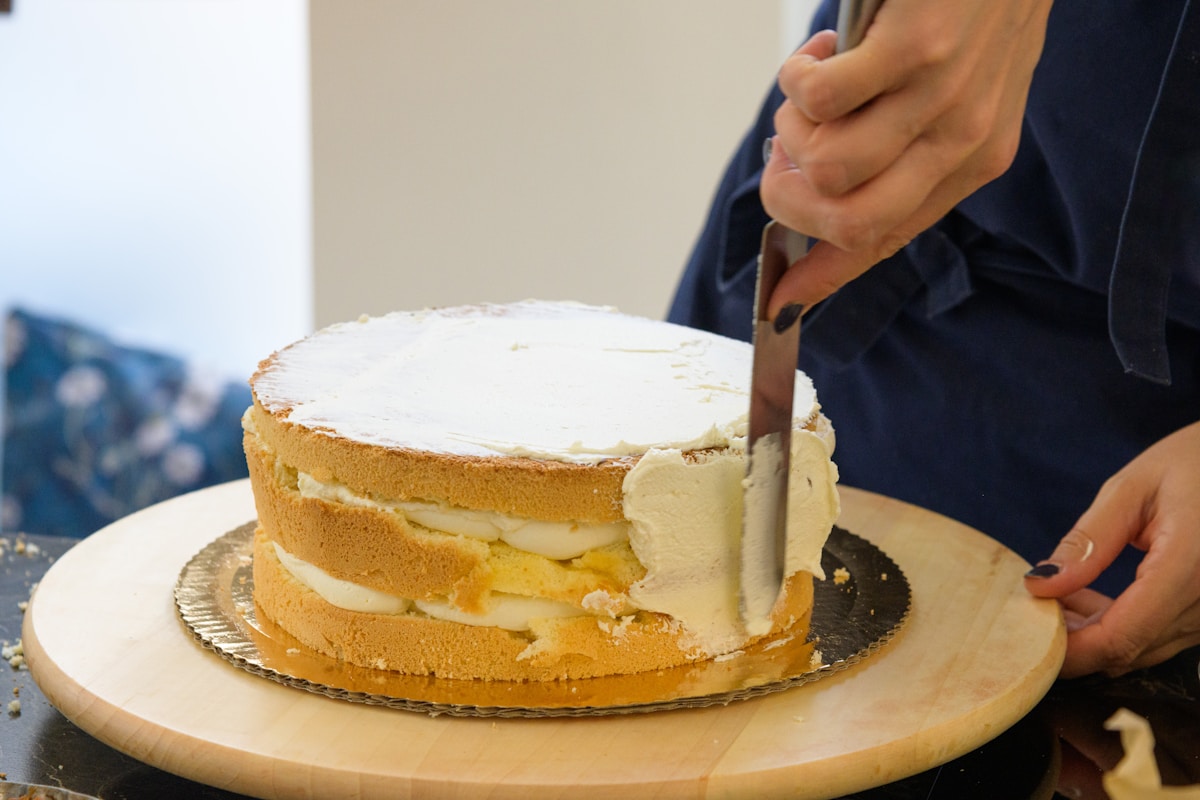
An offset spatula is one of the essential cake decorating tools because it spreads filling and frosting while keeping your hand away from the cake surface. Its angled blade makes it easier to reach the center and sweep frosting toward the edge without dragging your knuckles through the finish.
One medium offset spatula is enough for a beginner. A small spatula can be useful for filling and detail work, while a longer one can speed up outer frosting, but owning both is an upgrade rather than a requirement.
A rotating cake stand or turntable can help you apply frosting more consistently. Rather than constantly changing the angle of your spatula, you can hold it fairly still and rotate the cake. This is especially helpful when smoothing the sides.
A turntable is convenient, not essential. For a simple cake, place the cake board on a stable work surface and rotate it carefully by hand as you frost. The priority is a level surface that does not slide.
A bench scraper or icing smoother helps refine the sides after you have applied enough frosting to cover the cake. Hold the straight edge lightly against the side and rotate the cake, wiping the scraper between passes. It is most useful after a thin crumb coat has set or rested according to your recipe.
For a first birthday cake, you can skip it and use an offset spatula. A scraper is worth adding if smooth, straight sides are a regular goal. It improves the finishing process, but it cannot replace stable layers or an even filling layer.
Piping bags and tips are decorative extras. Buy them when your design calls for borders, rosettes, writing, or other piped details, not because they make a layer cake structurally better. A zip-top bag with one corner snipped can manage a few simple dots or lines, but it is not a complete substitute for piping bags and tips in detailed work.
A simple assembly sequence keeps the process organized:
- Level the layers only if a dome prevents stable stacking.
- Secure the first layer on a cake board or serving base.
- Spread filling in an even layer, leaving a small margin near the edge.
- Add the next layer with the flat sides oriented consistently.
- Apply a thin crumb coat to trap loose crumbs.
- Finish with the final frosting layer and smooth it with a spatula or scraper.
A practical starter kit and upgrade path for occasional bakers
For reliable birthday cakes, build a minimal kit around tools that solve the most common problems:
- Two or three matching cake pans
- A digital kitchen scale
- Parchment rounds and pan-prep supplies
- Toothpicks or a metal cake tester
- A wire cooling rack
- A long serrated knife
- A sturdy cake board or flat serving base
- One offset spatula
This set covers portioning, release, checking, cooling, trimming, stacking, and basic frosting. It also stores more easily than a large collection of decorating gear.
Add upgrades when a pattern appears. Buy cake strips if persistent doming is your main issue. Add a turntable if you regularly struggle to frost evenly. Choose a bench scraper if you want cleaner sides. Consider an adjustable leveler when frequent trimming makes a knife feel inconvenient.
Skip elaborate piping kits, specialty molds, novelty scrapers, and single-purpose gadgets until a specific project requires them. The best decision rule is simple: buy the tool that addresses your current problem, not the one that only makes your setup look more professional.
FAQ
Are cake strips worth it for layer cakes?
Cake strips can be worth buying if you regularly get pronounced domes despite using matching pans and evenly divided batter. They may help moderate heat around pan edges, but results vary with the recipe, pan, oven, and correct use. For occasional baking, accurate portioning and careful trimming are often enough.
Is a metal cake tester better than a toothpick?
A metal cake tester is slim, reusable, and can leave a smaller hole. A toothpick still works well, making a metal tester a convenience upgrade rather than an essential purchase. Use either tool alongside the timing and visual cues in your recipe.
What can I use instead of a cake leveler?
A long serrated knife is the most useful alternative. Cool the cake fully, mark a guide line, use light sawing motions, and rotate the cake as you cut. Work slowly on a stable surface, keep your fingers clear, and do not force the blade through the cake.