The Embarrassing Strawberry Cake Lesson
You spent hours baking a beautiful strawberry cake for your child’s teacher. You frosted it, refrigerated it, and delivered it with pride. The next day, you get a mortified text from the teacher about the cake’s unfortunate shape. This real-life story from Reddit’s r/Baking went viral because it’s a cautionary tale every baker needs to hear. The culprit? Untrimmed cake domes. (Trust me, this is a lesson you only need to learn once.)
Why Does My Cake Dome? The Science Behind the Rise
Cake domes happen when the center of the batter rises faster and higher than the edges. There are two main reasons: overmixing and oven hot spots. When you overmix flour, gluten develops excessively. This creates a tough, elastic structure that traps steam and gas from baking powder or baking soda. The center of the cake, being the last to set, continues to rise and forms a dome. Meanwhile, the edges set earlier and stay flat. Overmixing also weakens the structure, making the dome more pronounced.
Oven hot spots are equally common. Many home ovens have uneven heat distribution. The edges of the pan receive more heat and set quickly, while the center lags behind. As the center finally sets, the gas expansion pushes it upward. For example, if your oven runs hot on the bottom, the bottom of the cake sets first, forcing the top to dome. A good oven thermometer from ThermoWorks can reveal your oven’s personality.
How to Prevent Cake Doming Before You Bake
Prevention is better than a late-night trimming session. Here’s how to minimize doming:
- Use cake strips. Fabric strips like Bake Even by Wilton or homemade aluminum foil strips wrapped around the pan. They insulate the pan, allowing the edges to bake at a similar rate to the center. This reduces doming dramatically. Soak the strips in water before wrapping, then secure with a pin.
- Lower your oven temperature. If you normally bake at 350 degrees F (175 degrees C), try 325 degrees F (163 degrees C) and extend the baking time by 5-10 minutes. The lower temperature gives the cake more time to rise evenly before the edges set.
- Mix gently. Combine wet and dry ingredients just until no flour streaks remain. Use a spatula to fold in the last bits. Overmixing with a KitchenAid stand mixer on high speed for more than 30 seconds after adding flour is a surefire way to get a dome.
- Use a scale for accuracy. Too much flour or too much leavening can cause excessive rise. King Arthur Flour recommends weighing flour for consistent results.
Even with these steps, some doming is normal. But you can minimize it to a gentle crown rather than a peak.
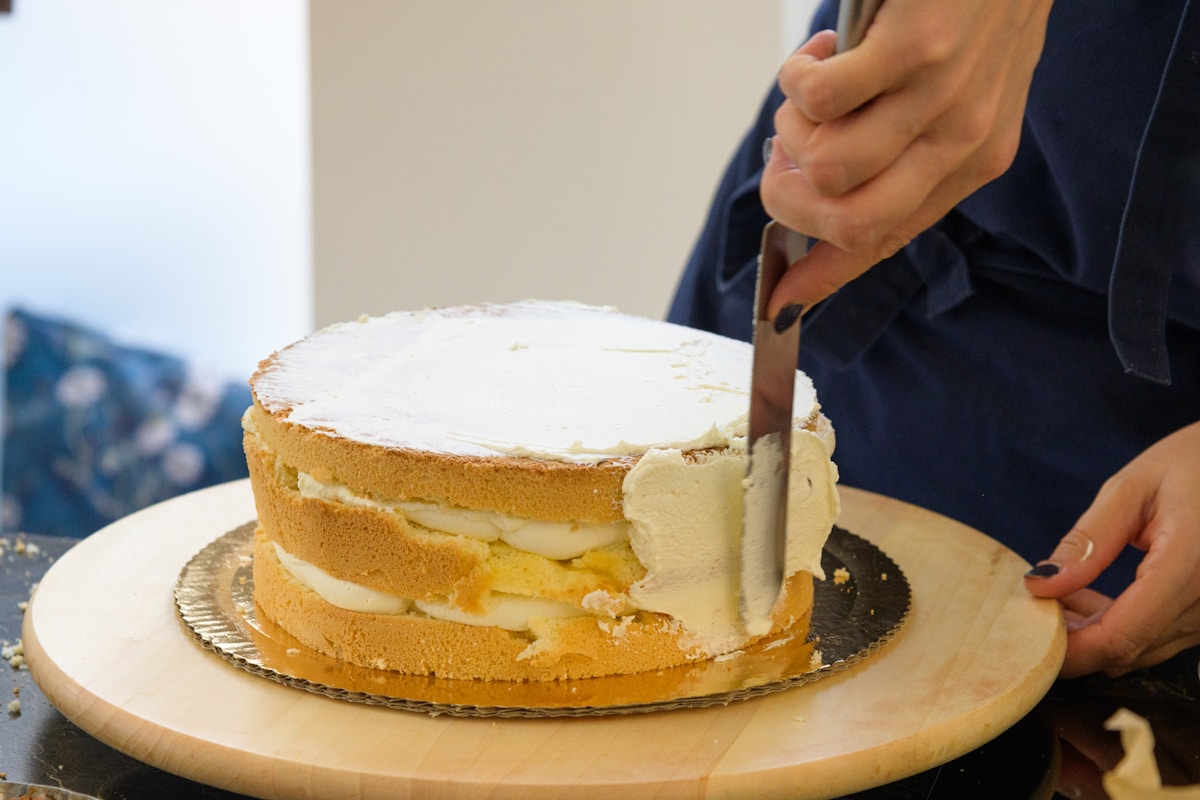
The Perfect Technique for Trimming a Cake Dome
Once your cake is baked and fully cooled (at least 1-2 hours at room temperature), it’s time to level. Tools needed: a long serrated knife (an 8-inch bread knife works great, like Wusthof or Victorinox) or a dedicated cake leveler from Wilton or Ohuhu. A turntable makes the job easier but isn’t required.
Place the cake on a flat surface or turntable. If using a knife, hold it horizontally with the blade parallel to the counter. Start sawing gently at the back of the cake, moving toward you with a smooth, even motion. Rotate the cake as you cut to maintain a level line. Remove about 1/4 to 1/2 inch (6-12 mm) from the top. For an 8-inch round cake, aim for 1/3 inch (8 mm). You want to remove just the dome, not too much of the crumb.
If using a cake leveler, set the wire at the desired height and draw it across the cake with one continuous motion. Clean the wire between cuts. After trimming, check with a spirit level or ruler. The surface should be flat. If it’s still slanted, trim a little more.
Why Leveling Your Cake Matters Beyond Appearance
Trimming the dome isn’t just about avoiding embarrassing shapes. It’s crucial for structural integrity. A flat top ensures that when you stack layers, the cake sits evenly. Fillings like jam or buttercream stay in place without sliding out the sides. The final frosted cake will be straight, not leaning like the Tower of Pisa. Plus, you’ll need less frosting to fill gaps. For tiered cakes, level layers are non-negotiable to prevent collapse.
And yes, it prevents the phallic mishap. (Your future self and the recipient will thank you.)
Troubleshooting Common Trimming Mistakes
- Cake crumbles: Your cake may be dry or overbaked. Chill the cake for 15-20 minutes in the fridge before trimming. Cold cake is firmer and cuts cleaner.
- Knife drags: Use a sharp serrated knife. A dull blade will tear the crumb. Replace your bread knife if it’s old.
- Uneven cut: Use guides like two chopsticks placed on either side of the cake at the desired height. Rest the knife on them to saw straight. Or invest in a cake leveling tool for consistent results.
- Cut too much: It’s OK if your layer ends up a bit thin. You can compensate with more filling. Just don’t trim more than half an inch.
Finally, remember that every baker has a dome story. That viral strawberry cake became a laughing meme, but it also taught thousands of home bakers the importance of a simple step. So next time you bake a layer cake, take the extra five minutes to level. Your cake will look professional, stack beautifully, and stay out of the gossip circle.