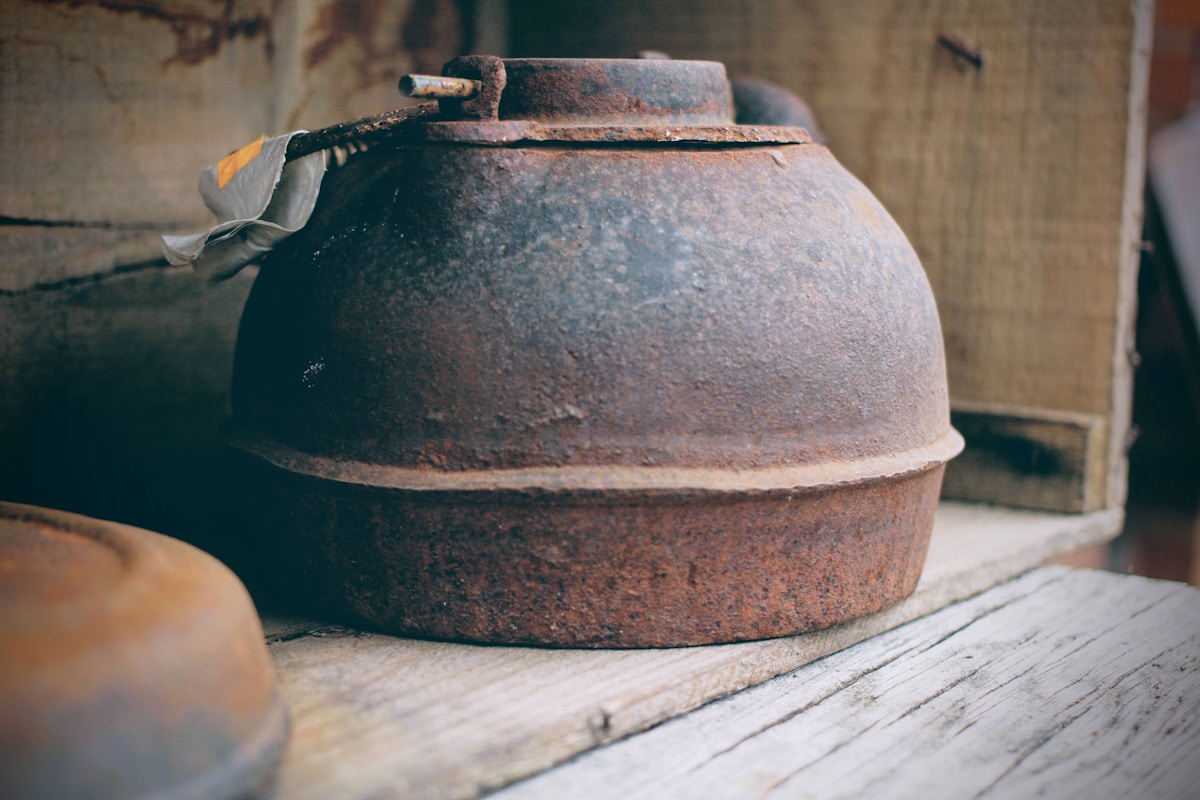
You pull an old cast iron pot from a cabinet, garage shelf, or thrift-store bag and find orange rust beneath a dull, flaky surface. The good news is that ordinary surface rust on bare cast iron is often removable, and you can season cast iron without an oven.
The practical route is simple: inspect the pot, remove removable rust, dry it completely, apply almost no oil, and heat that thin film on the stovetop in controlled rounds. The goal is not an instantly perfect black finish. It is a clean, dry, structurally sound pot with a protective seasoning layer that improves through regular cooking.
Key Takeaways
- Bare cast iron with light surface rust can often be restored, but cracked, deeply corroded, warped, or coated cookware needs a closer assessment first.
- Use warm, soapy water and a scrubber for light rust; use steel wool only on stubborn rust on confirmed bare cast iron.
- Dry the pot immediately, then warm it briefly on the stovetop to remove hidden moisture before oiling.
- Apply an extremely thin oil film and buff it until the surface looks nearly dry; excess oil creates sticky, patchy seasoning.
- A stovetop can build a useful base layer, although deep pots and Dutch ovens may season less evenly than skillets.
1. Check Whether the Pot Is a Good Candidate for Restoration
Start by identifying the cookware. This method is for bare cast iron: dark gray, black, or brown metal without a glossy enamel layer or separate interior coating. Because the cooking surface is exposed iron, a bare cast iron pot can often be cleaned and re-seasoned.
Do not assume every heavy pot is bare cast iron. An enamel-coated Dutch oven is not seasoned like bare iron, and steel wool or aggressive rust removal can damage its finish. If the interior is cream, white, colored, or glassy-looking, it is likely enameled. Follow the maker’s care instructions instead of using this restoration method.
Before attempting to restore a rusty cast iron pot, inspect it in bright light. Check the interior, base, rim, handles, lid, and hardware.
Look for these warning signs:
- Cracks in the walls, base, handles, or lid
- Holes, split seams, or areas that appear dangerously thin
- Loose handles, knobs, or attachments
- Sharp edges caused by chipped or broken metal
- A warped base that rocks badly on a flat surface
- Deep pitting, flaking metal, or widespread corrosion
- Unknown paint, plating, enamel, or other coating
A little orange rust sitting on the surface is usually a cleaning issue. Pitting is different: corrosion has eaten into the metal and left permanent rough spots. Minor pits do not automatically make a pot unusable, but deep, widespread, or flaky deterioration is a reason to stop and reassess.
If the pot has a crack, hole, unstable handle, major warping, or corrosion that appears to affect its strength, do not assume it is safe for cooking. A professional assessment may be worthwhile for a sentimental or collectible piece. Otherwise, replacement may be the better choice. A restored pot does not need to look flawless, but it should be structurally sound.
2. Remove Rust From a Bare Cast Iron Pot
Gather supplies before you start: warm water, dish soap, a stiff brush or nonmetal scrubber, steel wool for stubborn surface rust, clean towels, cooking oil, paper towels or lint-free cloths, and dry heat-safe grips for handling the pot later.
For light rust, wash the pot with warm, soapy water and scrub until the orange residue lifts away. Work around the rim, under the lid, near handle joints, and across the exterior. Rust often hides in those less-visible areas.
Using a little dish soap during restoration is appropriate. At this stage, you are removing rust, old residue, and unreliable seasoning so you can rebuild a clean protective layer.
For stubborn surface rust, use steel wool carefully on bare cast iron only. Focus on rusty patches rather than aggressively scouring the entire pot. The goal is to expose solid metal, not to grind the pot into a perfectly uniform finish.
Avoid power tools, harsh chemical stripping, or deep sanding as a routine beginner method. Those approaches can remove more material than intended, create rough areas, and make it harder to judge the pot’s true condition.
Rinse away loosened rust and residue, then wash the pot again with warm, soapy water. The cleaned surface may feel rough or mottled, especially on older cookware, but it should not shed flakes of metal.
Pause before moving on if deep pits remain, metal flakes away, rust seems trapped in crevices you cannot clean, or you uncover cracks or holes. Rust removal can improve a sound pot, but it cannot reliably correct structural damage.
3. Dry It Completely Before Adding Oil
Bare iron can develop fresh rust quickly when moisture remains on the surface, so drying is essential. Towel-dry the pot immediately after washing. Wipe the interior, exterior, rim, handles, lid, and the underside of the lid, where water can collect.
Then place the empty pot on the stovetop over low heat briefly to evaporate moisture left behind by the towel. Keep it attended, use a burner that supports the base, and avoid overheating an empty pot. You only need gentle heat to dry seams, textured areas, and small pores in the metal.
This step matters even more for a deep pot or cast iron Dutch oven. Water can linger around the lid lip, beneath a knob, or where a handle meets the pot. Oiling over trapped moisture can invite rust back.
Turn off the burner and let the pot cool until it is safe to handle with dry heat-resistant grips. Do not apply oil to a pot that is so hot it makes the cloth smoke or creates a flare-up risk. Controlled heat is safer and more effective than rushing.
4. Season Cast Iron Without an Oven on the Stovetop
The stovetop cast iron seasoning method is straightforward: wipe on an extremely thin coat of oil, heat the pot until the film begins to smoke lightly, turn off the heat, let the pot cool safely, and repeat as needed. Thin layers matter more than heavy coatings.
Choose a neutral cooking oil that is commonly used for high-heat cooking. There is no need to hunt for one supposedly perfect oil. A clean oil, a very thin application, and careful heating are more important than the specific bottle you choose.
Put a small amount of oil on a paper towel or lint-free cloth rather than pouring it directly into the pot. Wipe the inside bottom, walls, and rim. If the exterior was stripped to bare iron, lightly oil the outside bottom, sides, and lid as well.
Next, take a fresh dry towel and wipe the pot again as though you are trying to remove the oil you just applied. The surface should look nearly dry, not wet, glossy, or streaky. If oil runs when you tilt the pot, there is far too much.
Excess oil is a common reason newly seasoned cast iron feels sticky. A heavy layer can form a tacky, uneven film instead of a hard protective base. More oil does not create better seasoning; several light rounds are more useful than one thick coating.
Place the pot on a burner that matches its base as closely as possible. Heat it while staying nearby. As the cookware becomes hot, the thin oil film should begin to smoke lightly. Turn off the heat at that point and allow the pot to cool safely.
Keep the kitchen ventilated while seasoning. Move paper towels, oil bottles, and other combustible items away from the burner before heating. Use only dry heat-resistant grips, and never leave oil heating on the stovetop unattended.
A deep cast iron Dutch oven can heat unevenly because the burner mainly warms the bottom. That is the trade-off when you season cast iron without an oven: it is practical for a large or awkward pot, but the first few layers may look patchy on the sidewalls and exterior.
Do not compensate by adding more oil or turning the burner as high as possible. Instead, use several light rounds. Let the pot cool between rounds, lightly oil dry-looking bare areas, and repeat the attended heating process. Reposition the pot only once it is cool enough to move safely.
You are building a starting layer, not chasing a showroom finish in one afternoon. The color may shift from gray to brown, bronze, or uneven black as seasoning develops. Early color variation is normal and matters less than a dry, non-sticky surface with no active rust.
5. Keep the New Seasoning in Good Shape
New seasoning benefits from ordinary use and prompt cleanup. After cooking, wash the pot with warm water and a brush or scrubber. Use dish soap when needed, especially after greasy foods, then rinse well rather than leaving residue behind.
Dry the pot immediately with a towel, then warm it briefly over low stovetop heat to remove remaining moisture. Once it is dry and cool enough to handle, wipe on a barely-there film of oil and buff until it no longer looks greasy.
Cooking with oil or fat gradually helps reinforce seasoning. Sautéed vegetables, browned meat, and shorter braises can be useful early cooks. The finish usually becomes more dependable through repeated cooking and correct drying, not through frequent heavy recoating.
Be cautious with acidic dishes while the new seasoning is still developing. Tomato-heavy braises, beans with acidic ingredients, wine-forward sauces, and long-simmered recipes can be harder on a fresh layer. You do not need to avoid these foods forever, but shorter acidic cooks are a sensible starting point until the seasoning is better established.
After a long braise or carnitas, inspect the surface once the pot is washed. If it looks dull but clean, dry it and add the light oil film. If a small rusty patch appears, scrub that spot, dry the pot thoroughly, and complete one thin stovetop seasoning round rather than stripping the whole pot again.
Store the pot completely dry. If it has a lid, leave it slightly ajar or place a clean absorbent liner between the pot and lid. A tightly sealed lid can trap humidity, especially in a damp kitchen, allowing rust to return.
Here are common problems and practical fixes:
- Sticky surface: Scrub with warm water until the gummy excess oil is gone. Dry thoroughly, then apply a much thinner oil layer.
- Rust spots returning: Scrub the affected spots, wash away residue, dry immediately, and repeat a thin stovetop seasoning round.
- Uneven color: Continue cooking and maintaining the pot. Early seasoning often looks blotchy, and uneven color alone does not mean restoration failed.
- Food sticking: Use enough cooking fat, preheat gradually, and expect a freshly restored pot to improve with use.
FAQ
Can you season a cast iron Dutch oven on the stovetop?
Yes, if it is bare cast iron and structurally sound. Apply a very thin oil layer and heat it on an attended stovetop burner until the oil smokes lightly. A deep Dutch oven may season less evenly than a skillet, so use several light rounds rather than one heavy coating. Do not use this method on an enameled Dutch oven.
What oil should you use to season cast iron without an oven?
A neutral cooking oil commonly used for high-heat cooking is a practical choice. The application matters most: use so little oil that the pot looks nearly dry after buffing. Thick oil is more likely to become sticky than protective.
Is a rusty cast iron pot safe to cook in after restoration?
A bare cast iron pot with ordinary, removable surface rust can often be cleaned, dried, and re-seasoned for cooking. Do not use a pot with cracks, holes, loose hardware, severe flaking corrosion, major structural pitting, or an unknown coating until its condition and material have been properly assessed. When in doubt, choose safety over saving the pot.