The lunch may look great when you zip the bag at 7 a.m., then turn into damp bread, wilted lettuce, and soft crackers by noon. The good news is that you do not need expensive containers or an elaborate meal-prep system to avoid soggy work lunches. You simply need to keep wet, dry, crisp, and reheatable foods apart until lunch.
A component-style lunch is the easiest answer: pack the main parts separately, then combine them when you are ready to eat. It takes only a few extra minutes and makes familiar lunches taste much fresher.
Key Takeaways
- Keep sauces, dressings, tomatoes, pickles, and other wet ingredients separate from bread, crackers, and greens.
- Place dry, sturdy fillings such as cheese, turkey, or dry lettuce next to sandwich bread; keep wetter fillings in the middle or in a small container.
- Dry washed produce thoroughly and pack salad dressing, dips, fruit, and crunchy toppings separately.
- Use one main container, a few small sauce containers, and a dry bag or container for crackers and bread.
- Build filling component lunches with protein, a fiber-rich carbohydrate, produce, and a flavorful sauce or satisfying fat.
Use the Wet-Dry-Crisp Rule to Avoid Soggy Work Lunches
Moisture travels through a packed lunch. A juicy tomato can soften bread, dressing can wilt greens, and steam trapped inside a container can make crackers and roasted vegetables lose their crunch.
Before packing, sort ingredients into four quick groups:
- Wet: dressing, salsa, sauces, juicy fruit, tomatoes, pickles, marinated vegetables, and fillings with visible liquid.
- Dry: bread, crackers, chips, nuts, seeds, croutons, and toasted toppings.
- Crisp: lettuce, herbs, cucumbers, carrots, snap peas, apples, and bell peppers.
- Hot or reheated: leftovers, grains, beans, soups, and warm fillings that should not share space with foods meant to stay crisp.
The rule is simple: wet ingredients get their own small container; dry ingredients stay dry; crisp foods sit away from sauces and steam; and reheatable foods are packed separately. This is the foundation of practical make-ahead work lunch tips.
For example, instead of building a fully dressed chicken salad bowl the night before, pack chicken and grains in one container, greens in another, dressing in a cup, and nuts or croutons in a dry bag. At lunch, warm the chicken and grains if you like, then add the greens, dressing, and crunch.
Warm foods are a common hidden problem. Steam trapped in a sealed container becomes condensation, which can dampen nearby food. Follow safe cooling and refrigeration practices for cooked foods, and pack crisp items away from anything you plan to reheat.
Choose Meal Prep Lunch Containers That Keep Components Separate
Meal prep lunch containers do not need to be matching or costly. The goal is simply to give each moisture-sensitive item a sensible home.
A useful everyday setup includes:
- One larger container for a main meal, grains, protein, or reheatable leftovers.
- One or two small, tightly lidded containers for dressing, sauces, pickles, salsa, or juicy toppings.
- One dry container or reusable bag for crackers, toasted bread, nuts, tortilla chips, and crunchy toppings.
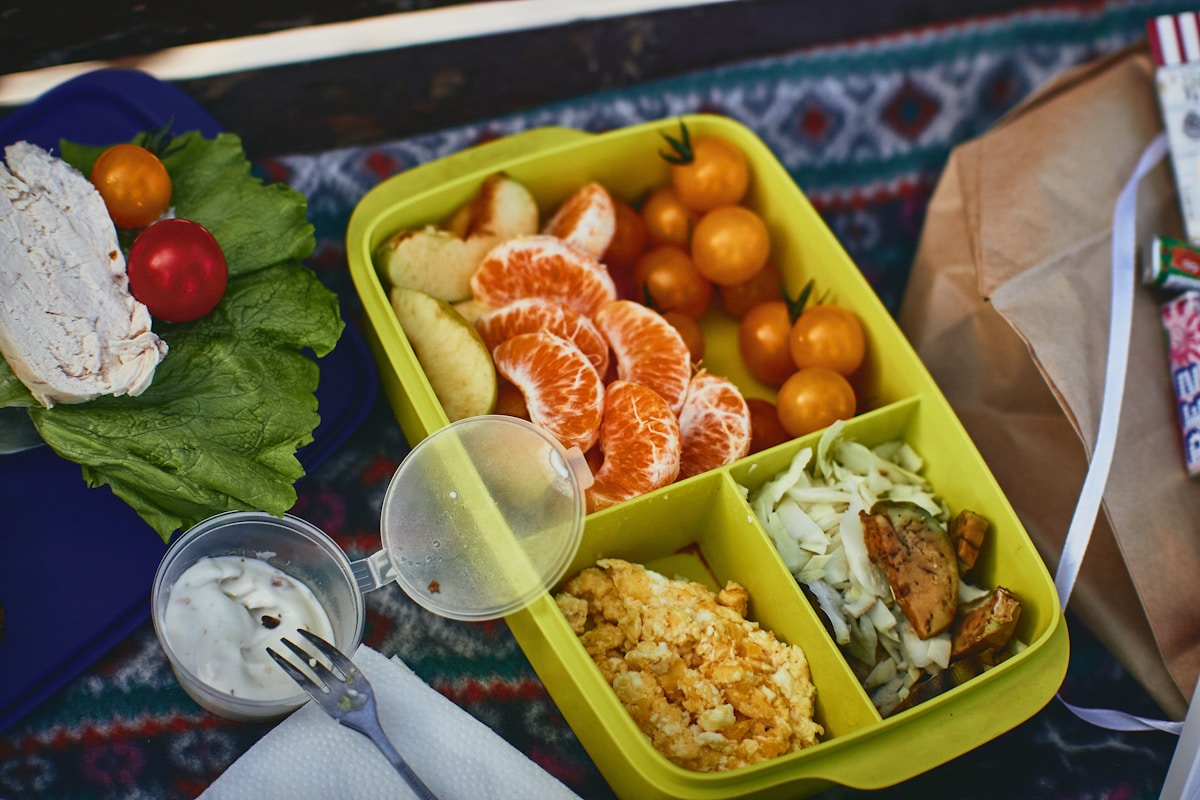
- An optional divided container for a snack-style lunch with separate sections.
Use rigid containers for foods that can be crushed, including sandwiches, salad greens, cut vegetables, and berries. A sandwich wrapped in parchment can work well inside a lunch bag, but a sturdy container is better if it may be squeezed under a water bottle or stacked beneath other food.
Small sauce cups do more than help prevent leaks. They let you pack the flavor you want without soaking the rest of lunch. A small portion of dressing, mustard, hummus, pesto, or dip is easy to add at lunch and much harder to undo once it has soaked into a salad or sandwich.
Wash produce ahead if that helps your routine, but dry it thoroughly before packing. A clean kitchen towel or paper towel can gently blot lettuce, herbs, cucumber slices, and berries. Extra surface water is often what makes crisp lunchbox vegetables turn limp.
Keep crackers and toasted items outside the main refrigerated container. Even sealed containers can create a damp environment around dry foods when everything is packed together. If you use a cold pack, place it beside foods that tolerate chill well rather than pressing it directly against delicate greens.
How to Keep Sandwiches and Wraps From Getting Soggy
If you are wondering how to keep sandwiches from getting soggy, focus on the order of the layers. Put the driest, most protective fillings beside the bread and the wettest fillings in the center or in a separate cup.
Start with fresh, dry bread. Lightly toasted bread can provide a firmer surface and may hold up better, though it cannot solve a sandwich filled with wet ingredients. Let toasted bread cool before assembling so it does not trap steam inside the wrap or container.
Next, add a barrier near each slice of bread. Cheese, dry lettuce leaves, sliced turkey, or a thin layer of a thick spread can help keep moisture farther from the bread. Then place wetter foods toward the middle.
Before packing, pat tomatoes, pickles, roasted vegetables, thawed frozen vegetables, and juicy fruit dry. If an ingredient is releasing liquid onto the cutting board, it is a strong candidate for its own container.
Try these easy sandwich arrangements:
- Turkey and cheese: Layer bread, cheese, turkey, and dry lettuce. Pack tomato slices and mustard separately.
- Rotisserie chicken sandwich: Pack bread, cheese, drained chicken, and greens together. Keep barbecue sauce, pesto, mayonnaise, or pickled onions in a small container.
- Hummus vegetable wrap: Spread hummus lightly, add dry greens and shredded carrot, then roll. Pack cucumber, tomato, or juicy roasted vegetables separately if the wrap will wait until lunch.
For night-before sandwiches, choose stable fillings: cheese, deli meat, well-drained cooked chicken, dry greens, shredded carrots, and bell pepper strips. Tomatoes, pickles, avocado, saucy fillings, salad dressings, and mayonnaise-heavy mixtures are generally better packed separately when texture matters.
For especially juicy fillings, do not force a fully assembled sandwich. Pack chicken salad, bean filling, tuna-style filling, or taco meat in a container. Bring pita, tortillas, bread, or crackers in a dry bag and assemble at work. This is one of the simplest ways to separate sandwich ingredients without adding much work.
Pack Salad Without Soggy Lettuce or Watery Vegetables
To pack salad without soggy lettuce, begin with truly dry greens and keep the dressing separate until you are ready to eat. A salad can be made ahead, but its layers need to respect moisture.
In a larger salad container, build from sturdy foods at the bottom to delicate foods at the top. Keep the dressing in its own small container rather than at the bottom.
A practical order looks like this:
- Add sturdy, low-moisture vegetables such as carrots, snap peas, bell peppers, radishes, or well-drained chickpeas.
- Add cooled grains, beans, chicken, eggs, tofu, or another protein.
- Put dry greens and herbs on top, away from heavier ingredients.
- Pack croutons, nuts, seeds, and crispy onions separately.
- Add dressing only when you are ready to eat.
Some vegetables naturally hold up better than others. Carrots, celery, sugar snap peas, bell peppers, radishes, and whole mini cucumbers are dependable choices. Cucumber slices can work well too when they are dry-cut and not salted ahead of time.
Cut tomatoes, salted cucumbers, thawed vegetables, dressed slaw, and marinated vegetables are more likely to release moisture. They are still useful lunch ingredients; they simply belong in a separate container when they will sit for several hours.
Pack dip separately as well. Hummus, yogurt sauces, and bean dips can make a crisp vegetable box watery if they touch everything all morning. Whole fruit is often the easiest option. If you bring apple slices, berries, orange segments, or melon, keep them in their own container so their moisture does not reach greens or crackers.
Build Filling Work Lunches That Stay Fresh Until Midday
A snack-box lunch can be satisfying, but a few pieces of meat, cheese, and crackers may leave you hungry soon after. Build a more substantial meal with this flexible formula: protein + fiber-rich carbohydrate + produce + a satisfying fat or sauce.
The pieces can stay separate while still feeling like one complete lunch. These affordable combinations travel well:
- Chicken grain box: Rotisserie chicken, brown rice or quinoa, roasted vegetables, dry shredded cabbage or slaw, and sauce in a cup. Reheat the chicken and grains, then add the cold crunchy parts.
- Turkey and cracker plate: Turkey, cheese, whole-grain crackers packed dry, carrots, bell pepper strips, apple slices in their own container, and hummus or mustard in a small cup.
- Chickpea pita lunch: Drained chickpea salad filling in one container, pita packed separately, cucumber and pepper sticks, fruit, and a handful of nuts or seeds.
- Taco-style lunch: Seasoned beans or chicken in a reheatable container, tortillas in a dry bag, shredded lettuce and salsa separately, plus cheese and avocado added at lunch.
- Grain-and-greens bowl: Grains and protein in one container, greens and crunchy toppings in another, and dressing packed separately. Add the greens after warming the grain base.
This approach works well for families with different preferences, too. One person can build a sandwich, another can use the same chicken and vegetables in a salad, and children can eat the components separately. The shopping list stays simple even when lunches look different.
Follow a Simple Three-Day Prep Routine
You do not need to cook three separate lunches every weekend. Choose a few building blocks that can change shape during the week.
For three workdays, shop for two proteins, two sturdy vegetables, one salad green, one carbohydrate base, fruit, and one or two sauces. For example, choose rotisserie chicken and canned chickpeas; carrots and bell peppers; romaine; whole-grain bread or tortillas; brown rice; apples; hummus; and mustard.
On prep day, cook or portion grains and proteins. Wash and dry the vegetables and greens, then portion sauces into small containers. Store perishable ingredients in the refrigerator and follow current USDA or FDA guidance for safe storage and transport.
The night before each workday, assemble only the stable pieces. Put chicken, grains, and roasted vegetables in a main container. Pack crackers, bread, tortillas, greens, and wet toppings separately when they need extra protection.
Use the same ingredients in different formats:
- Day one: Turkey and cheese sandwich with tomato and mustard packed separately, plus carrots and fruit.
- Day two: Chicken-and-grain salad bowl with greens, dressing, and seeds held apart.
- Day three: Chickpea or chicken taco box with tortillas, lettuce, salsa, and avocado added at lunch.
Keep perishable ingredients refrigerated before lunch and return them to refrigeration promptly when possible. If your commute or work setup makes refrigeration difficult, use current USDA or FDA guidance to choose an appropriate packing method.
FAQs About Preventing Soggy Work Lunches
Can I make sandwiches the night before without them getting soggy?
Yes, especially when the fillings are dry and sturdy. Cheese, deli meat, well-drained chicken, and dry greens are good choices. For better texture, pack tomatoes, pickles, sauces, avocado, and juicy fillings separately.
What is the best way to pack salad dressing for work?
Use a small container with a secure lid, and toss the salad only when you are ready to eat. Check that the lid fits securely and store the container upright when possible.
How do I keep crackers and crunchy toppings crisp in a lunchbox?
Keep them in a separate dry container or bag. Do not place them beside salad, fruit, dips, or reheated food, where moisture and steam can soften them quickly.
A crisp lunch is not about perfection. It is about giving wet ingredients, dry ingredients, and fresh produce a little breathing room. Once you get used to packing components separately, you can avoid soggy work lunches with the familiar foods you already enjoy.