There’s a unique kind of kitchen heartbreak that comes from investing hours into a beautiful, multi-colored bake, only to pull it from the oven and see your vibrant vision has melted into a disappointing, muddy swirl. You dreamed of crisp rainbow stripes or a perfect bi-flag cinnamon roll, but ended up with a vaguely brownish-purple blob. We’ve all been there. It feels like a magic trick gone wrong.
But what if I told you the secret to those bakery-perfect, distinctly layered creations isn’t magic at all? It’s a combination of science, technique, and a little bit of patience. Whether you’re baking for a birthday, a Pride celebration, or just to bring a splash of joy to your table, you can absolutely achieve those stunning results at home. Let’s walk through the process, step by step, and turn that color-blending frustration into a thing of the past.
The Secret Isn’t Magic It’s Science (and the Right Coloring)
The number one culprit behind bleeding colors is excess moisture. Think about your standard dough recipe—it’s a carefully balanced ratio of flour and liquid. When you start adding typical liquid food coloring from the grocery store, you’re essentially just adding more water. This seemingly small addition can throw the whole recipe off balance.
Too much liquid weakens the gluten structure you worked so hard to develop, resulting in a sticky, hard-to-handle dough. During proofing and baking, this extra moisture allows the dyes to migrate and bleed into one another. The result? Mud.
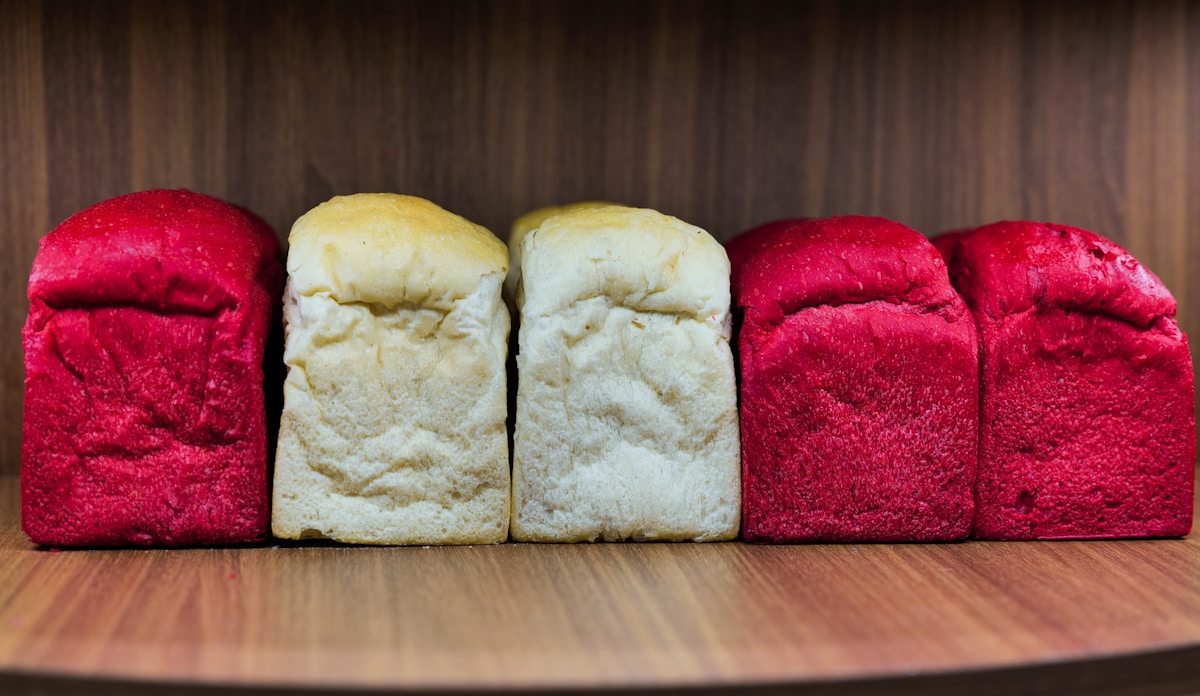
This is where gel food coloring comes in as our hero. Gel colorings are highly concentrated pastes with very little water content. A tiny dab on the end of a toothpick provides an incredible punch of color without altering your dough’s hydration. This is non-negotiable for achieving deep, vibrant hues. Brands like AmeriColor and Wilton are beloved by bakers for their intensity and the vast array of colors they offer.
So, the first rule of vibrant baking is to ditch the little liquid dropper bottles and invest in a set of quality gel colors. (Your dough will thank you.)
Your Dough is the Canvas Get it Right First
You can’t create a masterpiece on a flawed canvas. A great multi-colored bake begins with a great single-colored dough. You need a reliable, workable recipe before you even think about dividing it. For projects like cinnamon rolls, an enriched dough is the perfect choice.
Enriched doughs contain fat (like butter, eggs, or oil) and sugar, which create a soft, tender, and flavorful crumb. A good base recipe to look for will have ingredients like:
- Flour: All-purpose or bread flour works well. Bread flour provides more gluten for a chewier texture.
- Yeast: The leavening agent that makes the dough rise.
- Liquid: Usually milk or water, warmed to about 110°F (43°C) to activate the yeast.
- Fat: Unsalted butter is classic for flavor and tenderness.
- Sugar: Provides food for the yeast and adds sweetness.
- Salt: Controls the yeast and enhances flavor.
Prepare your dough according to your chosen recipe, making sure to knead it until it’s smooth and elastic. You should be able to perform the “windowpane test.” This is where you can gently stretch a small piece of dough between your fingers until it’s thin enough to see light through without tearing. Once you’ve reached this stage and completed the first proof (where the dough doubles in size), you’re ready for the fun part.
The Art of the Mix How to Add Color Cleanly
Now that your base dough has risen, gently deflate it and divide it into as many portions as you have colors. For the most uniform layers, use a kitchen scale to ensure each portion is exactly the same weight. This precision at the beginning pays off in the final look.
Now, for a crucial kitchen hack: put on a pair of food-safe disposable gloves. This isn’t just about preventing your hands from looking like you’ve been finger-painting for a week. It also allows you to be more assertive when kneading in the color without hesitation.
Work with one portion of dough at a time:
- Flatten the dough ball into a small disc.
- Using a clean toothpick, add a small amount of gel food coloring to the center. Remember, it’s highly concentrated, so start with less than you think you need. You can always add more.
- Fold the dough over the color, pinching the seams to enclose it. This prevents the gel from getting all over your work surface right away.
- Begin kneading the dough. It will look streaky and messy at first—don’t panic! This is normal. Continue kneading until the color is completely uniform and no streaks remain.
- Repeat this process for each portion of dough with its respective color, using a clean workspace or piece of parchment paper for each to avoid cross-contamination.
Building Your Rainbow The Stacking and Chilling Method
This is where the crisp, clean layers are born. Once all your dough portions are beautifully colored, you might be tempted to immediately roll them out and stack them. Stop! Here’s the game-changing tip that professional bakers swear by.
The Chill Hack: Cover each colored dough ball and place it in the refrigerator for 20-30 minutes.
Why does this work? The brief chill firms up the butter within the enriched dough. This makes the dough less sticky, easier to handle, and significantly less likely to smear its color onto its neighbors. It is the single most effective trick for ensuring sharp, defined lines in your final product.
After chilling, you’re ready to assemble:
- Lightly flour your work surface. Roll out your first color of dough into a neat rectangle. Use a ruler to keep the dimensions precise. Aim for a consistent thickness across the entire sheet.
- Place this rectangle on a piece of parchment paper and set it aside.
- Roll out your second color to the exact same dimensions.
- Lightly brush the surface of the first rectangle with a tiny bit of milk or water. This acts as a gentle glue.
- Carefully place the second rectangle directly on top of the first, aligning the edges perfectly.
- Repeat this process for all your colors, creating a neat, multi-layered stack of dough.
- Once stacked, you can use your rolling pin to gently roll over the entire stack once or twice to press the layers together and ensure they are well-adhered.
From here, you can proceed with your recipe. For cinnamon rolls, you would now add your filling (like a cinnamon-sugar-butter mixture) and roll the entire stack into a tight log.
The Final Steps Slicing and Baking for Perfection
You’ve done the hard work of creating a beautiful, multi-layered log. Don’t let it get squished now! The best way to slice a soft log of dough is not with a knife, but with a piece of unflavored dental floss or heavy-duty thread. Slide it under the log, cross the ends over the top, and pull. It creates a perfectly clean cut every time without compressing the layers.
Arrange your sliced rolls in a prepared baking pan. Now it’s time for the second proof. Cover the pan loosely and let the rolls rise in a warm, draft-free spot for 30-60 minutes, or until they look puffy. The ideal proofing temperature is around 75°F (24°C). Avoid proofing in a place that’s too hot, as this can cause the butter to melt and the colors to bleed before they even hit the oven.
When you’re ready to bake, preheat your oven to the temperature specified in your recipe, typically around 375°F (190°C). Bake for 20-25 minutes, or until the rolls are lightly golden and cooked through. If you notice the tops are browning too quickly (which can sometimes happen with the sugars in colored doughs), you can loosely tent the pan with aluminum foil for the last 5-10 minutes of baking. This protects the colors while allowing the inside to finish cooking.
A Celebration in Every Swirl
As you pull that pan of perfect, vibrant rolls from the oven, take a moment to admire your work. You didn’t just bake; you created edible art. Each distinct swirl of color tells a story—of patience, of technique, and of joy. These bakes are more than just food; they are expressions of celebration, solidarity, and love, perfect for sharing with people who bring color to your own life.
The kitchen is a place where we can turn simple ingredients into something magical. By understanding the ‘why’ behind the techniques, you empower yourself to create with confidence. So go ahead, chase that rainbow, and bake something that makes the world feel a little bit brighter.


