The invitations are out, the characters are assigned, and the plot is thickening for your murder mystery party. You’ve curated the perfect playlist and dimmed the lights to set a wonderfully suspenseful mood. But then you turn to the kitchen, and a crucial question arises: how do you create a dessert that fits the theme without actually tasting… well, scary?
It’s a unique culinary challenge. You want gasps of theatrical shock when the dessert is revealed, followed by sighs of genuine delight once your guests take a bite. This is where the magic of themed baking truly shines. It’s not just about baking; it’s about storytelling. You’re creating an edible prop, a centerpiece that deepens the immersion of your game. The secret lies in the delightful contrast between a macabre appearance and a comforting, delicious flavor. Let’s explore how you can craft some frightfully good sweets that will be the talk of the night, for all the right reasons.
The Art of Delectable Deception
The most successful themed desserts play with expectations. A cupcake that looks like a crime scene should taste like the best vanilla bean confection you’ve ever had. A chocolate truffle disguised as a piece of evidence should melt in your mouth with rich, decadent flavor. This guiding principle is your North Star: the aesthetic is for the story, but the flavor is for your guests.
Think of your dessert as the final act of your party’s narrative. It’s the twist that no one saw coming. The beauty is that you don’t need to be a professional pastry chef to pull this off. You just need a few clever techniques, some quality ingredients, and a willingness to embrace a little bit of kitchen theatricality. The goal is to create a multi-sensory experience where the food is an active participant in the fun. When your friends are laughing about how they hesitated to eat a “bloody” dessert that turned out to be heavenly, you’ll know you’ve succeeded.
Before we dive into specific recipes, let’s assemble our toolkit. You’ll be surprised how a few key items can transform your kitchen into a special effects studio for sweets.
Creating convincing effects is all about having the right tools and ingredients. Investing in a few quality items will make the process smoother and the results far more impressive. You don’t need a professional-grade kitchen, just a few well-chosen supplies.
-
High-Quality Red Food Coloring: This is non-negotiable. For a realistic “blood” effect, you need a deep, true red that won’t fade to a disappointing pink. Gel-based food colorings from brands like Americolor (Super Red) or Wilton (No-Taste Red) are your best friends. They provide intense color without watering down your icing or batter.
-
Silicone Molds: To create specific, eerie shapes, silicone molds are a game-changer. You can find them in all sorts of designs online—think daggers, skulls, bones, or even miniature vintage keys. They are perfect for working with chocolate, fondant, or even hard candy, as they are flexible and release your creations easily.
-
A Good “Canvas” Recipe: Your spooky decorations need a delicious base. Whether it’s a classic vanilla cupcake, a rich chocolate brownie, or a simple sugar cookie, have a go-to recipe that you trust. The decorations are the star, but the supporting actor (the dessert itself) needs to deliver a stellar performance.
-
Food-Safe Paintbrushes: For detailed work, especially the blood splatter effect, a set of new, food-safe paintbrushes is essential. Designate them for kitchen use only. A stiff-bristled brush is perfect for flicking color, while a fine-tipped brush is great for painting delicate cracks or veins.
-
Isomalt or Sugar: For creating edible “broken glass,” isomalt is the easiest and most stable option. It’s a sugar substitute that cools to a crystal-clear, glass-like hardness and is less prone to yellowing than regular sugar. You’ll need to heat it to the hard-crack stage (around 300-310°F or 149-154°C), so a candy thermometer is also a must-have.
With these tools in hand, you’re ready to start creating some culinary evidence.
Recipe Idea 1 The ‘Blood Splatter’ Masterpiece
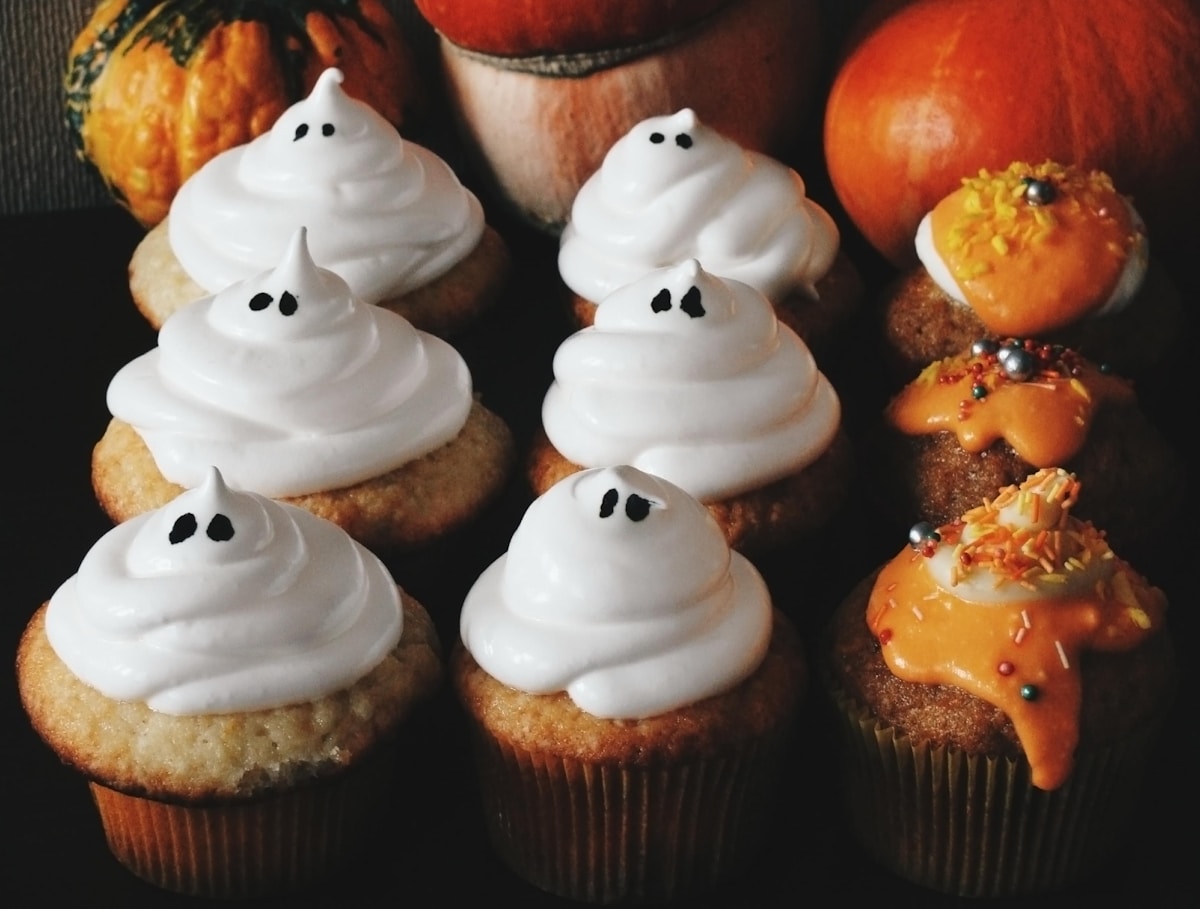
This is the quintessential murder mystery dessert. It’s visually striking, surprisingly easy, and always gets a reaction. We’ll use a simple vanilla cupcake with white fondant or a smooth white buttercream as our canvas.
The Base: Start with your favorite vanilla cupcake recipe. For the topping, you have two great options. A perfectly smooth layer of white fondant offers the cleanest canvas. Alternatively, a crusting American buttercream, chilled until firm, works wonderfully. The key is a bright white, smooth surface.
The ‘Blood’ Mixture:
- In a small bowl, mix about 1/4 teaspoon of high-quality red gel food coloring with 1-2 teaspoons of a clear liquid. Clear vanilla extract works, but for the best splatter and quick drying, a clear alcohol like vodka or lemon extract is ideal. (The alcohol evaporates completely, leaving only the color behind.)
- Stir until the gel is fully dissolved. You’re aiming for the consistency of ink—not too thick, not too watery. Add more liquid or color as needed to get it just right.
The Technique:
This is the fun part, but it can get messy! Lay down newspaper or a plastic tablecloth to protect your workspace.
- Arrange your finished, frosted cupcakes on the covered surface.
- Dip a stiff, food-safe paintbrush into your red mixture.
- Hold the brush over the cupcakes and use your thumb to flick the bristles. This will create a fine, realistic splatter pattern. Experiment with different distances and flicking speeds to vary the size of the droplets.
- For larger drips, load the brush with a bit more color and let it drip directly onto the edges of the cupcakes.
- Let them dry completely before serving. The effect is stunning, especially when you place a small, molded white chocolate dagger on top of one of them.
Recipe Idea 2 ‘Shards of Glass’ Lemon Tarts
This dessert combines elegance with a hint of danger. The sharp, tangy flavor of a lemon tart is a fantastic contrast to the sweet, crunchy “glass” shards on top. It’s sophisticated, delicious, and perfectly on theme.
The Base: Use a mini tartlet pan to create individual lemon curd tarts. The bright yellow of the curd provides a beautiful backdrop for the clear glass.
The Edible Glass:
Safety first! Working with hot sugar requires your full attention. Keep a bowl of ice water nearby in case of accidental burns.
- In a heavy-bottomed saucepan, combine 1 cup of isomalt nibs with about 1/4 cup of distilled water. (Using distilled water helps prevent cloudiness.)
- Stir over medium heat until the isomalt dissolves. Once it begins to boil, stop stirring.
- Clip a candy thermometer to the side of the pan. Cook until the mixture reaches the hard-crack stage, which is 300-310°F (149-154°C).
- Immediately remove from the heat. Let the bubbles subside for a minute.
- Carefully pour the hot liquid onto a silicone baking mat (like a Silpat) in a thin, even layer.
- Let it cool completely at room temperature for about 30-45 minutes. It will become hard and brittle.
- Once fully hardened, carefully lift the mat and let the sheet of sugar glass slide off. Place it inside a clean plastic bag and use a mallet or rolling pin to gently break it into shards of various sizes.
Assembly:
Just before serving, arrange the shards on top of your lemon tarts. You can stick them directly into the curd so they stand upright. For an extra touch, you can add a small drizzle of raspberry coulis for a “blood” effect near the glass. (It’s best to add the glass right before serving, as moisture can make it sticky over time.)
Finishing Touches Edible Evidence
Sometimes the smallest details have the biggest impact. These easy-to-make edible props can elevate any simple dessert, from a bowl of ice cream to a plain cheesecake.
-
Pretzel ‘Cigarettes’: This is a brilliant and simple illusion. Dip pretzel sticks about three-quarters of the way into melted white chocolate. Before the chocolate sets, roll the dipped end in crushed Oreo cookies or finely chopped dark chocolate to create an “ash” effect. For a final touch, use a tiny dab of red icing or a red sprinkle on the very tip to mimic a lit end.
-
Fondant ‘Evidence Markers’: Dye a small amount of fondant a bright yellow. Roll it out thinly and cut it into small, tented shapes like the evidence markers used at crime scenes. Use a black edible marker to write numbers on them. Place these next to a “clue” on your dessert platter—perhaps next to a chocolate truffle “bullet” or a raspberry coulis “bloodstain.”
Ultimately, hosting a murder mystery party is about creating a shared story and an unforgettable experience. By weaving the theme into your food, you’re not just feeding your guests—you’re delighting them, surprising them, and giving them another piece of the puzzle to talk about. So embrace your inner culinary detective, have fun with the theatrics, and serve up a dessert that’s truly to die for. (Metaphorically, of course.)

 Lucas
Lucas
