There’s a special kind of magic that happens in a quiet kitchen. It’s the sound of tiptoes on the floor, the hushed whispers, and the shared, conspiratorial giggles. You’re on a secret mission, and your co-conspirators are your own little ones. The objective? To bake a surprise birthday cake for someone you all love.
I’ve been there, my dears. Balancing the desire for a lovely, edible surprise with the joyful chaos that children bring to any baking project. It feels like trying to conduct a secret orchestra where half the musicians have just learned to hold their instruments. Spills happen. Flour dusts every surface. And the volume is rarely library-approved.
But let me tell you a secret of my own: it is absolutely, one hundred percent worth it. The pride on a child’s face when they present a cake they helped create is a gift in itself. The key isn’t to aim for perfection; it’s to plan for success. And success, in this kitchen, is measured in smiles and happy memories, not in perfectly smooth frosting.
So, let’s roll up our sleeves, put on our quietest aprons, and get ready to bake a memory together.
The Secret Ingredient is Preparation
If you take away only one piece of advice from our little chat today, let it be this: prepare everything before you invite the children into the kitchen. We call this “mise en place” in the culinary world, which is just a fancy French way of saying “get everything in its place.” For a secret mission with kids, it’s your superpower.
Before you even whisper the words “let’s bake a cake,” you should have the kitchen set up like a cooking show stage. This minimizes the frantic searching for the baking soda while your toddler is “helpfully” redecorating the floor with sugar. (Yes, I speak from experience.)
Here’s your pre-mission checklist:
- Pre-Measure Everything: This is the game-changer. Measure out your flour, sugar, cocoa powder, leaveners, and salt into small, separate bowls. Pour your milk, oil, and vanilla into little pitchers or liquid measuring cups. This turns the complex task of measuring into the simple, fun task of pouring.
- Tool Time: Get out every single tool you will need. The big mixing bowl, the whisks, the spatulas, the cake pans. Grease and flour (or line with parchment paper) your pans ahead of time. Nothing stops the fun faster than a hunt for a missing spatula.
- Create a Kid Zone: Set up a safe, sturdy spot for your little baker. A low table or a secure step stool at the counter works beautifully. Lay down some newspaper or a washable mat underneath to catch the inevitable spills. This gives them their own space and keeps them away from the hot oven.
- Review the Plan: Read the recipe one more time by yourself. Know the steps in your head so you can guide the process calmly and confidently. The calmer you are, the more fun everyone will have.
By doing this prep work, you transform the experience. Instead of a chaotic scramble, it becomes a smooth, step-by-step adventure where your child gets to do all the fun parts. (This is the secret to keeping your sanity, I promise.)
Your Little Baker’s Job Chart
Every great team has assigned roles, and your secret baking mission is no different! Delegating tasks based on age and ability not only keeps everyone safe but also gives each child a sense of ownership and pride. Here’s a little guide to help you assign the perfect job to your little chef.
For the Littlest Bakers (Ages 3-5): The Pourers & Mashers
At this age, it’s all about sensory exploration and simple motor skills. Their enthusiasm is their greatest contribution!
- Pouring: Since you’ve pre-measured everything, they can be in charge of pouring the contents of the little bowls into the big mixing bowl. Guide their hands and celebrate each successful addition.
- Whisking Dry Ingredients: Give them a large whisk and let them stir the flour, sugar, and cocoa powder together. It’s a low-stakes task that makes them feel very important.
- Mashing: If your recipe calls for soft ingredients like bananas or very soft butter, give them a fork and let them mash away in a separate bowl.
- Decorating: This is their time to shine! Pour sprinkles into a small bowl and let them use their fingers to pinch and sprinkle them over the frosted cake.
For the Growing Chefs (Ages 6-9): The Measurers & Mixers
These kids are ready for a bit more responsibility and can start to understand the science of baking. Supervision is still key!
- Reading the Recipe: Have them read the simple steps of the recipe out loud. It’s great reading practice and helps them understand the process.
- Measuring: Let them scoop and level ingredients with measuring cups and spoons. You can hold the bag or container steady while they scoop.
- Cracking Eggs: Teach them the golden rule: crack eggs into a separate, small bowl first. This way, if any pesky shells get in, you can easily fish them out without contaminating the whole batter.
- Mixing: With your hand guiding theirs, they can begin to use a hand mixer on its lowest speed. They can also do all the manual stirring and folding.
- Spreading Frosting: Give them an offset spatula or the back of a spoon and let them have at it. Encourage swirls and patterns!
For the Junior Sous Chefs (Ages 10+): The Lead Chefs
Older kids can take on more complex tasks and start to bake with more independence. They can be your true partner in this culinary crime.
- Operating a Mixer: They can learn to safely operate a stand mixer like a KitchenAid, starting on low speeds and gradually increasing as needed.
- Following the Recipe: Let them take the lead on reading the recipe and gathering the (pre-measured) ingredients for each step.
- Oven Duty (With Strict Supervision): Teach them about oven safety. They can help put the cake in and take it out with you, using proper oven mitts. They can also be in charge of setting the timer.
- Melting Chocolate: Show them how to melt chocolate chips in the microwave in short 30-second bursts, stirring in between.
Our Go-To “Secret Mission” Cake Recipe
For a project like this, you want a recipe that is forgiving, delicious, and doesn’t require a lot of fussy steps. This “One-Bowl Chocolate Celebration Cake” is my go-to. It’s wonderfully moist and comes together so quickly.
You Will Need:
- 1 ½ cups all-purpose flour
- 1 cup granulated sugar
- ⅓ cup unsweetened cocoa powder
- 1 teaspoon baking soda
- ½ teaspoon salt
- 1 cup cool water (or coffee for a richer flavor)
- 1 teaspoon pure vanilla extract
- 1 teaspoon white vinegar
- ⅓ cup vegetable oil
The Plan of Action:
- Prepare for Launch: Preheat your oven to 350°F (175°C). Grease and flour one 8-inch round or square cake pan.
- The Dry Team: In your large mixing bowl, have your little one whisk together the flour, sugar, cocoa powder, baking soda, and salt. Let them stir until it’s all one lovely, dusty brown color.
- The Wet Team: In a separate medium bowl or large liquid measuring cup, combine the cool water, vanilla, vinegar, and oil.
- Combine Forces: Now for the magic! Let your child pour the wet ingredients into the dry ingredients. Hand them the spatula and let them stir just until everything is combined. It’s okay if there are a few small lumps—don’t overmix!
- Into the Pan: Carefully pour the batter into your prepared pan. Let your little one help you smooth the top with the spatula.
- Bake the Surprise: Bake for 30-35 minutes, or until a wooden skewer or toothpick inserted into the center comes out clean. Let it cool in the pan for about 15 minutes before turning it out onto a wire rack to cool completely. (This is a grown-up job!) A completely cool cake is crucial for frosting.
Frosting Fun and the Grand Reveal
While the cake cools, you can whip up a simple frosting. A can of store-bought frosting is a wonderful, stress-free option! Or, you can make a simple American buttercream by beating 1/2 cup of softened butter with 2 cups of powdered sugar, 1 teaspoon of vanilla, and 2-3 tablespoons of milk until smooth.
Here’s my favorite little kitchen hack for a clean finish: Tuck strips of parchment or wax paper just under the edges of the cooled cake on its serving plate. Let the kids go wild with the frosting, spreading it all over the top and sides. The parchment will catch all the drips and smudges. When they’re done, just gently pull the strips out, and you’ll have a perfectly clean plate!
Set out bowls of sprinkles, mini chocolate chips, or colorful candies. This is the moment of pure creative joy. Let go of what you think it should look like and embrace their vision. A mountain of sprinkles in the middle? Perfect. A lopsided smiley face? Adorable.
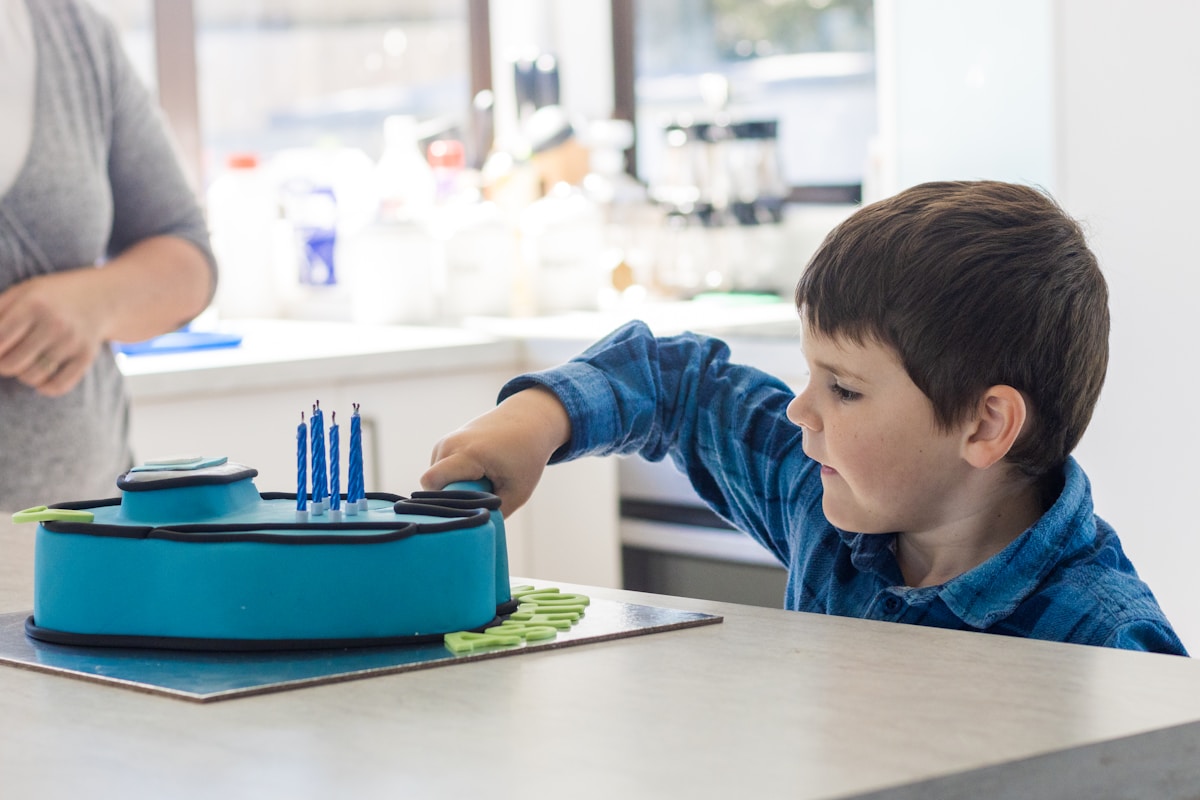
Then comes the best part. Lighting the candles, singing the song, and watching your child present the beautiful, imperfect cake they made with their own hands. That look of pure pride is the sweetest thing you’ll taste all day.
More Than a Cake It’s a Memory
Years from now, the birthday person probably won’t remember the exact gifts they received. But they will remember the chocolate-smudged, sprinkle-covered cake that was presented with so much love and excitement.
And your children will remember it, too. They’ll remember the secret they kept, the fun they had, and the amazing thing they created with you in the warm, happy heart of the home.
So embrace the mess. Laugh at the spills. You’re not just baking a cake, my dear. You’re building a beautiful memory, one spoonful of batter at a time.


